15-2
15
Accessing e Upper Component Area - TR300 Series
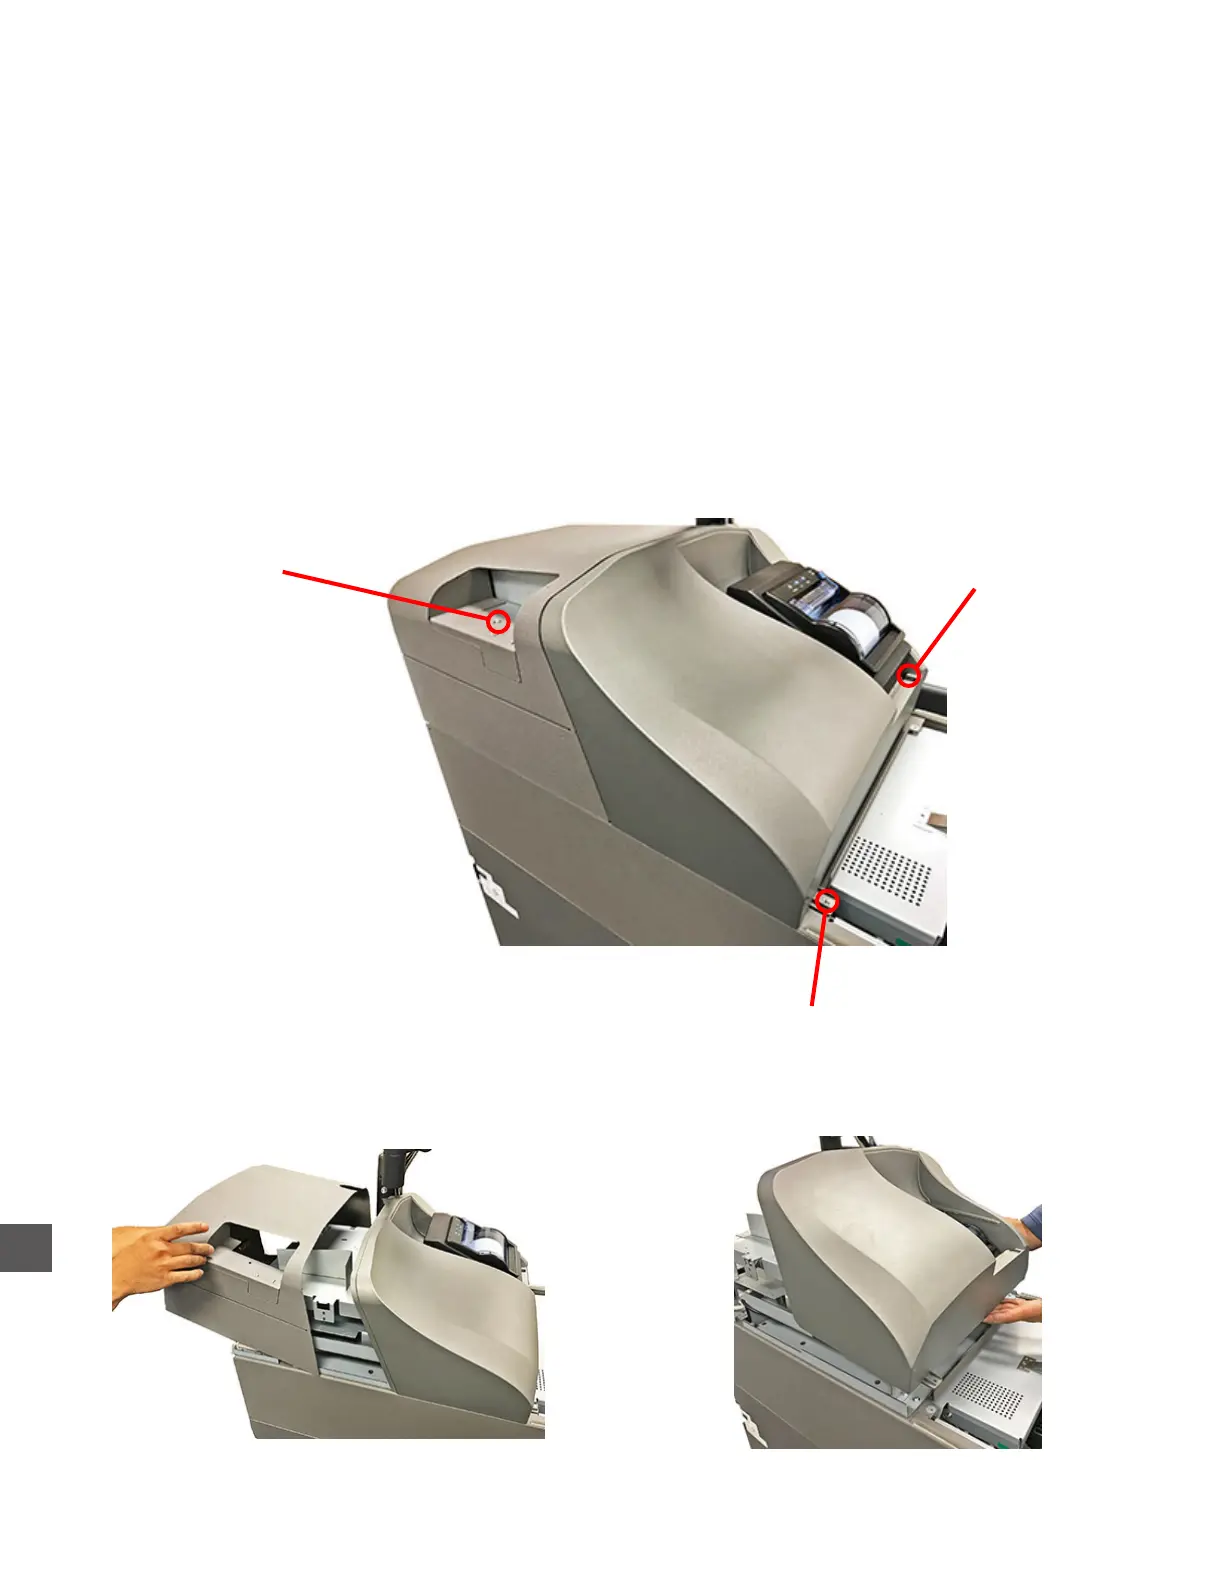
Step 1: Extend the Upper Note Collection Assembly.
Log In > Open Doors > (CI300) Upper Door
Step 2: Remove the (1) screw that secures the upper compartment rear hood.
Lift the back of the rear hood and slide it up/rearward to remove.
Step 3: Remove the (2) screws that secure the upper compartment front hood.
Step 4: Lift the front hood slightly.
Step 5: Apply pressure to the rear of the Printer while lifting the top of the front hood forward.
(The Printer should slide loose from it’s mounted position).
Rear Hood
Securing Screw
Front Hood
Securing Screw
Front Hood
Securing Screw