1-13
1
Note Recycler Assembly Installation
Step 1: Position the Note Recycler assembly back into the cabinet opening and route the wiring
harness into the electronics bay.
X To ease installing the Note Recycler - extend the Cassette Rack and press down to
leverage the rear of the Dispenser UP
WARNING - Ensure the Note Recycler is seated fully into the R50 cabinet
Place a Cradle Retaining Bracket (“C”) and ensure the anchor mounting hole and
Recycler frame are aligned before proceeding
If not pull the Note Recycler out about 1/2 way and attempt to reinstall it in
the TR250 cabinet.
Step 2: Install the Note Recycler retaining bracket “A” to the upper/front/left of the Note Recycler.
(1) JIS #2 screw and (2) 7/16” nuts
Step 3: Secure the Note Recycler Cradle into the cabinet using the retaining brackets “B” (included in
the accessory kit) and engage the caster brakes.
Step 4: Install the (2) Cradle shipping brackets “C” (removed previously), onto the front of the Cradle
Frame with the phillips head screws (do not tighten fully).
Step 5: Secure the Cradle Shipping brackets with the (2) front anchor bolts and tighten the phillips
head screws on the Cradle frame.
Step 6: Ensure the Cassette Rack Support wheel is secured in the fully down position.
Step 7: Install the Cassette Rack retaining bracket “D” using the (2) TOP SCREWS ONLY.
Install the 2 remaining screws on the outsides of the brackets “C”
Step 8: Locate the Cash Handler wiring harness inside the electronics bay (on the front/right side) and
reconnect the following:
a) The LOWER connector on the front side of the Power Supply.
b) The USB cable on the front side of the PC assembly.
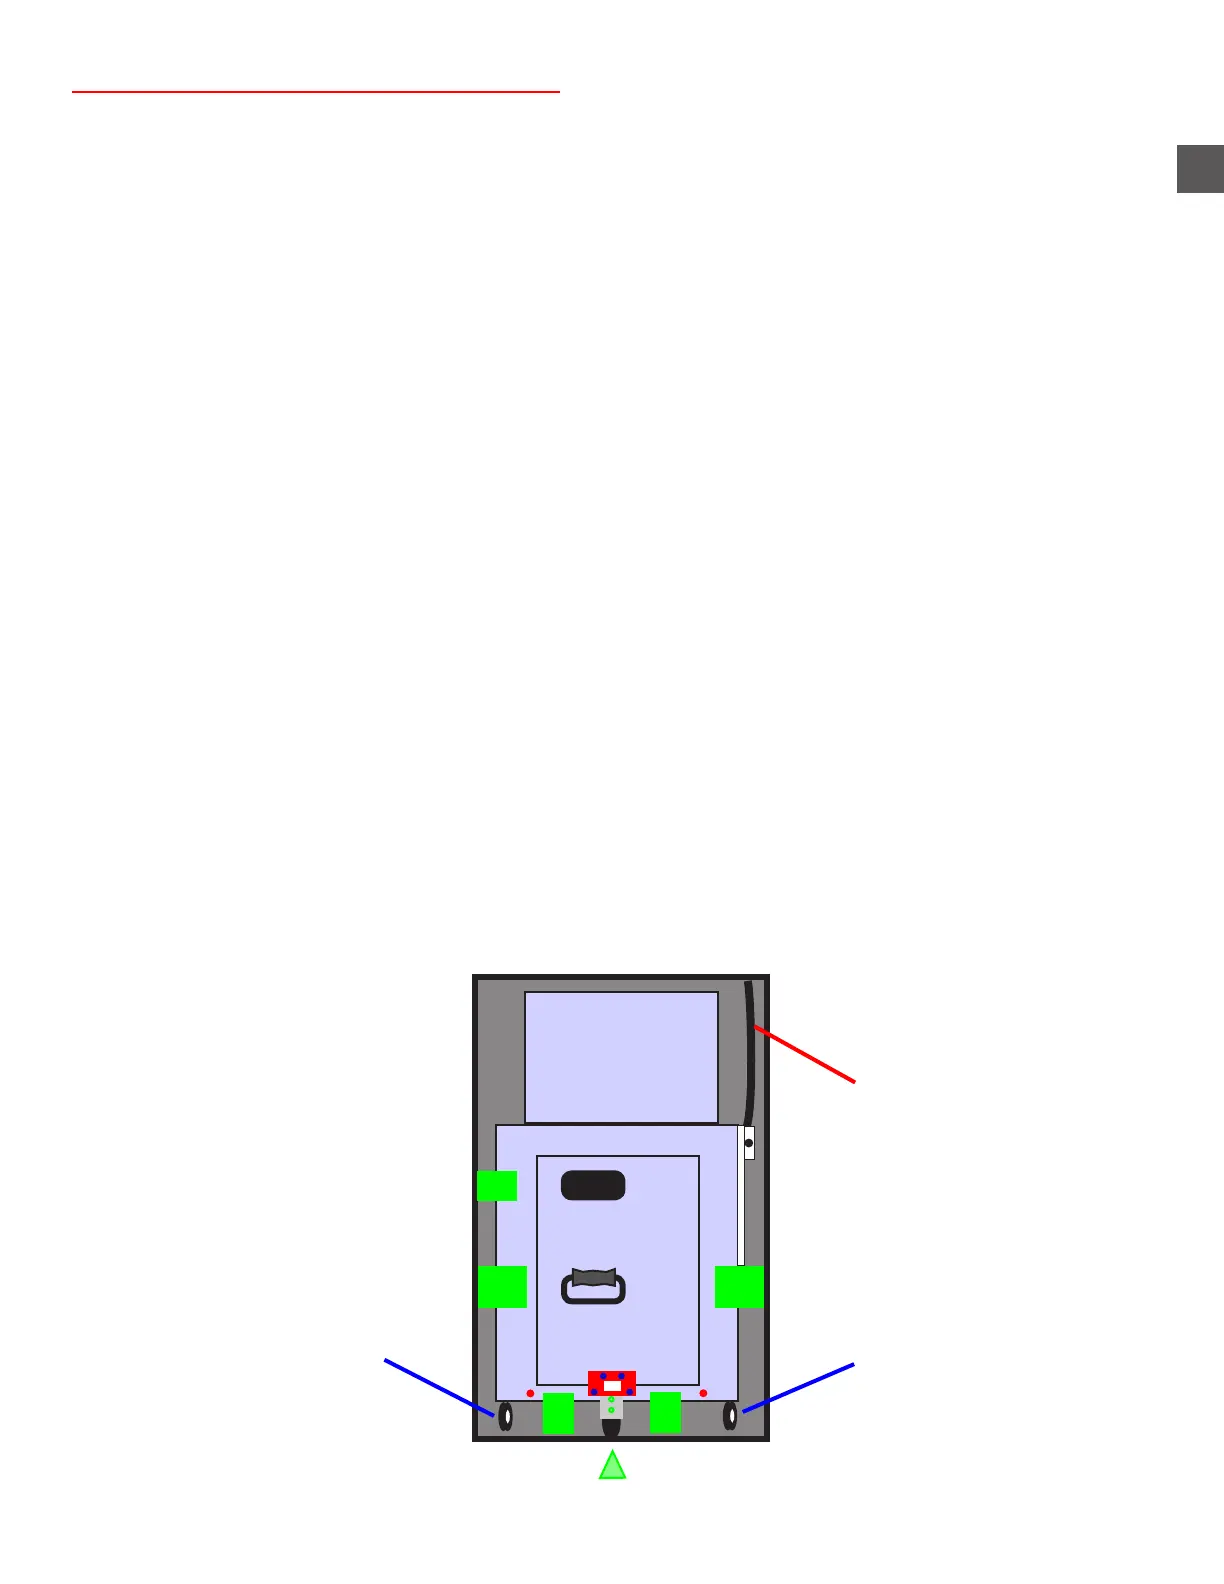
A
B
Caster “brakes” Caster “brakes”
B
C
C
“D”
Note Recycler +24VDC
and Data cable harness
Cassette Rack Support Wheel