(8) Install downstream oxygen sensor and connect
electrical connector.
(9) Install SRV (Single Runner Valve) vacuum res-
ervoir and control valve assembly at right rear of
engine (3.2/3.5L engine only).
(10) Install air cleaner assembly with air inlet
hose.
(11) Raise vehicle on hoist.
(12) Tighten extension pipe band clamp to 61 N·m
(45 ft. lbs.) (Fig. 7).
(13) Install and/or tighten nut attaching extension
pipe to transaxle bracket to 47 N·m (35 ft. lbs.).
(14) Install exhaust system.
(15) Lower vehicle.
LEFT CATALYTIC CONVERTER
REMOVAL
(1) Loosen and remove V-Band clamp at exhaust
manifold joint (Fig. 7).
NOTE: Do not reuse V-Band clamp.
(2) Hoist vehicle.
(3) Remove exhaust system. Refer to procedure in
this section.
(4) Disconnect downstream oxygen sensor electri-
cal connector and remove sensor from converter pipe.
(5) Loosen or remove nut attaching left pipe to
transaxle bracket (Fig. 7).
CAUTION: Care should be taken when removing
converter not to damage driveshaft boot.
(6) Remove converter from below vehicle.
INSTALLATION
(1) Install converter.
(2) Attach a NEW V-Band clamp and tighten to 11
N·m (100 in. lbs.) (Fig. 7).
(3) Install and/or tighten nut attaching pipe to
transaxle bracket to 47 N·m (35 ft. lbs.) (Fig. 7).
(4) Install downstream oxygen sensor and connect
electrical connector.
(5) Install exhaust system.
(6) Lower vehicle.
CLEANING AND INSPECTION
EXHAUST SYSTEM
INSPECTION
Inspect the exhaust pipes, catalytic converters,
muffler, and resonators for cracked joints, broken
welds and corrosion damage that would result in a
leaking exhaust system. Inspect the clamps, support
brackets, and insulators for cracks and corrosion
damage.
NOTE: Slip joint band clamps are spot welded to
exhaust system. If a band clamp must be replaced,
the spot weld must be ground off.
ADJUSTMENTS
EXHAUST SYSTEM ALIGNMENT
A misaligned exhaust system is usually indicated
by a vibration, rattling noise, or binding of exhaust
system components. These noises are sometimes hard
to distinguish from other chassis noises. Inspect
exhaust system for broken or loose clamps, heat
shields, isolators, and brackets. Replace or tighten as
necessary. It is important that exhaust system clear-
ances and alignment be maintained.
Perform the following procedures to align the
exhaust system:
(1) Loosen clamps and support brackets.
(2) Align the exhaust system starting at the front,
working rearward.
(3) Tighten all clamps and brackets once align-
ment and clearances are achieved.
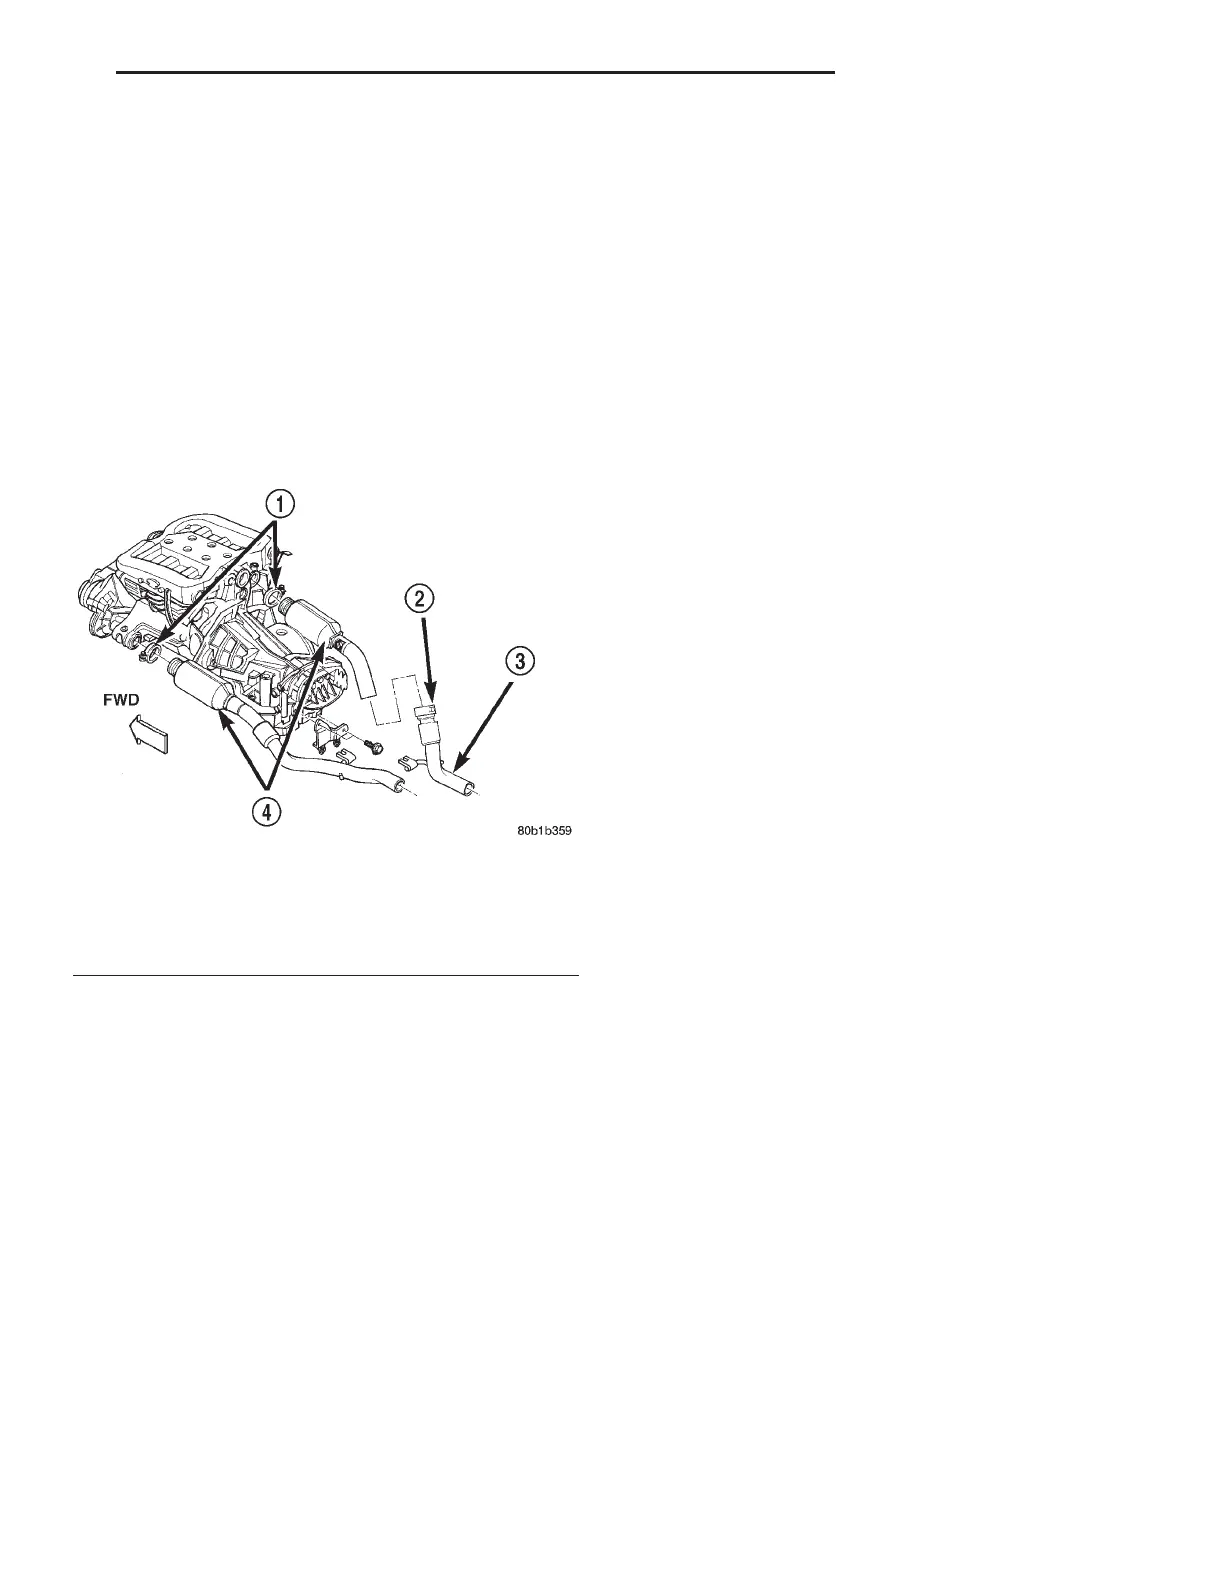
Fig. 7 Catalytic Converters
1 – V-BAND CLAMPS
2 – BAND CLAMP
3 – EXTENSION PIPE
4 – CATALYTIC CONVERTERS
LH EXHAUST SYSTEM 11 - 7
REMOVAL AND INSTALLATION (Continued)