(8) Connect negative cable.
CYLINDER HEAD
REMOVAL
(1) Perform fuel pressure release procedure before
attempting any repairs. Refer to FUEL SYSTEM
for procedure.
(2) Disconnect negative cable from remote jumper
terminal.
(3) Drain cooling system and remove accessory
drive belts. Refer to COOLING SYSTEM for proce-
dures.
(4) Remove crankshaft damper.
(5) Remove upper and lower intake manifolds.
Refer to procedures in this section.
(6) Remove cylinder head cover and timing chain
cover. Refer to procedure in this section.
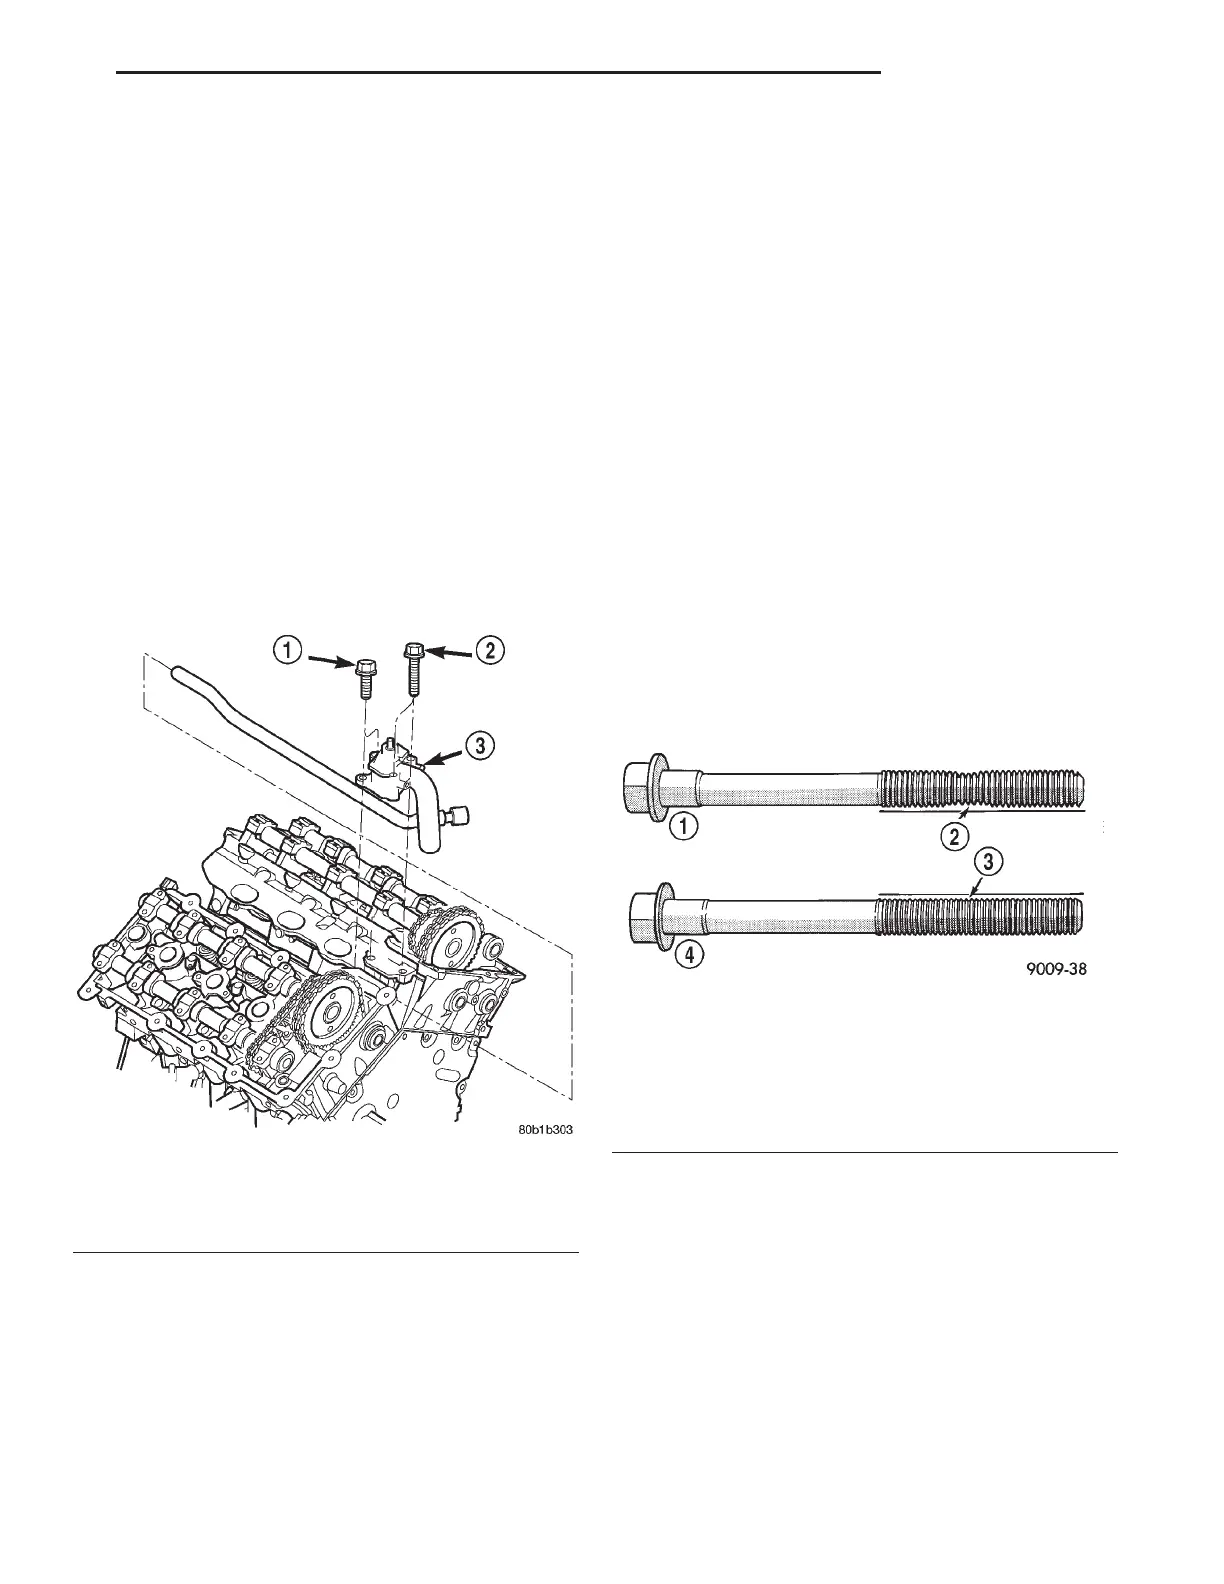
(7) Remove water outlet connector (Fig. 61). Refer
to COOLING SYSTEM for procedure.
(8) Rotate crankshaft until crankshaft sprocket
timing mark aligns with timing mark on oil pump
housing.
(9) Remove primary timing chain. Refer to proce-
dure in this section.
(10) Remove camshaft bearing caps gradually in
reverse sequence of installation (Fig. 64).
(11) Remove camshafts from cylinder head.
(12) Remove V-Band clamp(s) at exhaust manifold
to catalytic converter pipe.
NOTE: Do not reuse V-Band clamp.
CAUTION: Ensure cylinder head bolts 11–9 (Fig. 63)
are removed before attempting the removal of cylin-
der head, as damage to cylinder head and/or block
may occur.
(13) Remove cylinder head bolts in reverse
sequence of installation (Fig. 63) starting with bolts
11–9, then bolts 8–1.
(14) Remove cylinder head(s).
INSTALLATION
NOTE: The cylinder head bolts are tightened using
a torque plus angle procedure. The bolts must be
examined BEFORE reuse. If the threads are necked
down the bolts should be replaced (Fig. 62).
Necking can be checked by holding a straight edge
against the threads. If all the threads do not contact
the scale, the bolt should be replaced (Fig. 62).
CAUTION: When cleaning cylinder head and cylin-
der block surfaces, DO NOT use a metal scraper
because the surfaces could be cut or ground. Use
ONLY a wooden or plastic scraper.
(1) Clean sealing surfaces of cylinder head and
block.
(2) Install new head gasket over locating dowels.
(3) Install cylinder head to block, assuring head is
properly positioned over locating dowels.
(4) Lubricate bolt threads with clean engine oil
and install bolts.
Fig. 61 Water Outlet Connector
1 – BOLT (2)
2 – BOLT (2)
3 – WATER OUTLET CONNECTOR
Fig. 62 Checking Cylinder Head Bolts for Stretching
(Necking)
1 – STRETCHED BOLT
2 – THREADS ARE NOT STRAIGHT ON LINE
3 – THREADS ARE STRAIGHT ON LINE
4 – UNSTRETCHED BOLT
LH 2.7L ENGINE 9 - 43
REMOVAL AND INSTALLATION (Continued)