CAUTION: Main bearings are select fit. Refer to
Crankshaft Main Bearing Fitting in this section for
proper bearing selections.
(1) Lubricate upper main bearing halves with
engine oil (Fig. 88).
CAUTION: When installing crankshaft, use care not
to damage bearing surfaces on the crankshaft.
(2) Install crankshaft.
NOTE: Make sure that the coated and oil groove
side of crankshaft thrust washer faces the crank-
shaft thrust surface.
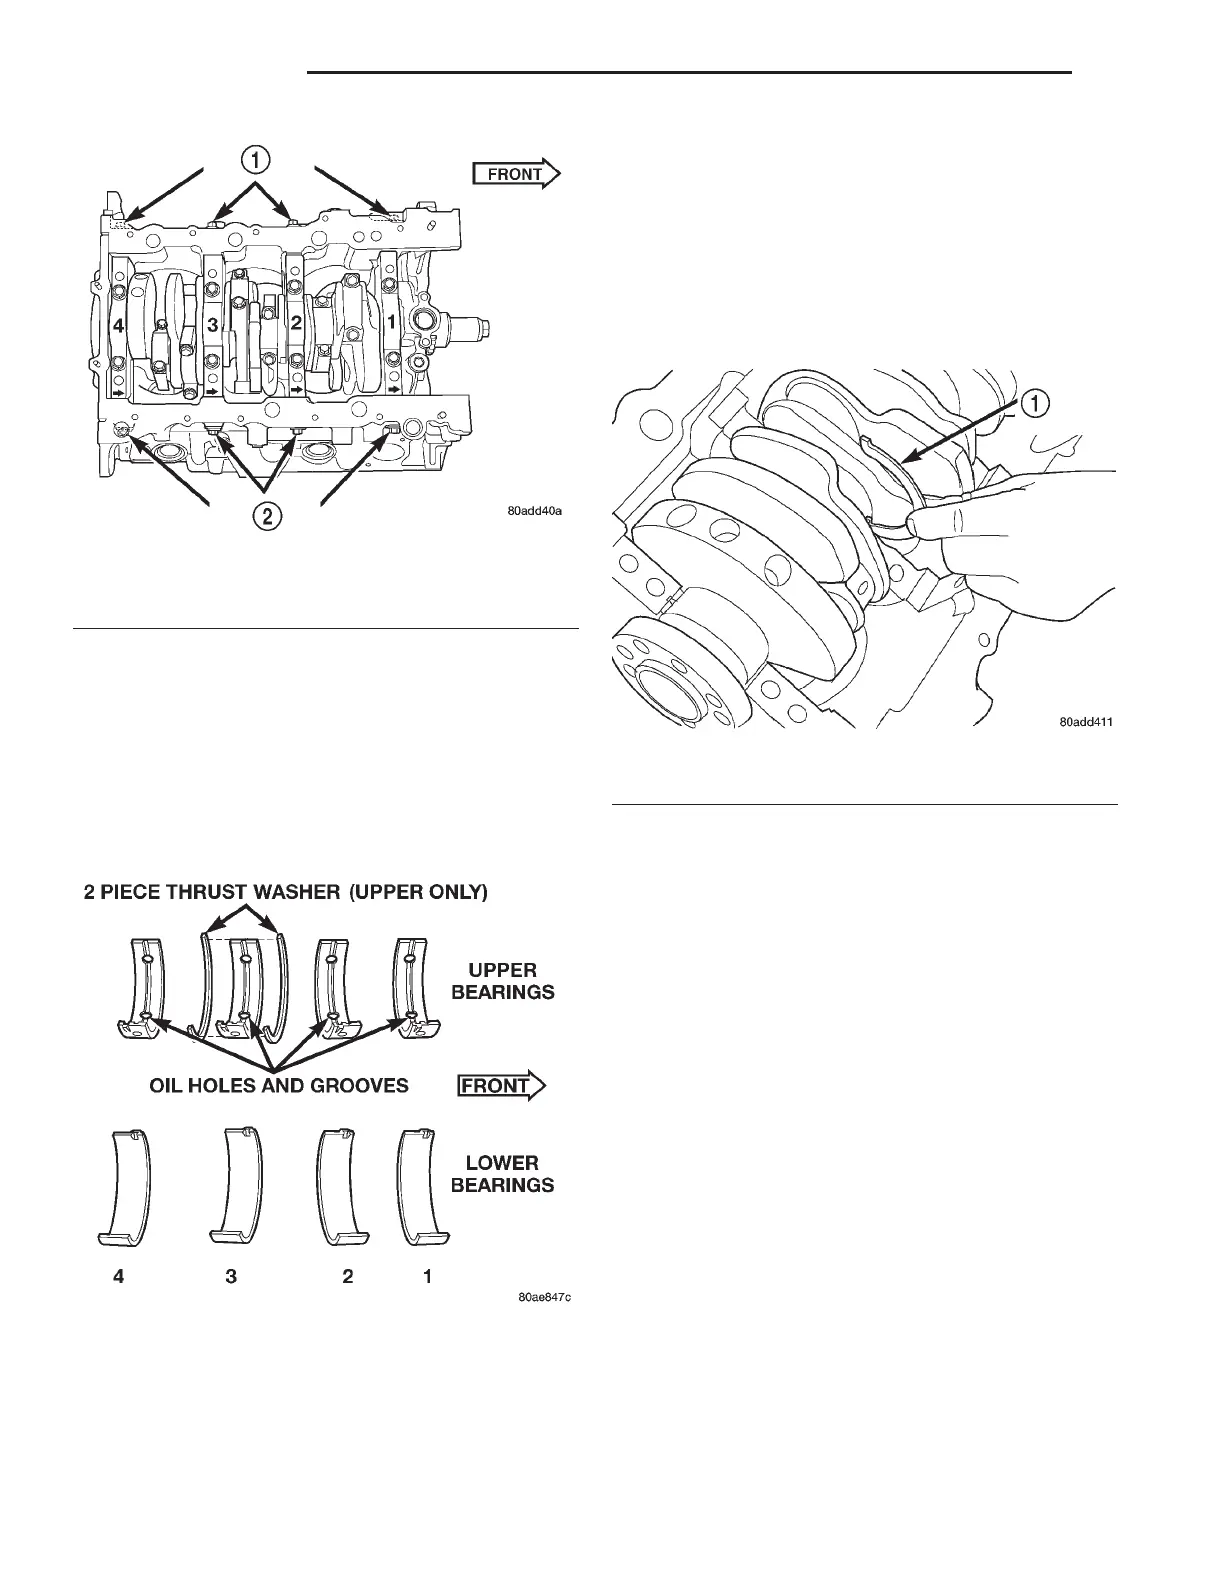
(3) Push crankshaft forward. Lubricate and install
the front thrust washer by rolling the thrust washer
onto the machined shelf between the No. 3 upper
main bulk head and crankshaft thrust surface (Fig.
89).
(4) Move crankshaft rearward. Lubricate and
install the rear thrust washer by rolling the thrust
washer onto the machined shelf between the No. 3
upper main bulk head and crankshaft thrust surface.
(5) Lubricate lower main bearings with engine oil.
(6) Install main bearings and caps.
NOTE: Lubricate main bearing cap bolts with
engine oil before installation.
The main bearing cap bolts must be tightened in
the proper sequence. First the inner main cap bolts,
secondly the windage tray bolts, and lastly the main
cap tie (horizontal) bolts.
(7) Install the inside main bearing cap bolts and
tighten to 20 N·m + 1/4 Turn (15 ft. lbs. + 1/4 Turn)
(Fig. 90).
(8) Measure crankshaft end play. Refer to Service
Procedures—Crankshaft Bearing Installation for pro-
cedure.
(9) Install connecting rods and measure side clear-
ance. Refer to Service Procedures—Connecting Rod
Bearing Installation for procedures.
(10) Install windage tray (Fig. 91). Lubricate bolts
with engine oil and tighten to 27 N·m + 1/4 Turn (20
ft. lbs. + 1/4 turn).
(11) Install the main cap tie (horizontal) bolts and
tighten to 28 N·m (250 in. lbs.) (Fig. 90).
(12) Install rear crankshaft oil seal retainer and
oil seal. Refer to procedures in this section.
(13) Install oil pump assembly. Refer to procedure
in this section.
Fig. 87 Main Bearing Cap Identification
1 – TIE BOLTS
2 – TIE BOLTS
Fig. 88 Main Bearing Identification
Fig. 89 Thrust Washer—Installation
1 – FRONT THRUST WASHER
9 - 56 2.7L ENGINE LH
REMOVAL AND INSTALLATION (Continued)