(15) Using a hammer and a brass drift punch, tap
on top surface of spindle driving it down and off the
end of the strut assembly (Fig. 10).
(16) Let the rear spindle and assembled compo-
nents hang from the trailing arm while the strut
assembly is out of the vehicle.
(17) Lower vehicle enough to access rear passenger
compartment.
NOTE: When removing rear strut assembly from
vehicle, access for the 3 rear strut assembly to
strut tower attaching nuts is through the passenger
compartment of the vehicle.
(18) Remove the 3 strut assembly to rear strut
tower attaching nuts (Fig. 11), then remove strut
assembly from vehicle.
(19) Remove the nut, washers, and rubber isola-
tors securing the stabilizer bar attaching link to the
strut.
(20) For disassembly and assembly of the strut
assembly, refer to DISASSEMBLY AND ASSEMBLY
in this section of this service manual group.
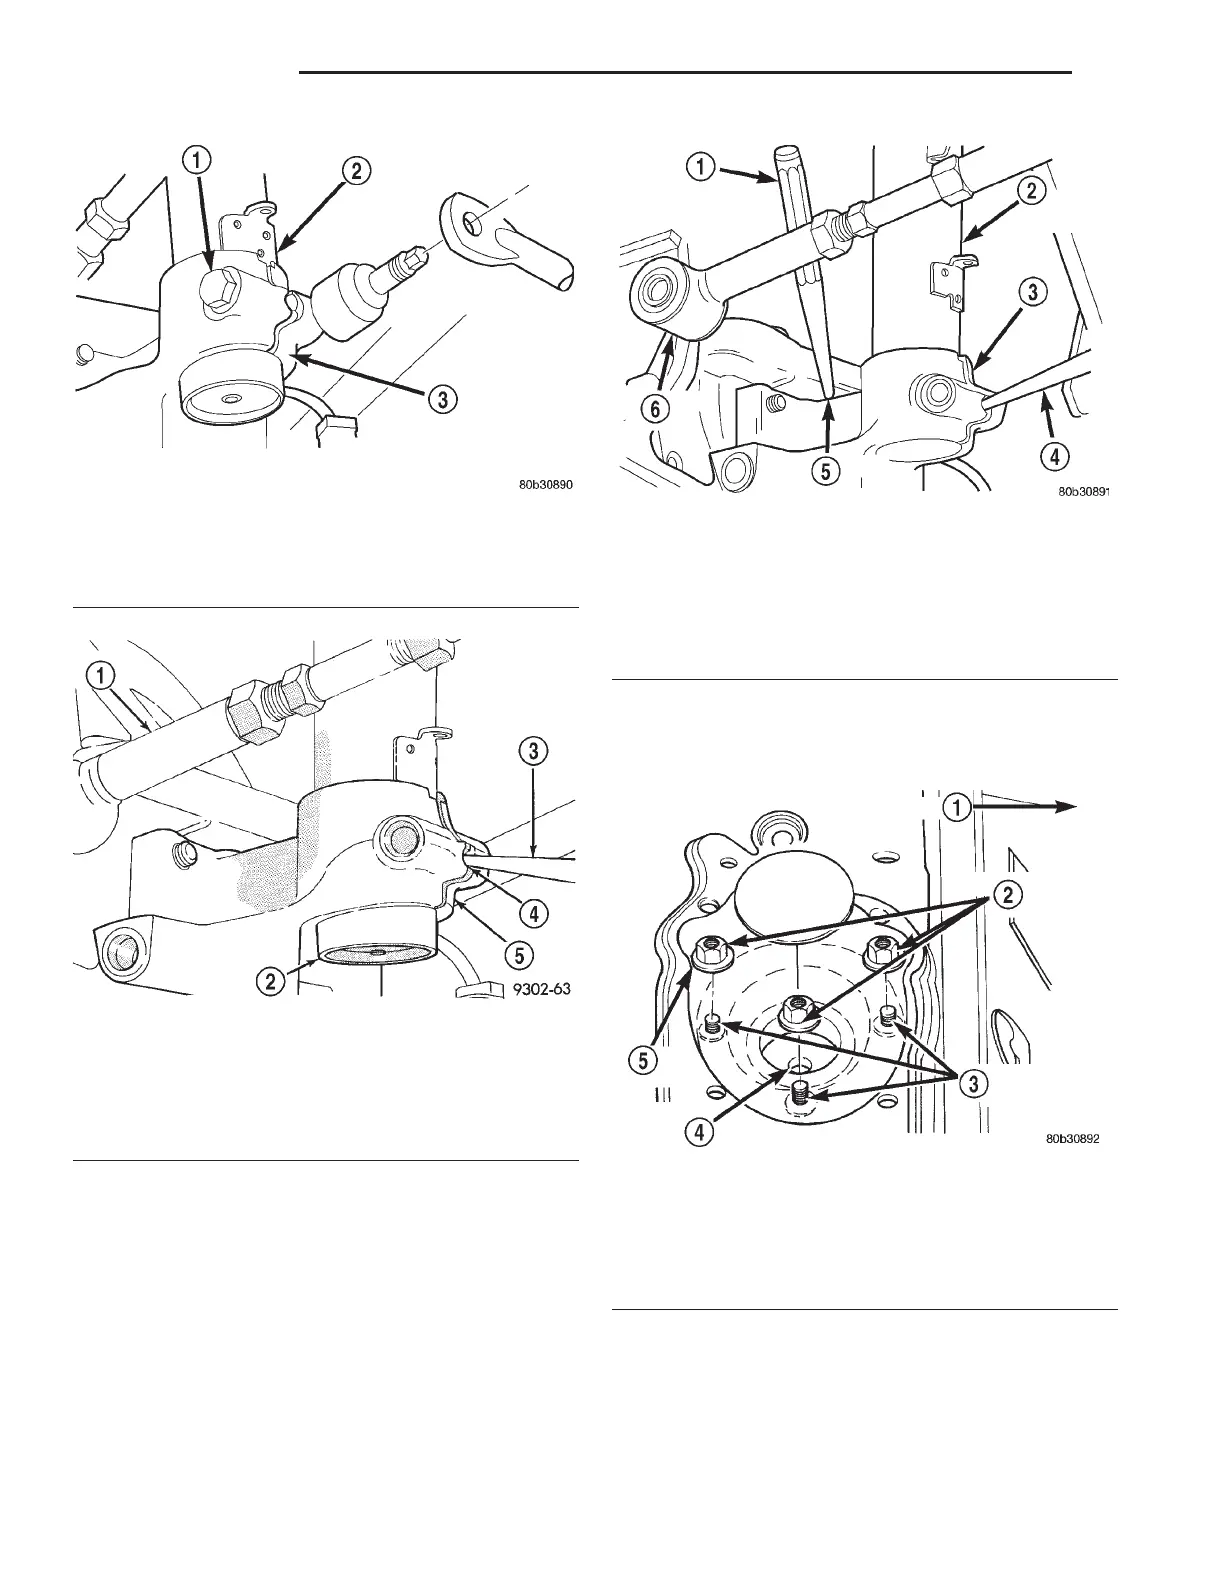
Fig. 8 Spindle To Strut Assembly Pinch Bolt
1 – PINCH BOLT
2 – STRUT ASSEMBLY
3 – REAR SPINDLE
Fig. 9 Center Punch Installed In Spindle
1 – LATERAL LINK
2 – STRUT ASSEMBLY
3 – CENTER PUNCH
4 – HOLE
5 – SPINDLE
Fig. 10 Removing Spindle From Strut Assembly
1 – BRASS DRIFT PUNCH
2 – STRUT ASSEMBLY
3 – SPINDLE
4 – CENTER PUNCH
5 – HIT SPINDLE HERE
6 – LATERAL LINK
Fig. 11 Strut Assembly Attaching Nuts
1 – FRONT OF CAR
2 – ATTACHING NUTS
3 – MOUNTING STUDS
4 – STRUT ASSEMBLY
5 – SPEAKER OPENING
2 - 50 SUSPENSION LH
REMOVAL AND INSTALLATION (Continued)