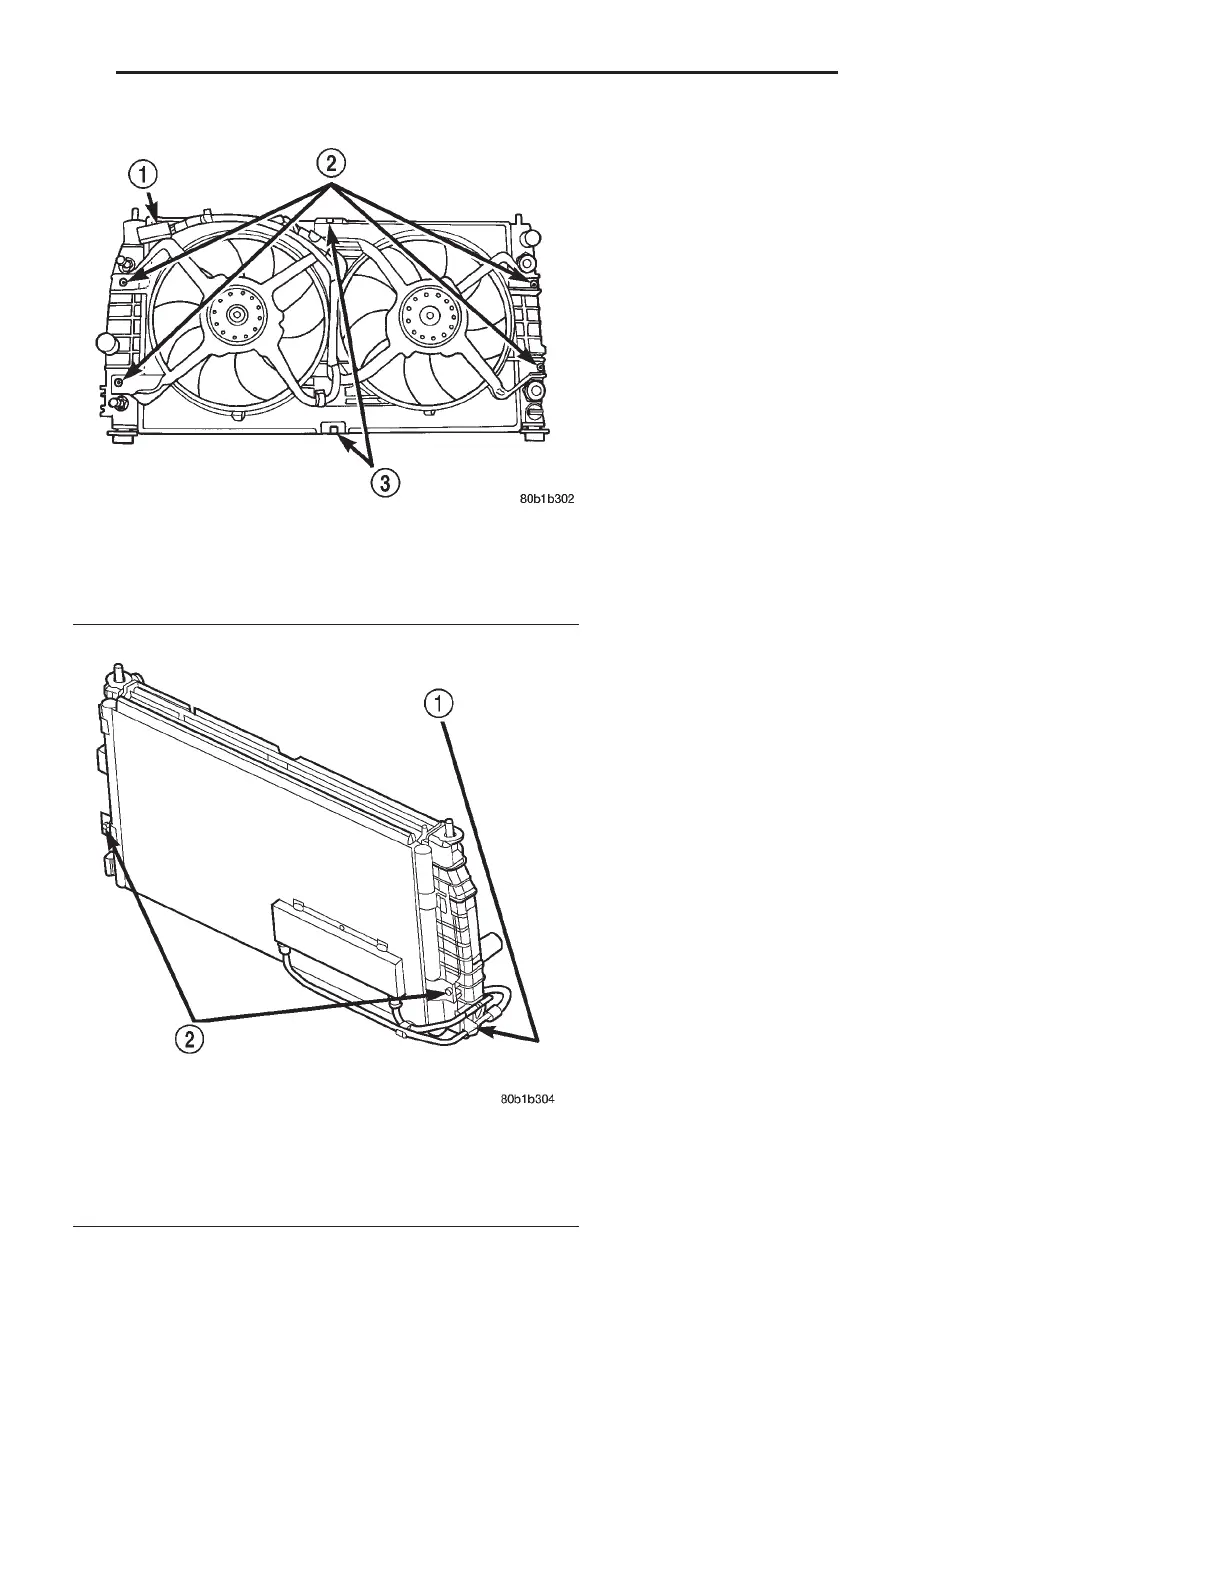
(9) Remove the air conditioning condenser attach-
ing screws located at the front of the radiator (Fig.
34).
(10) Remove fastener attaching transmission
cooler line bracket to left side of radiator (Fig. 34).
(11) Lift condenser upward, only enough to clear
upper mounting clips; allow condenser to rest on
lower radiator crossmember. It is not necessary to
discharge the air conditioning system.
(12) Radiator can now be lifted free from engine
compartment. Care should be taken not to dam-
age radiator cooling fins or water tubes during
removal.
INSTALLATION
(1) Slide radiator down into position; seat the radi-
ator assembly lower rubber isolators in the mounting
holes provided in lower radiator support (Fig. 32).
(2) Attach air conditioning condenser to mounting
clips on radiator. Install mounting screws and
tighten to 5 N·m (45 in. lbs.) (Fig. 34).
(3) Connect lower radiator hose and clamp.
(4) Install transmission cooler line bracket and
attaching fastener. Connect automatic transmission
hoses; torque hose clamps to 2 N·m (18 in. lbs.).
(5) Install fan module.
(6) Connect fan motor electrical connector.
(7) Connect engine oil cooler lines (if equipped).
Torque lines to 18 N·m (160 in. lbs.).
(8) Install upper radiator hose. Align hose so it
does not interfere with the accessory drive belt or
engine. Position hose clamp so it will not interfere
with the hood liner.
(9) Install upper radiator support crossmember.
(10) Connect negative cable to remote jumper ter-
minal.
(11) Fill cooling system with coolant. Refer to Cool-
ing System Filling in this section.
(12) Operate engine until it reaches normal oper-
ating temperature. Check cooling system and auto-
matic transmission for correct fluid levels.
RADIATOR DRAINCOCK
REMOVAL
WARNING: DO NOT REMOVE THE CYLINDER
BLOCK PLUG OR THE RADIATOR DRAINCOCK
WITH THE SYSTEM HOT AND UNDER PRESSURE
BECAUSE SERIOUS BURNS FROM COOLANT CAN
OCCUR.
CAUTION: Use of pliers on draincock is not recom-
mended. Damage may occur to part. Draincock
should not be removed unless leakage is observed.
(1) Turn the draincock stem counterclockwise to
unscrew the stem. When the stem is unscrewed to
the end of its threads, turn back 1/8 turn and pull
the stem (Fig. 35) from the radiator tank.
INSTALLATION
(1) Push the draincock assembly body into the
tank opening until it snaps into place.
(2) Tighten the draincock stem by turning clock-
wise until it stops.
Fig. 33 Fan Module—Removal and Installation
1 – ELECTRICAL CONNECTOR
2 – FASTENERS
3 – CLIPS
Fig. 34 A/C Condenser To Radiator—Removal and
Installation
1 – TRANSMISSION OIL COOLER LINE MOUNTING BRACKET
2 – A/C CONDENSER TO RADIATOR MOUNTING SCREWS
LH COOLING SYSTEM 7 - 27
REMOVAL AND INSTALLATION (Continued)