against crankshaft step flange. Use care not to rotate
crankshaft.
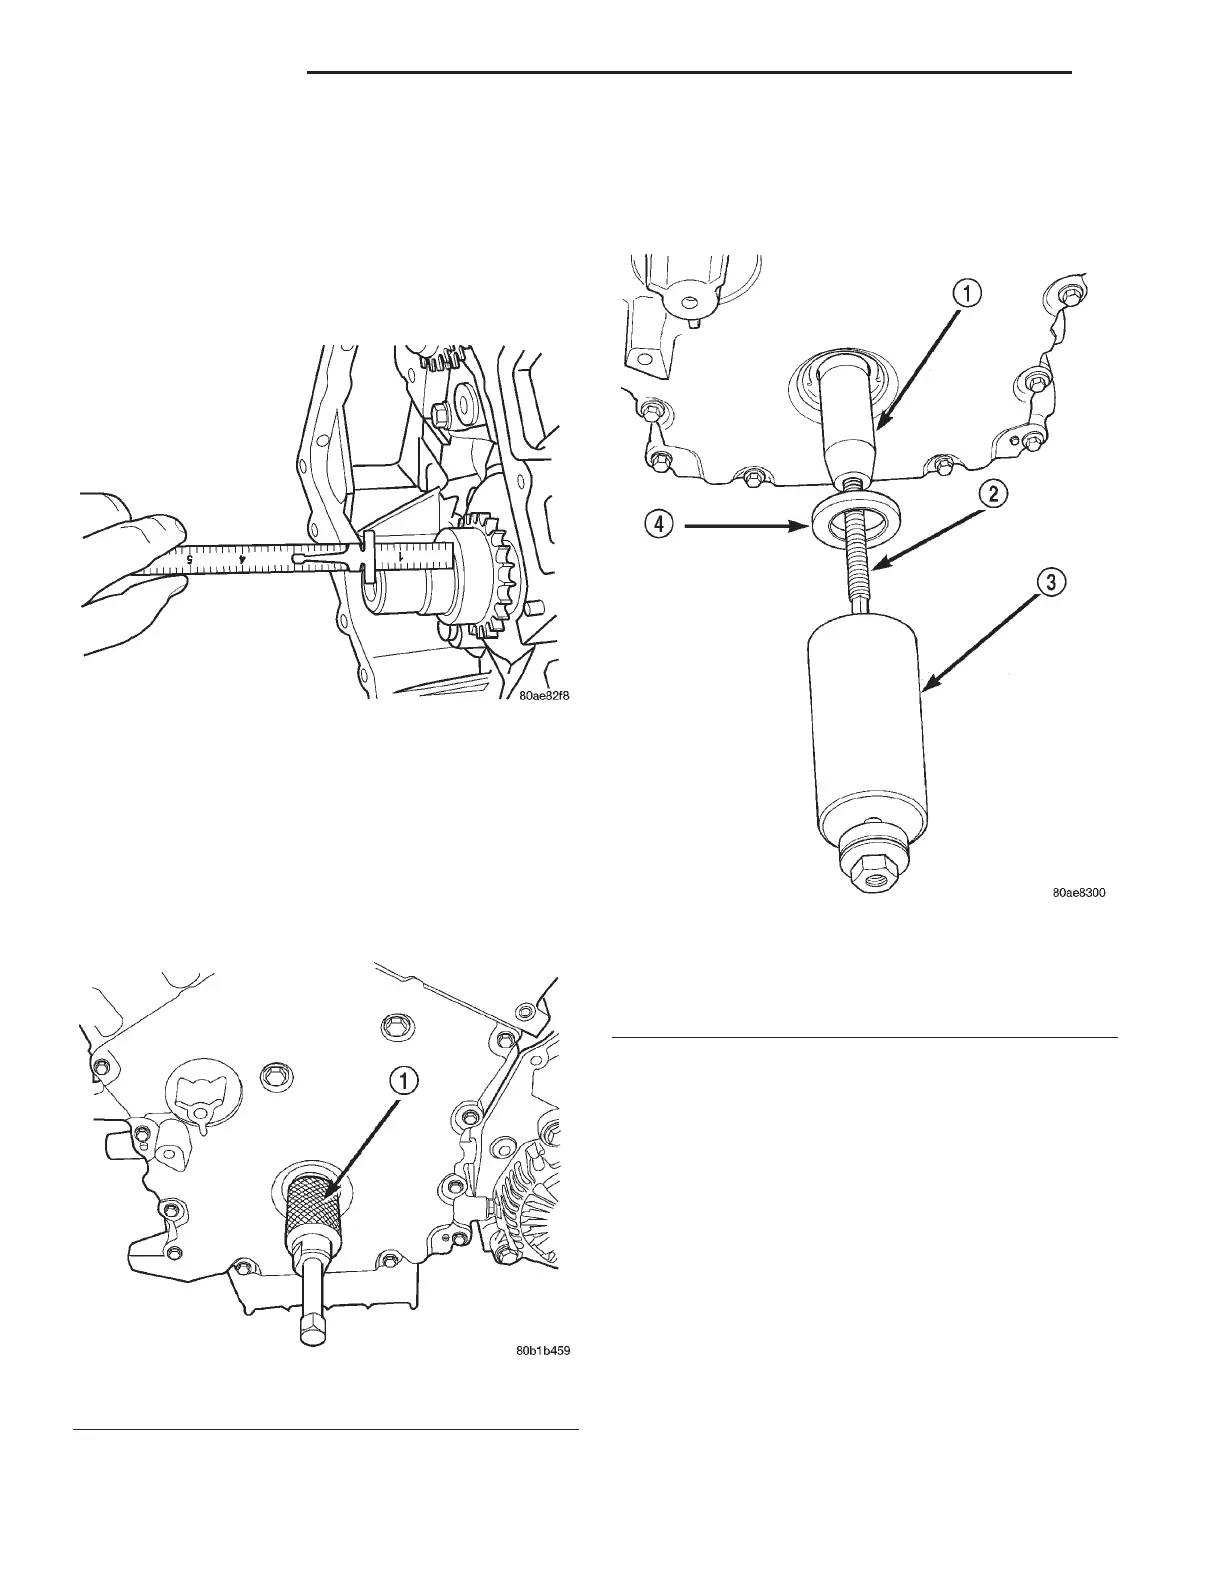
(2) Verify that crankshaft sprocket is installed to
proper depth by measuring from sprocket outer face
to end of crankshaft (Fig. 78). Measurement should
read: 39.05 60.50 mm (1.5374 60.020 in.).
(3) Install primary timing chain. Refer to proce-
dure in this section.
CRANKSHAFT OIL SEAL—FRONT
REMOVAL
(1) Remove crankshaft damper. Refer to procedure
in this section.
(2) Install Special Tool 8194, Insert into crankshaft
nose. Remove seal using Special Tool 6771, Remover
(Fig. 79).
INSTALLATION
(1) Install new seal using Special Tools 6780-2
Sleeve, 6780-1 Installer, and 8179 Stud (Fig. 80).
(2) Install crankshaft damper.
CRANKSHAFT OIL SEAL—REAR
REMOVAL
(1) Remove transaxle from vehicle. Refer to TRAN-
SAXLE for procedure.
(2) Remove drive plate.
(3) Insert a 3/16” wide flat bladed screwdriver
between the dust lip and the metal case of the crank-
shaft seal. Angle the screwdriver (Fig. 81) through
the dust lip against the metal case of the seal. Pry
out seal.
CAUTION: Do not allow the screwdriver blade to
contact the crankshaft seal surface. Contact of the
screwdriver blade against crankshaft edge (cham-
fer) is permitted.
Fig. 78 Crankshaft Sprocket Depth Measurement
Fig. 79 Crankshaft Front Oil Seal—Removal
1 – SPECIAL TOOL 6771
Fig. 80 Crankshaft Front Oil Seal—Installation
1 – SPECIAL TOOL 6780–2
2 – SPECIAL TOOL 8179
3 – SPECIAL TOOL 6780–1
4 – SEAL
9 - 52 2.7L ENGINE LH
REMOVAL AND INSTALLATION (Continued)