(3) Place shield in position on seat cushion.
(4) Install screws attaching seat cushion side
shield. Tighten screws in sequence refer to (Fig. 2).
(5) Install seat. Tighten front screws to 61 N·m (45
ft. lbs.) and the rear screws to 61 N·m (45 ft. lbs.).
FRONT SEAT CUSHION
REMOVAL
(1) Remove seat from vehicle.
(2) Remove front seat cushion side shields and dis-
connect wire connectors, if equipped.
(3) Remove seat back.
(4) Remove track and recliner assembly.
(5) Disconnect seat cushion heater element connec-
tor, if equipped.
(6) Disconnect wire harness fasteners from cushion
frame (Fig. 4).
(7) Remove seat cushion (Fig. 5).
INSTALLATION
(1) Install wire harness fasteners to cushion
frame.
(2) Connect seat cushion heater element connector,
if equipped.
(3) Install track and recliner assembly.
(4) Install seat back. Tighten pivot bolts and
recliner bolts to 8 N·m (71 in. lbs.) torque.
(5) Connect switch wire connectors to the cushion
side shield, if equipped.
(6) Install cushion side shields.
(7) Install seat in vehicle.
FRONT SEAT CUSHION COVER/HEATED SEAT
COVER
REMOVAL
(1) Remove seat from vehicle.
(2) Remove front seat cushion side shields.
(3) Disconnect seat cushion heater element har-
ness connectors from seat pan, if equipped.
(4) Remove seat back.
(5) Remove track and recliner assembly.
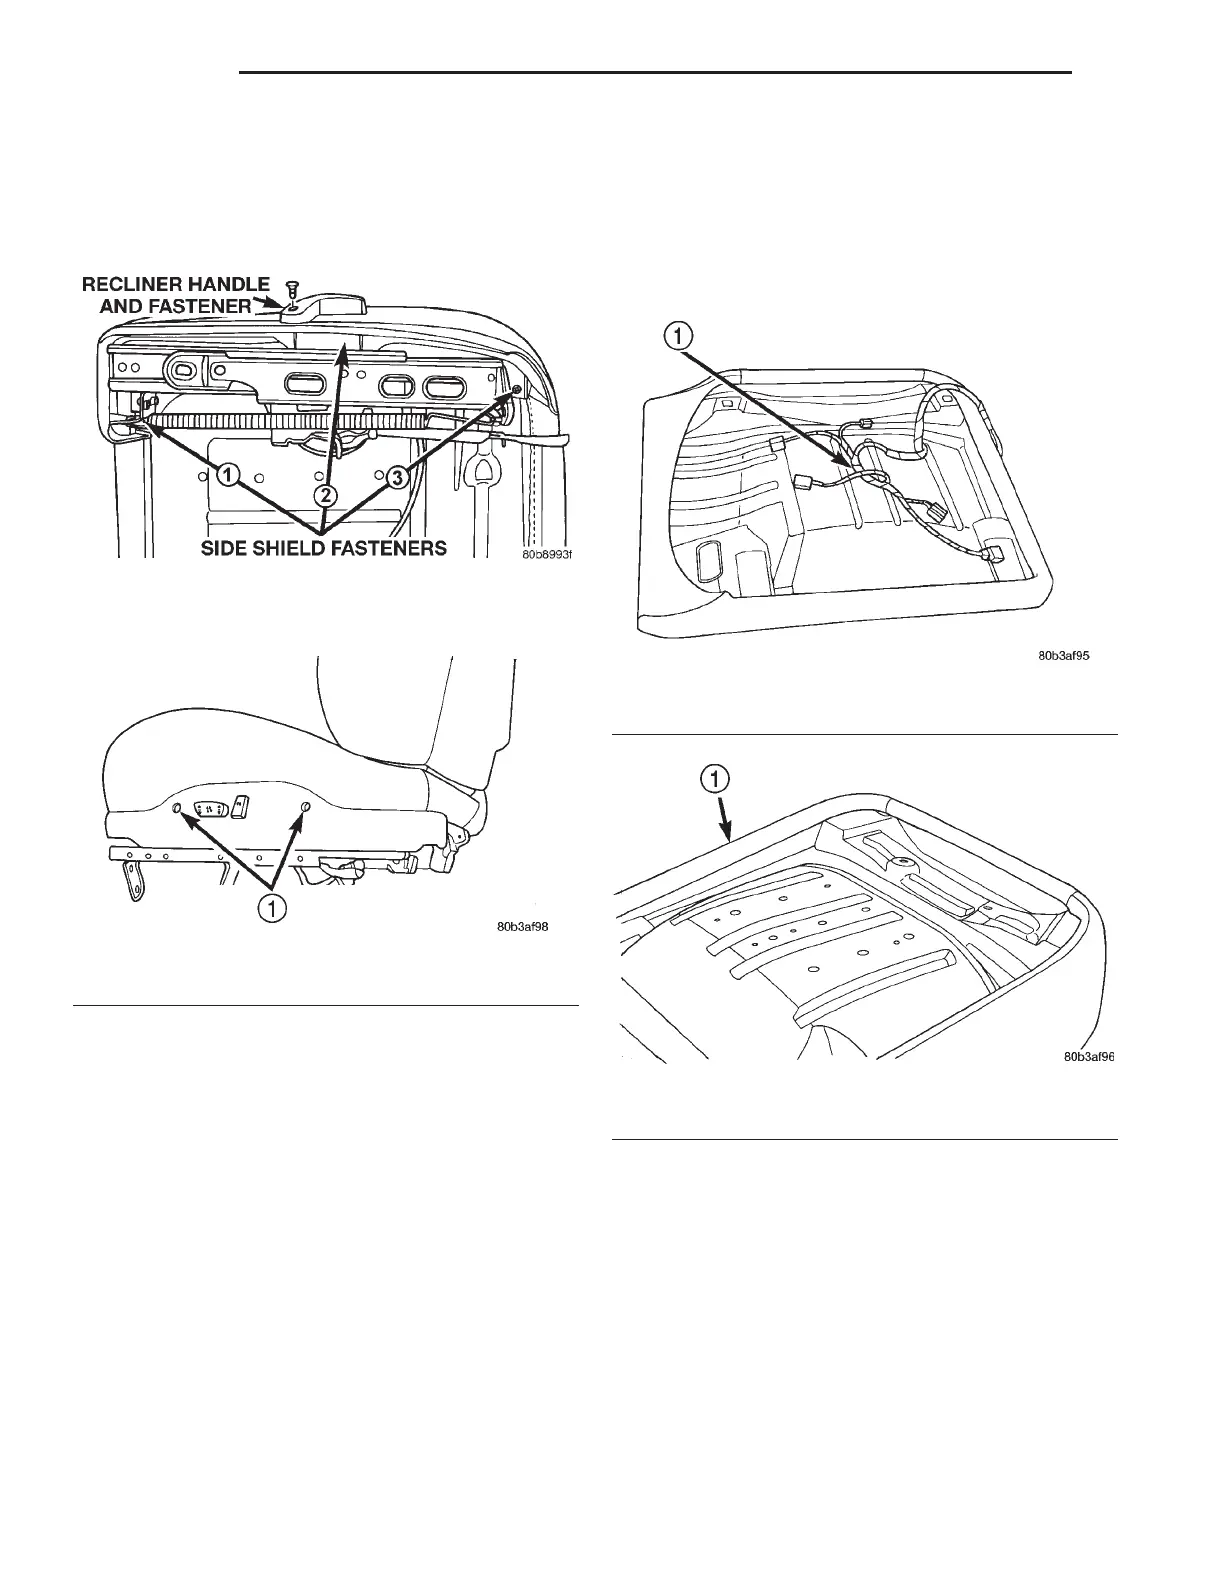
Fig. 2 Bottom View of Side Shield and Tightening
Sequence
Fig. 3 Side View of Side Shield
1 – SIDESHIELD FASTENERS
Fig. 4 Front Seat Cushion Wire Harness
1 – WIRE HARNESS
Fig. 5 Front Seat Cushion
1 – FRONT SEAT CUSHION
23 - 12 BODY LH
REMOVAL AND INSTALLATION (Continued)

 Loading...


