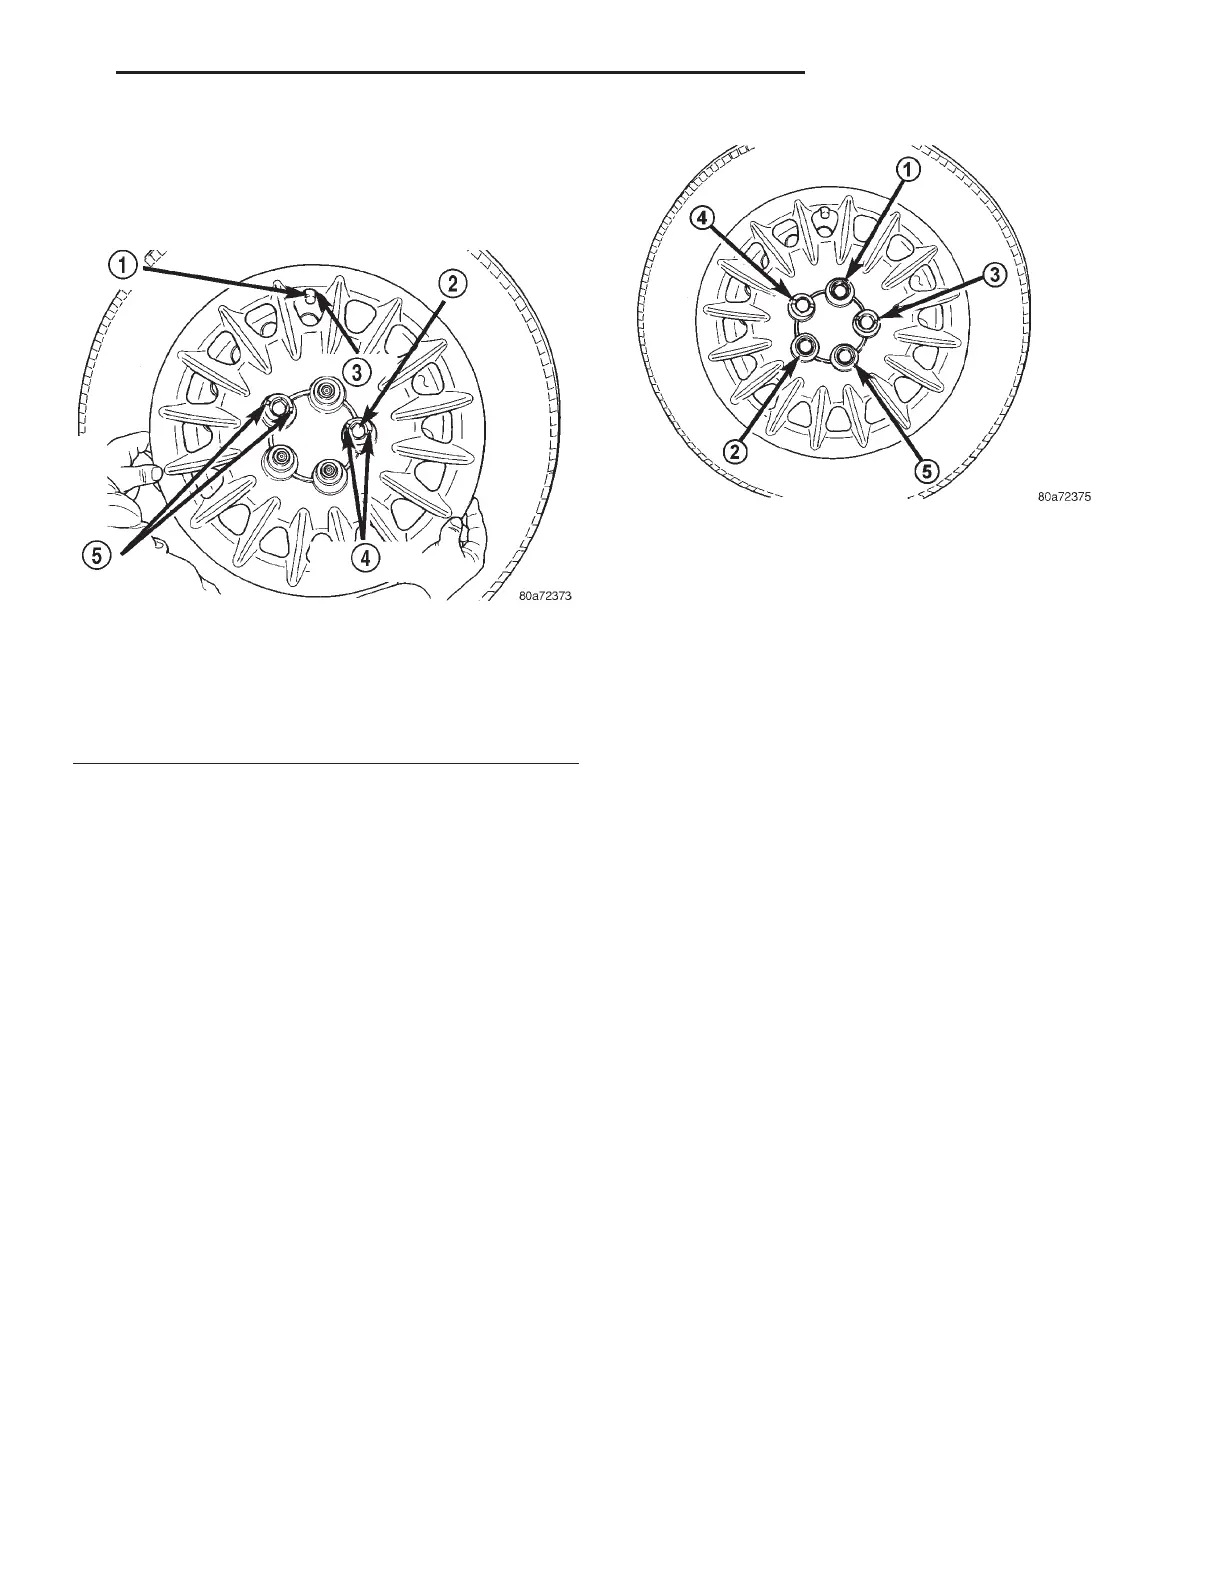
(2) Align the valve notch in the wheel cover with
the valve stem on the wheel (Fig. 20). Align the two
holes in the wheel cover having the retaining tabs,
with the two installed wheel nuts (Fig. 20).
(3) Press in on center of wheel cover until retain-
ing tabs on wheel cover engage with wheel nuts. This
will hold the wheel cover to the wheel.
(4) Install the three remaining wheel nuts (Fig.
17).
(5) Progressively tighten the 5 wheel nuts in the
proper sequence (Fig. 21). Tighten wheel nuts to 135
N·m (100 ft. lbs.).
(6) Lower the vehicle.
CLEANING AND INSPECTION
ALUMINUM WHEEL CARE
Chrome plated and painted aluminum wheels
should be cleaned regularly using mild soap and
water to maintain their luster and to prevent corro-
sion.
Care must be taken in the selection of tire and
wheel cleaning chemicals and equipment to prevent
damage to the wheels. Any of the “DO NOT USE”
items listed below WILL damage chrome plated and
painted aluminum wheels.
DO NOT USE:
• any abrasive metal cleaner
• any abrasive cleaning pad or brush
• any cleaner that contains an acid (this will
immediately react with and discolor the chromium
surface)
• chrome polish (unless it is buffed off immedi-
ately after application)
• oven cleaner
• a car wash that uses carbide-tipped wheel clean-
ing brushes
SPECIFICATIONS
WHEEL SPECIFICATIONS
Wheel:
Mounting Stud Size.............. M12x1.5mm
Mounting Stud Lug Nut Hex Size ......... 19mm
Wheel Mounting (Lug)
Nut Tightening Torque . . . 135 N·m (100 ft. lbs.)
Fig. 20 Wheel Cover Installation Position
1 – VALVE STEM
2 – WHEEL NUT
3 – NOTCH
4 – RETAINING TABS
5 – RETAINING TABS
Fig. 21 Wheel Nut Tightening Sequence
LH TIRES AND WHEELS 22 - 15
REMOVAL AND INSTALLATION (Continued)