• Inspect the strut for any condition of shaft bind-
ing over the full stroke of the shaft.
• Inspect the jounce bumper for cracks and signs
of deterioration.
• Check the upper mount for cracks and distortion
and its retaining studs for any sign of damage.
• Check the upper seat and bearing for cracks and
distortion.
• Check for binding of the seat and bearing pivot
bearing.
• Inspect the dust shield for rips and deteriora-
tion.
• Inspect the upper and lower spring isolators for
material deterioration.
• Inspect the coil spring for any sign of damage to
the coating.
ASSEMBLY
NOTE: If the coil spring has been removed from the
spring compressor, proceed with the next step, oth-
erwise, proceed with step 5.
(1) Place the coil spring in the compressor follow-
ing the manufacturers instructions (Fig. 62). Before
compressing the spring, rotate the spring to the posi-
tion noted in the note between steps 7 and 8.
(2) If disassembled, reinstall the upper spring iso-
lator and dust shield on seat and bearing. Match the
step in the isolator with the step in the seat and
bearing.
(3) Install the seat and bearing (with dust shield
attached) on top of the coil spring. Position the step
built into the seat and upper spring isolator against
the coil end of the coil spring.
(4) Install the lower spring isolator on the lower
spring seat of the strut (Fig. 65). The tabs on the iso-
lator will align it on the strut spring seat. They
straddle the expanded area of the lower spring seat
on the strut.
(5) Install the jounce bumper on the strut shaft.
The jounce bumper is to be installed with the smaller
end pointing downward toward the lower seat (Fig.
64).
(6) Install the jounce bumper cup (Fig. 64) on the
strut shaft. The cupped side goes on first.
(7) Install the strut through the bottom of the coil
spring until the lower spring seat contacts the lower
end of the coil spring. The inboard side of the strut
(or rear of the clevis bracket) should align with the
flat on the inboard side of the seat and bearing outer
perimeter. Install the clamp on the lower end of the
coil spring and strut, so the strut is held in place
(Fig. 62).
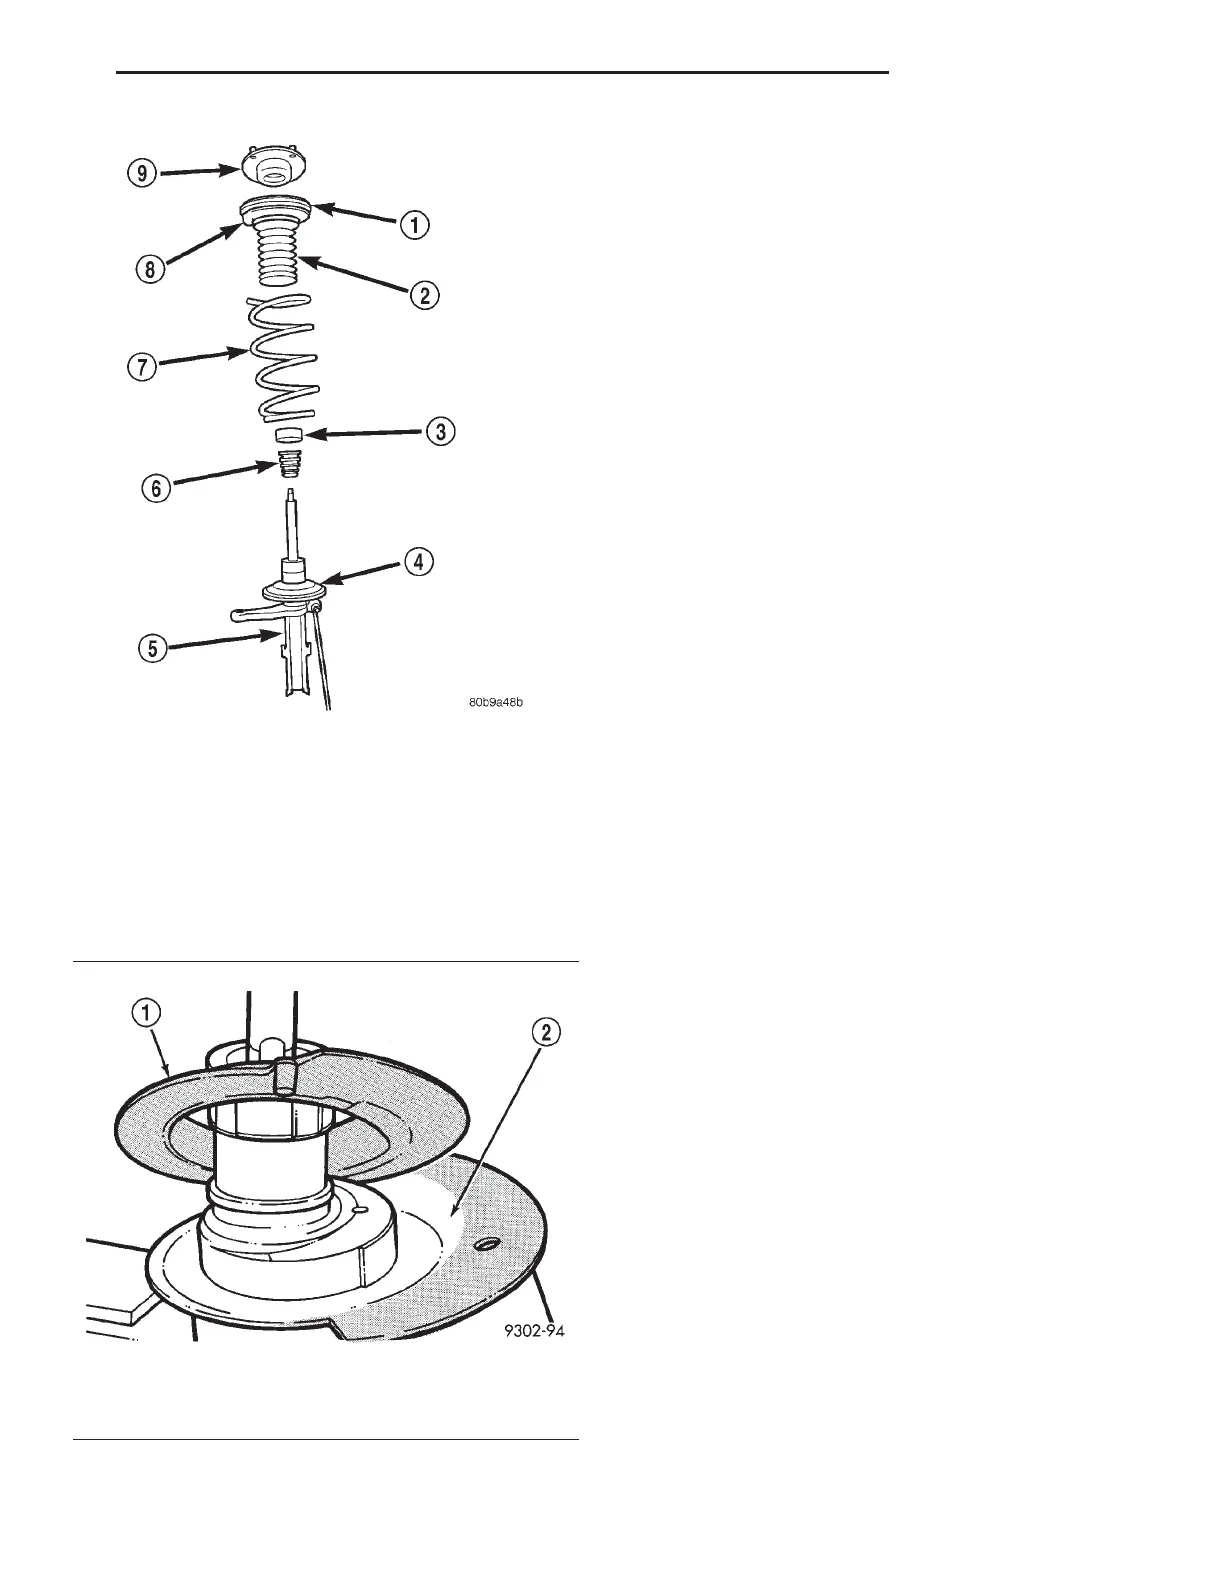
Fig. 64 Strut Assembly Components
1 – SEAT AND BEARING
2 – DUST SHIELD
3 – CUP
4 – LOWER SPRING ISOLATOR
5 – STRUT
6 – JOUNCE BUMPER
7 – COIL SPRING
8 – UPPER SPRING ISOLATOR
9 – UPPER MOUNT
Fig. 65 Lower Spring Isolator
1 – LOWER SPRING ISOLATOR
2 – LOWER SPRING SEAT
LH SUSPENSION 2 - 35
DISASSEMBLY AND ASSEMBLY (Continued)