If runout is not within specifications, reface or
replace the brake rotor. Refer to SERVICE PROCE-
DURES in this section of this group for information
on brake rotor machining.
BRAKE ROTOR LIMITS
Braking Rotor Rotor Thickness
Minimum
Rotor
Thickness
Rotor
Thickness
Variation
Rotor Run
Out*
Rotor Micro
Finish
Front Rotor
25.87–26.13 mm
1.019 -1.029 in.
24.4 mm
0.960 in.
0.013 mm
0.0005 in.
0.08 mm
0.003 in.
15-80 RMS
Rear Rotor
11.63–12.13 mm
0.458 -0.478 in.
10.4 mm
0.409 in.
0.013 mm
0.0005 in.
0.08 mm
0.003 in.
15-80 RMS
* TIR Total Indicator Reading (Measured On Vehicle)
BRAKE FLUID CONTAMINATION
Indications of fluid contamination are swollen or
deteriorated rubber parts.
Swollen rubber parts indicate the presence of
petroleum in the brake fluid.
To test for contamination, put a small amount of
drained brake fluid in clear glass jar. If fluid sepa-
rates into layers, there is mineral oil or other fluid
contamination of the brake fluid.
If brake fluid is contaminated, drain and thor-
oughly flush system. Replace master cylinder, propor-
tioning valve, caliper seals, wheel cylinder seals,
Antilock Brakes hydraulic unit and all hydraulic
fluid hoses.
BRAKE LAMP SWITCH
NOTE: Before proceeding with this diagnostic test,
verify the adjustment of the brake lamp switch to
rule out misadjustment. Refer to ADJUSTMENTS in
this service manual group.
If the electrical circuit has been tested and the
brake lamp switch is suspected of being faulty, it can
be tested using the following method.
(1) Remove the switch from the vehicle. Refer to
REMOVAL AND INSTALLATION in this section for
the proper procedure.
(2) With the switch in the released position (plung-
er extended), use an ohmmeter to test each of the
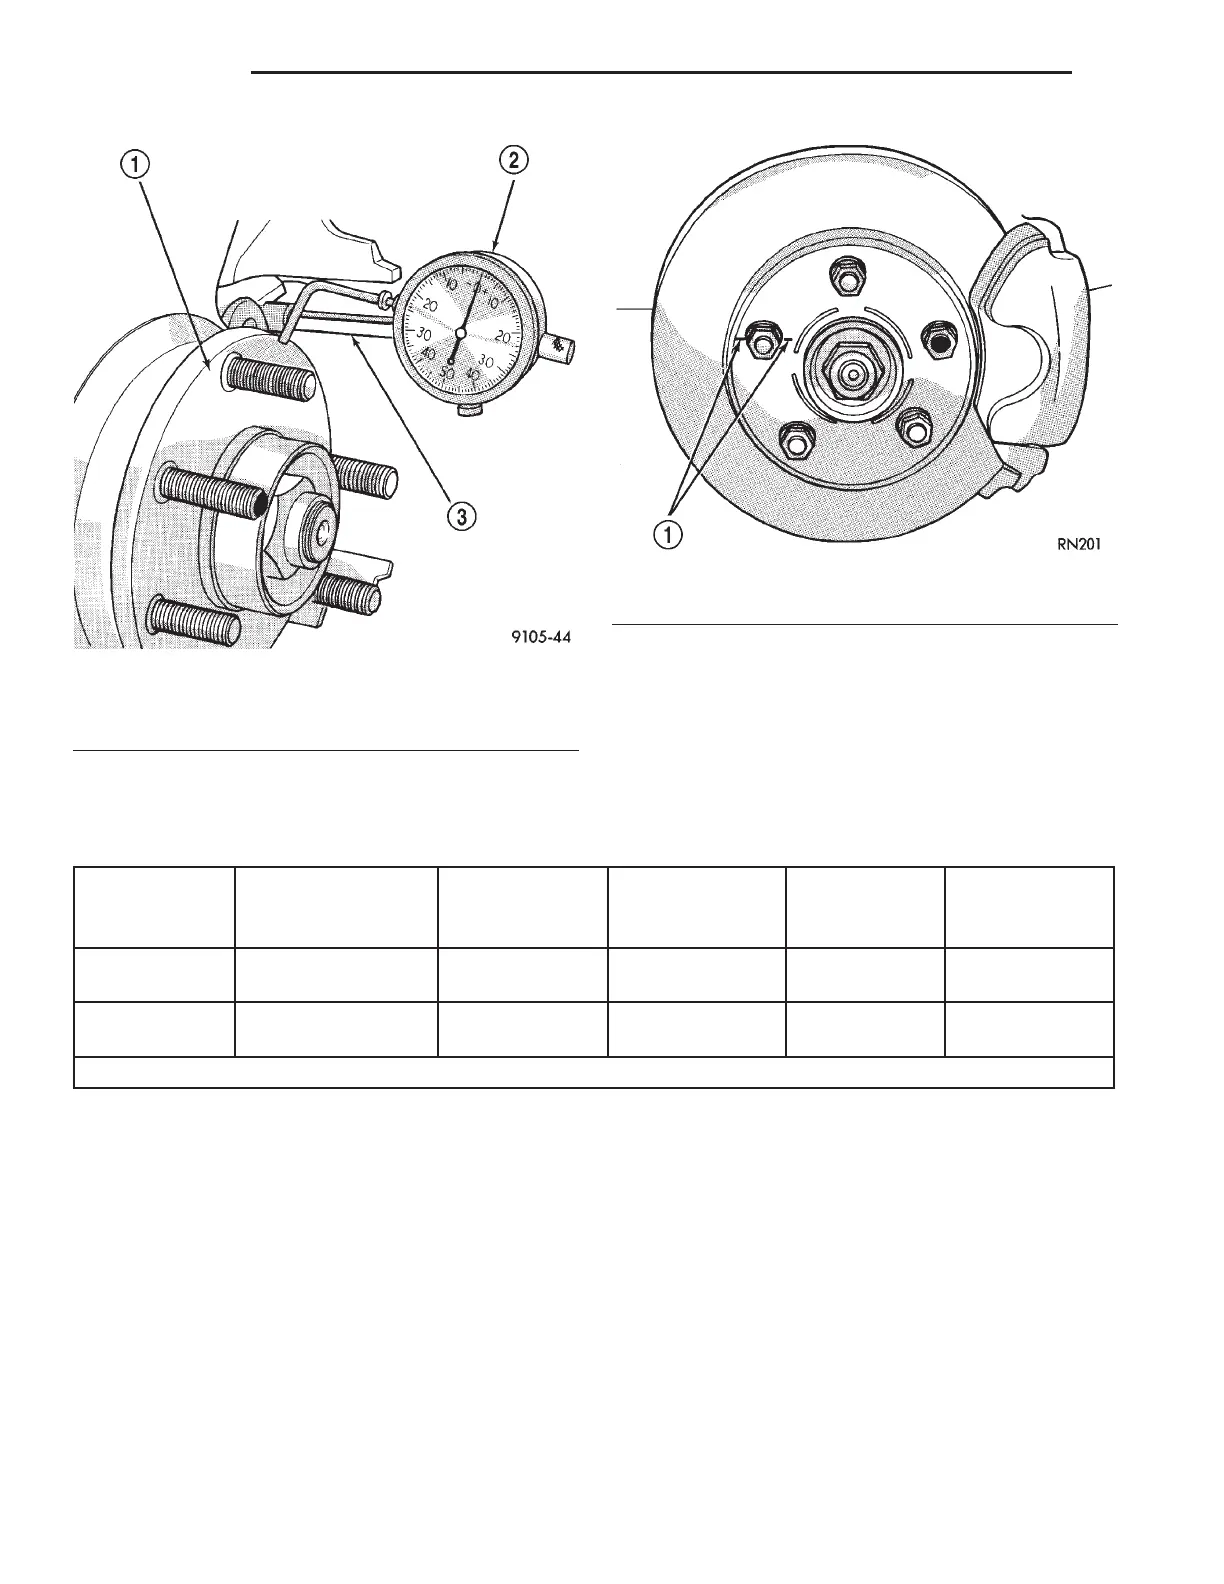
Fig. 23 Index Rotor And Wheel Stud
1 – CHALK MARK
Fig. 22 Checking Hub Runout
1 – HUB SURFACE
2 – SPECIAL TOOL C-3339
3 – SPECIAL TOOL SP-1910
5 - 18 BRAKES LH
DIAGNOSIS AND TESTING (Continued)