INSTALLATION
CAUTION: If a burr or scratch is present on the
crankshaft edge (chamfer), clean surface using 400
grit sand paper to prevent seal damage during
installation.
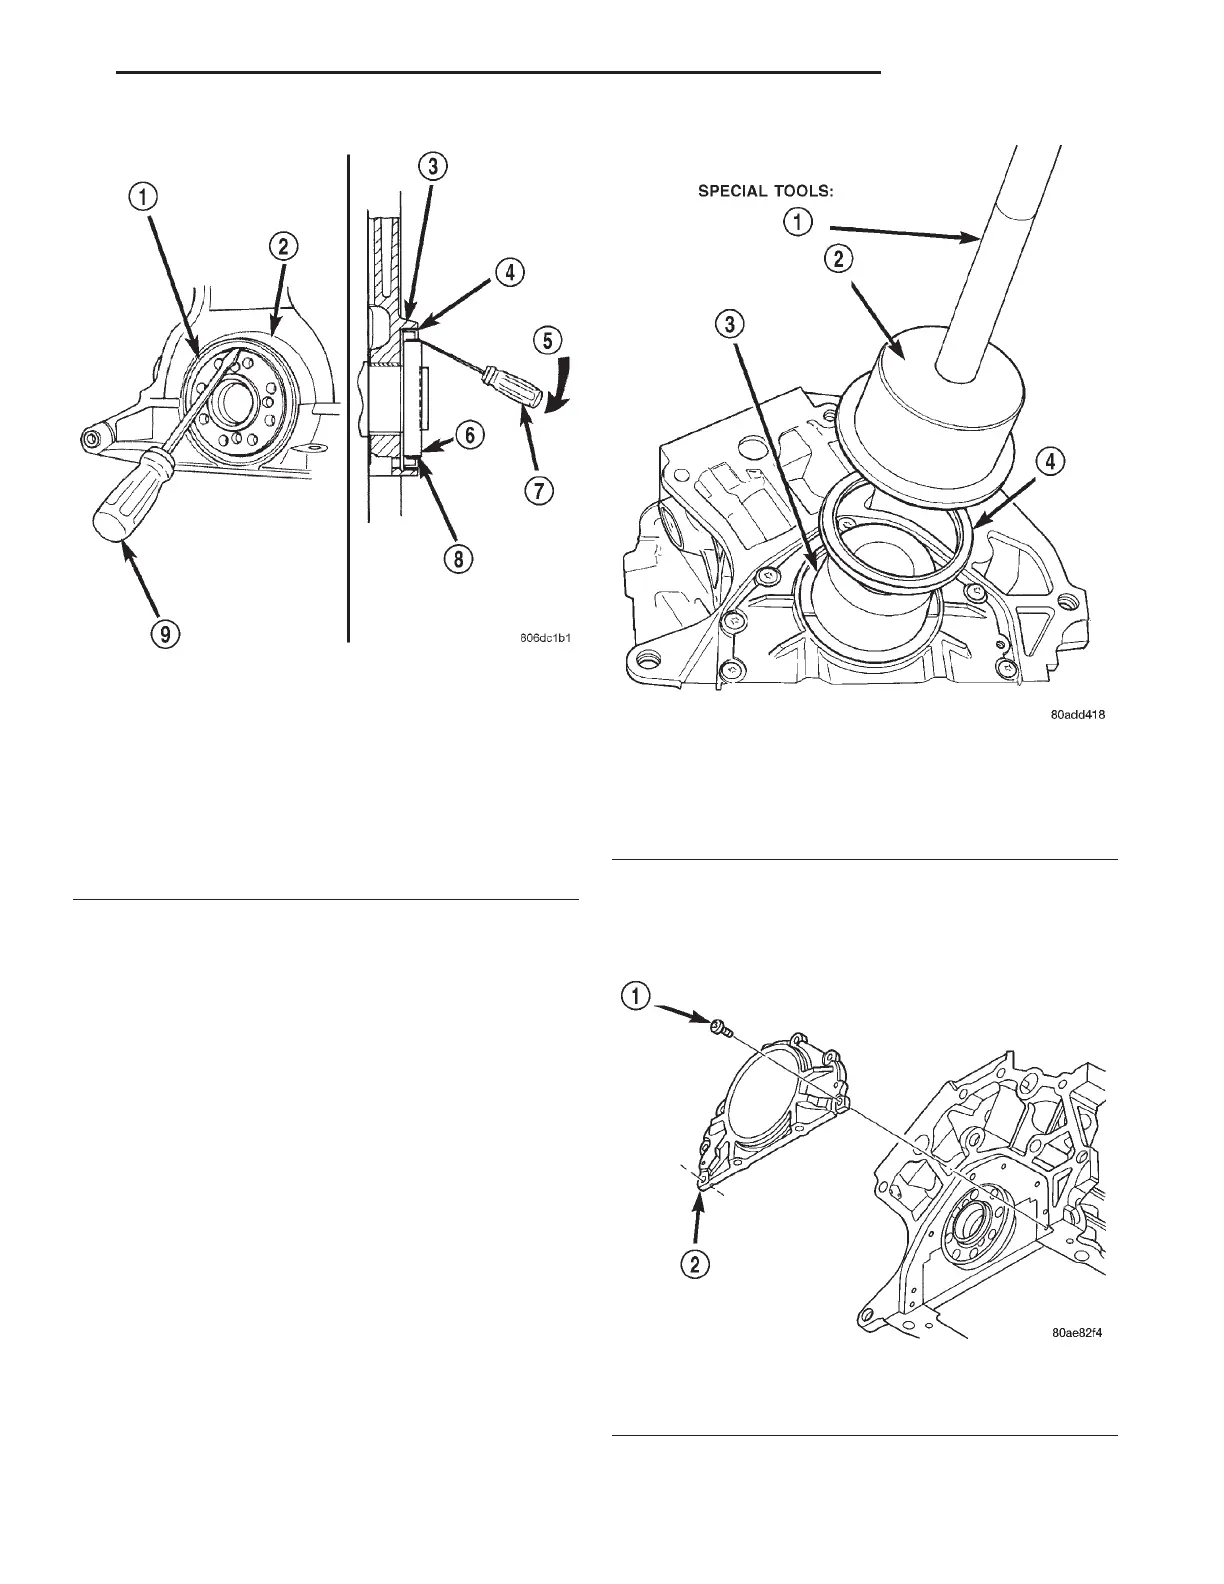
(1) Place Special Tool 6926-1 Guide on crankshaft
(Fig. 82). This is a pilot tool with a magnetic base.
(2) Position seal over pilot tool. Assure that lip of
seal is facing towards the crankshaft during installa-
tion. The pilot tool remains on crankshaft during seal
installation.
(3) Using Special Tool 6926-2 Installer, and C-4171
Handle (Fig. 82), drive seal into the retainer housing
until seal is flush with housing surface.
(4) Install drive plate and transaxle. Refer to
TRANSAXLE for procedures.
CRANKSHAFT OIL SEAL RETAINER—REAR
REMOVAL
(1) Remove crankshaft rear oil seal and oil pan.
Refer to procedures in this section.
(2) Remove seal retainer attaching screws (Fig.
83).
(3) Remove retainer and gasket (Fig. 83).
Fig. 81 Rear Crankshaft Oil Seal Removal—Typical
1 – REAR CRANKSHAFT SEAL
2 – ENGINE BLOCK
3 – ENGINE BLOCK
4 – REAR CRANKSHAFT SEAL METAL CASE
5 – PRY IN THIS DIRECTION
6 – CRANKSHAFT
7 – SCREWDRIVER
8 – REAR CRANKSHAFT SEAL DUST LIP
9 – SCREWDRIVER
Fig. 82 Crankshaft Rear Seal—Installation
1 – C-4171 HANDLE
2 – 6926–2 INSTALLER
3 – 6926–1 GUIDE
4 – SEAL
Fig. 83 Oil Seal Retainer
1 – SCREWS (7)
2 – SEAL RETAINER
LH 2.7L ENGINE 9 - 53
REMOVAL AND INSTALLATION (Continued)