WARNING: DO NOT REMOVE THE STRUT SHAFT
NUT BEFORE THE COIL SPRING IS COMPRESSED.
THE COIL SPRING IS HELD UNDER PRESSURE
AND MUST BE COMPRESSED, REMOVING SPRING
TENSION FROM THE UPPER MOUNT AND PIVOT
BEARING, BEFORE THE SHAFT NUT IS REMOVED.
(3) Compress the coil spring until all coil spring
tension is removed from the upper mount.
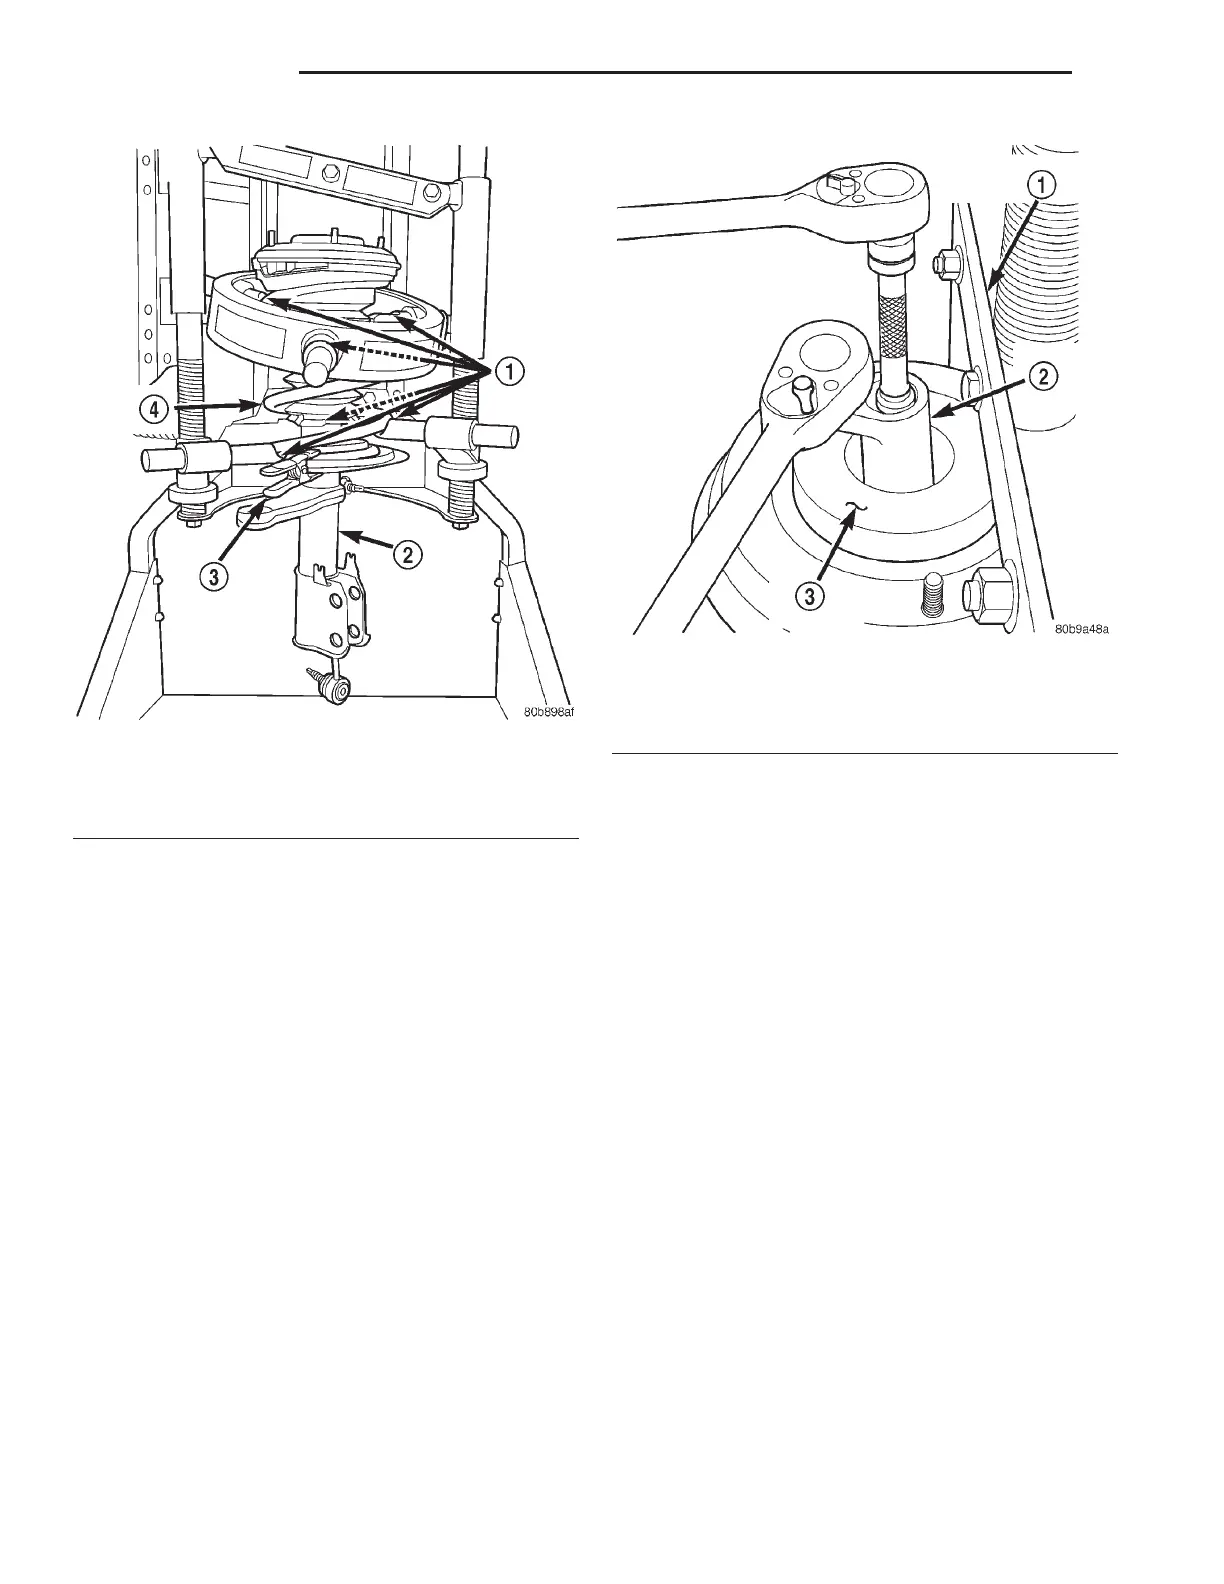
(4) Install Strut Nut Socket, Special Tool 6864, on
the strut shaft retaining nut (Fig. 63). Next, install a
socket on the hex on the end of the strut shaft. While
holding the strut shaft from turning, remove the nut
from the strut shaft.
(5) Remove the upper mount from the strut shaft.
(6) Remove the clamp from the bottom of the coil
spring and remove the strut out through the bottom
of the coil spring.
NOTE: If the seat and bearing, upper spring isola-
tor, dust boot, or coil spring need to be serviced,
proceed with the next step, otherwise, proceed with
step 9.
NOTE: Before removal of the seat and bearing from
the spring, note the flat on the inboard side of the
seat and bearing outer perimeter. This must align
with the inboard side of the strut (or rear of the cle-
vis bracket) on reassembly. Also note the coil
spring ending at the stop built into the seat and
upper isolator.
(7) Remove the seat and bearing, upper spring iso-
lator and dust shield as an assembly from the top of
the coil spring by pulling them straight up. They can
be separated once removed from the vehicle. The
jounce bumper cup may also come off when the
assembly is removed. Check inside the dust shield.
NOTE: Before releasing the tension on the coil
spring, note the position of the coil end on the
upper end of the coil spring. When reistalled, it
must be positioned in the same spot for proper
alignment of the seat and bearing, and the strut.
(8) Release the tension from the coil spring by
backing off the compressor drive fully. Push back the
compressor hooks and remove the coil spring.
(9) Remove the jounce bumper cup and jounce
bumper from the strut shaft by pulling each straight
up and off the strut shaft (Fig. 64). If the jounce
bumper cup is not present, check inside the dust
shield. It may have stayed inside the dust shield.
(10) Remove the lower spring isolator from the
lower spring seat on the strut (Fig. 65).
(11) Inspect the strut assembly components for the
following and replace as necessary:
Fig. 62 Strut Assembly In Compressor
1 – HOOKS
2 – STRUT ASSEMBLY
3 – CLAMP
4 – COIL SPRING
Fig. 63 Shaft Nut Removal/Installation
1 – SPRING COMPRESSOR
2 – SPECIAL TOOL 6864
3 – UPPER MOUNT
2 - 34 SUSPENSION LH
DISASSEMBLY AND ASSEMBLY (Continued)