REAR SUSPENSION CROSSMEMBER
BUSHINGS
DESCRIPTION
The rear suspension crossmember has 4 rubber iso-
lator bushings which are replaceable. Once the cross-
member is removed from the vehicle, the following
procedure may be used to remove each of the cross-
member bushings.
REMOVAL AND INSTALLATION
FRONT BUMPER FASCIA - CONCORDE/LHS/
300M
REMOVE
(1) Release hood latch and open hood.
(2) Remove large rubber grommet (70 mm x 168
mm) from splash shield to gain access to fascia fas-
teners (Fig. 2).
(3) Remove fasteners attaching fascia to the front
fender and splash shield, using access hole in splash
shield (Fig. 3).
(4) Remove the fasteners attaching the fascia to
the lower crossmember (Fig. 4).
(5) Remove the fasteners attaching the fascia to
the upper radiator closure panel (Fig. 4).
(6) Disconnect wire connectors (fog lamps, parking/
turn signal, side marker), if equipped (Fig. 5).
(7) Remove fascia from vehicle.
INSTALLATION
(1) Connect wire connectors.
(2) Place fascia in position on vehicle, by fitting
foam to bumper reinforcement. Use care not to
scratch fender. Tape may be put on fender for protec-
tion.
(3) Install the top center fasteners, to upper radi-
ator closure panel.
(4) Install fasteners attaching fascia to the front
fender and splash shield, using access hole in splash
shield
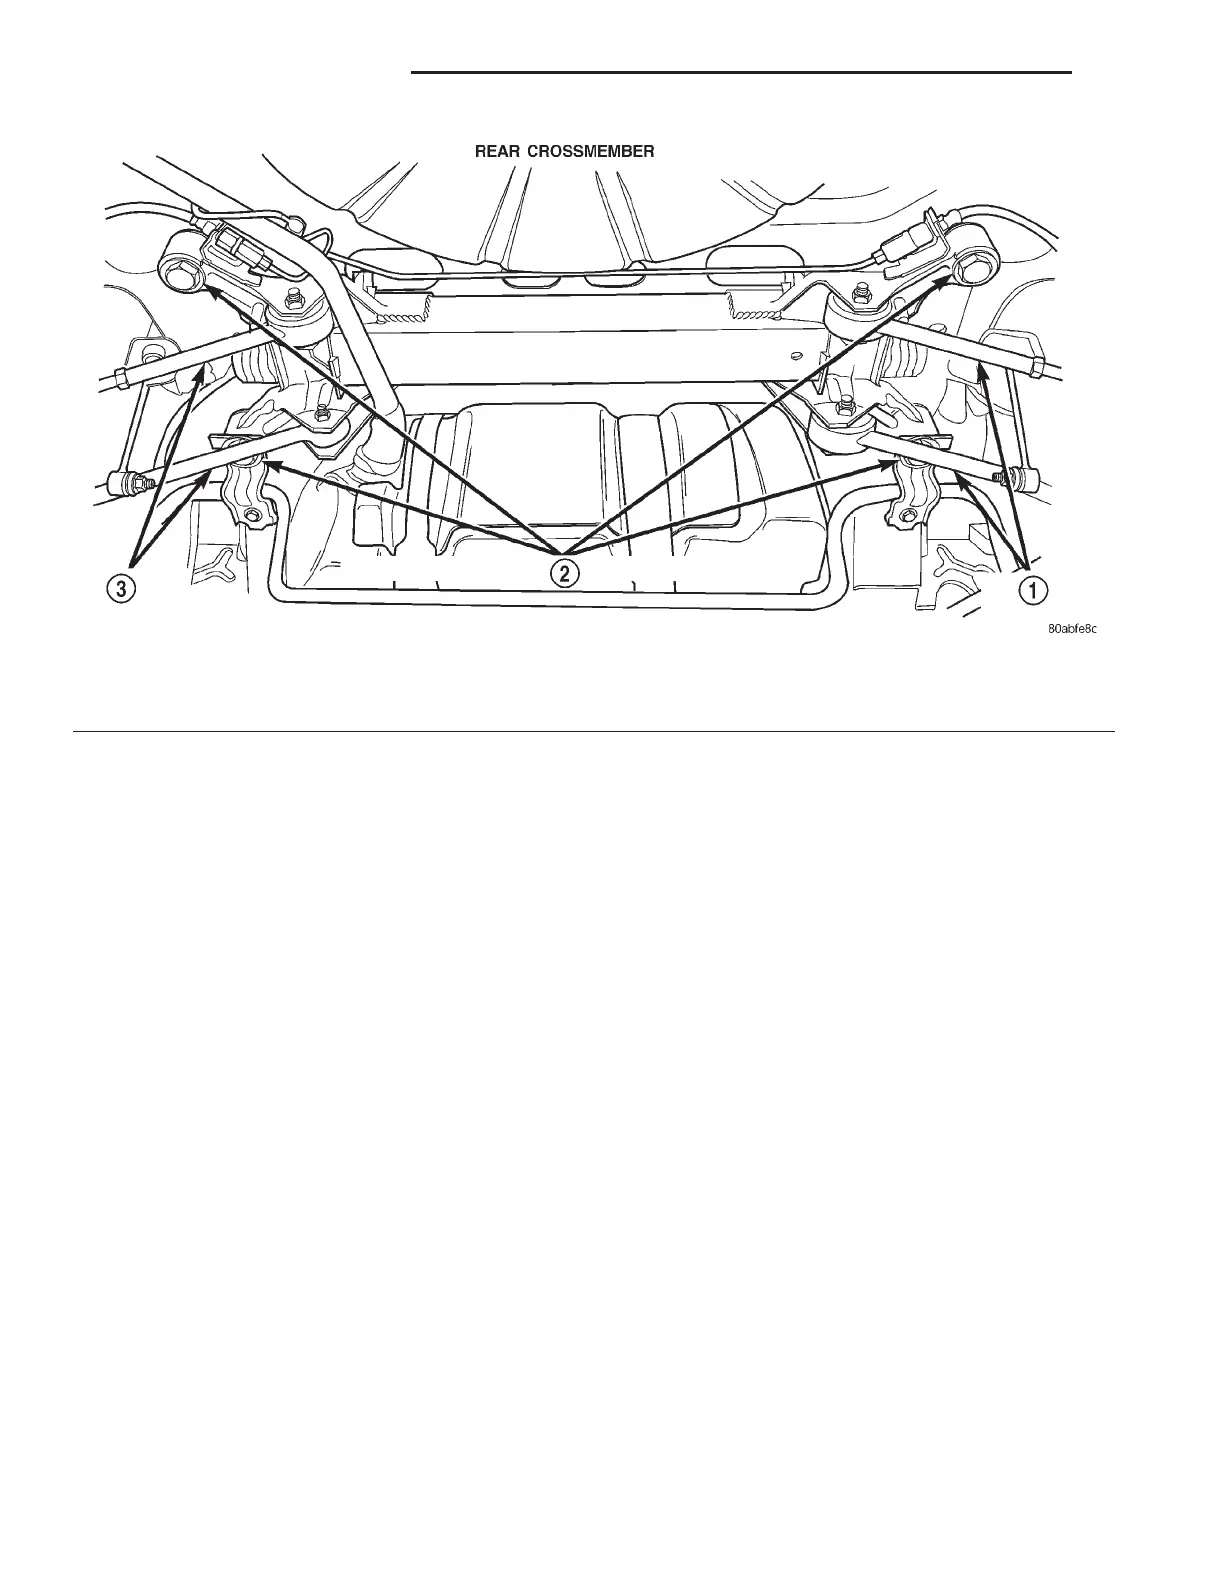
Fig. 1 Rear Suspension Crossmember
1 – LATERAL LINKS
2 – REAR CROSSMEMBER ISOLATOR BUSHINGS
3 – LATERAL LINKS
13 - 2 FRAMES AND BUMPERS LH
DESCRIPTION AND OPERATION (Continued)