(9) Road test the vehicle and make several stops to
wear off any foreign material on the brakes and to
seat the brake shoe linings.
DISC BRAKE SHOES (FRONT)
NOTE: Before proceeding with this procedure,
review SERVICE WARNINGS AND CAUTIONS at the
beginning of the REMOVAL AND INSTALLATION
section.
REMOVAL
(1) Remove caliper as described in Front Disc
Brake Caliper Removal and Installation, found else-
where in this section of this service manual.
(2) Remove the shoe retractor clips from between
the shoes.
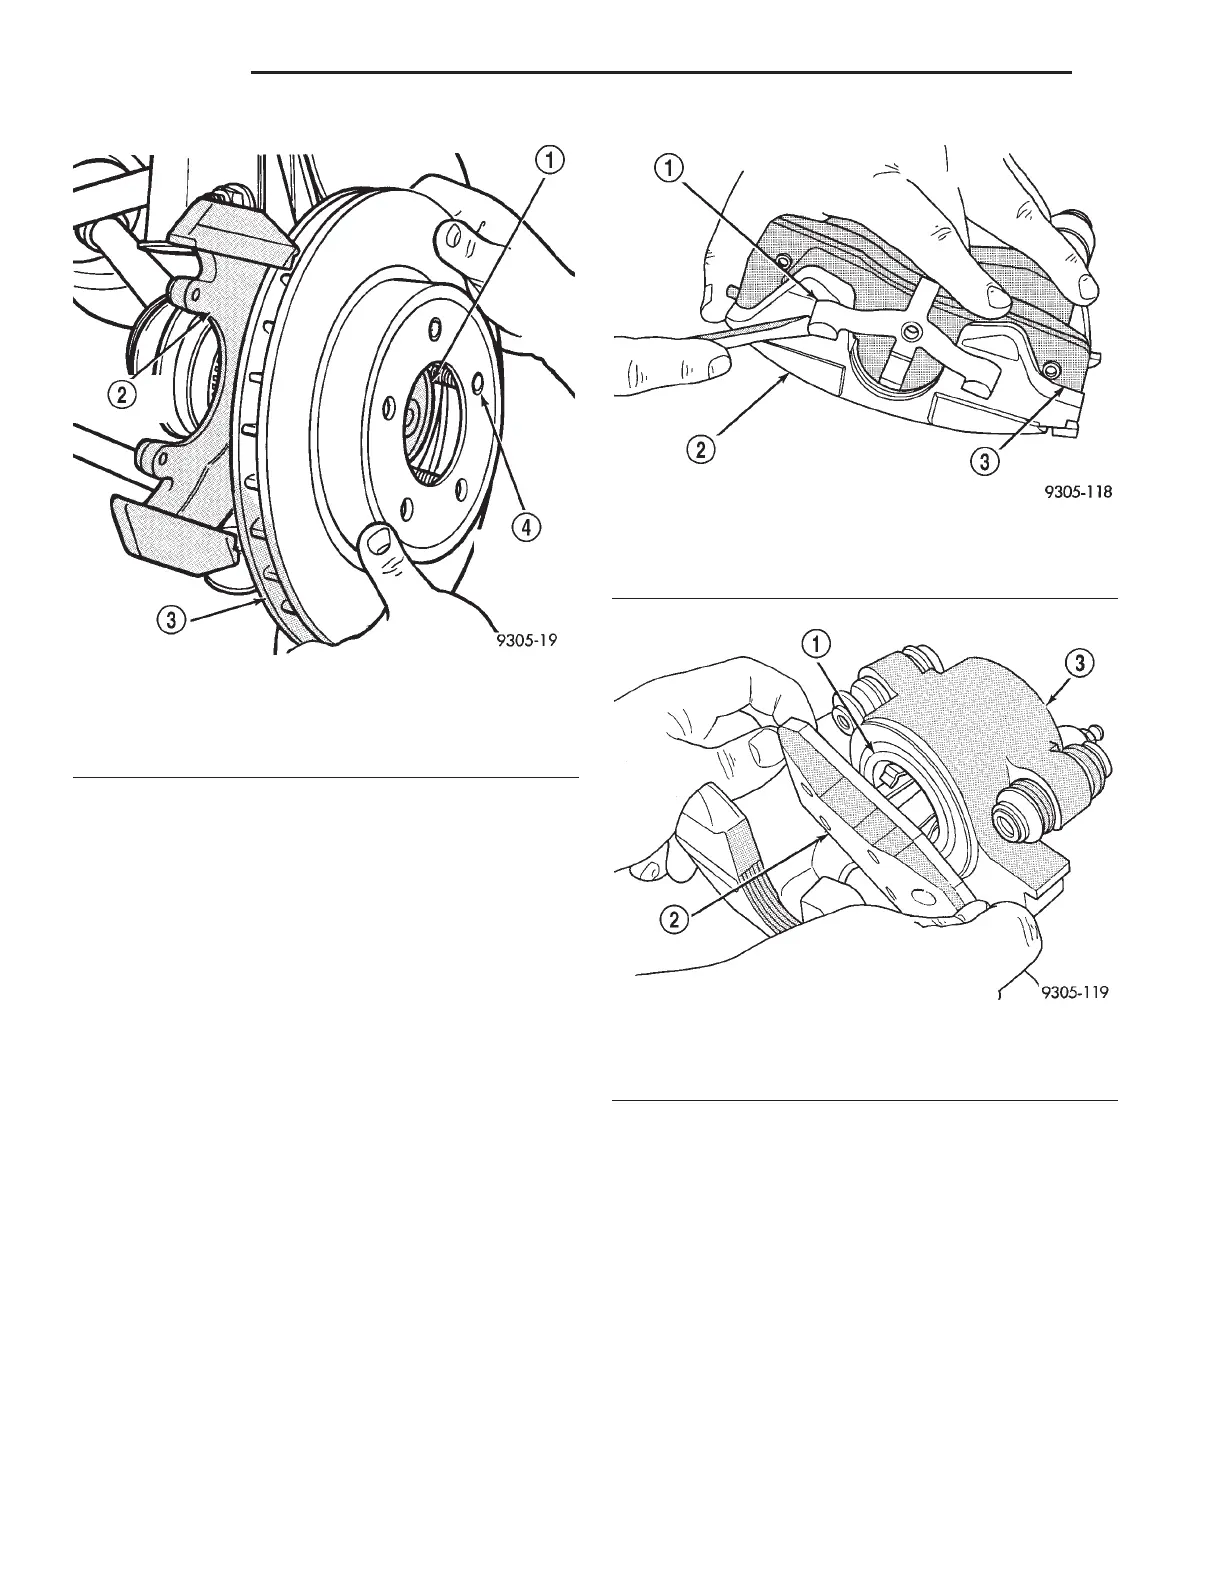
(3) Remove outboard brake shoe, by prying the
shoe retaining clip over raised area on caliper. Then
slide the brake shoe off the caliper (Fig. 54).
(4) Pull inboard brake shoe away from piston,
until retaining clip is free from cavity in piston (Fig.
55).
CALIPER INSPECTION
Check for piston seal leaks (brake fluid in and
around boot area and inboard lining) and for any
ruptures of the piston dust boot. If boot is damaged,
or fluid leak is visible, disassemble caliper assembly
and install a new seal and boot, (and piston if
scored). Refer to procedures titled Disc Brake Caliper
Disassembly.
Check the caliper dust boot and caliper pin bush-
ings to determine if they are in good condition.
Replace if they are damaged, dry, or found to be brit-
tle. Refer to Cleaning And Inspection Of Brake Cali-
per.
INSTALLATION
NOTE: Step 1 below is only required when install-
ing a caliper after new brake shoes have been
installed.
Fig. 53 Removing Or Installing Braking Disc
1 – HUB
2 – STEERING KNUCKLE
3 – BRAKING DISC (ROTOR)
4 – WHEEL MOUNTING STUD
Fig. 54 Removing Outboard Brake Shoe
1 – RETAINING CLIP
2 – CALIPER ASSEMBLY
3 – BRAKE SHOE
Fig. 55 Inboard Brake Shoe
1 – PISTON
2 – BRAKE SHOE
3 – CALIPER ASSEMBLY
5 - 32 BRAKES LH
REMOVAL AND INSTALLATION (Continued)

 Loading...


