INSTALLATION
(1) Clean sealing surfaces and replace gasket as
needed.
(2) Install gasket and loose assemble seal retainer
to block.
NOTE: The following steps must be performed to
prevent oil leaks at sealing joints.
(3) Attach Special Tools 8225 to pan rail using the
oil pan fasteners.
NOTE: Make sure that the “2.7L” stamped on the
special tool is facing the cylinder block (flat side of
tools against pan rail).
(4) While applying firm pressure to the seal
retainer against Special Tools 8225 (Fig. 84), tighten
seal retainer screws to 12 N·m (105 in. lbs.).
(5) Install oil pan and crankshaft rear oil seal.
Refer to procedures in this section.
OIL PAN
REMOVAL
(1) Remove dipstick and tube.
(2) Raise vehicle on hoist.
(3) Drain engine oil and remove oil filter.
(4) Disconnect suspension stabilizer bar and repo-
sition for oil pan clearance. Refer to SUSPENSION
for procedure.
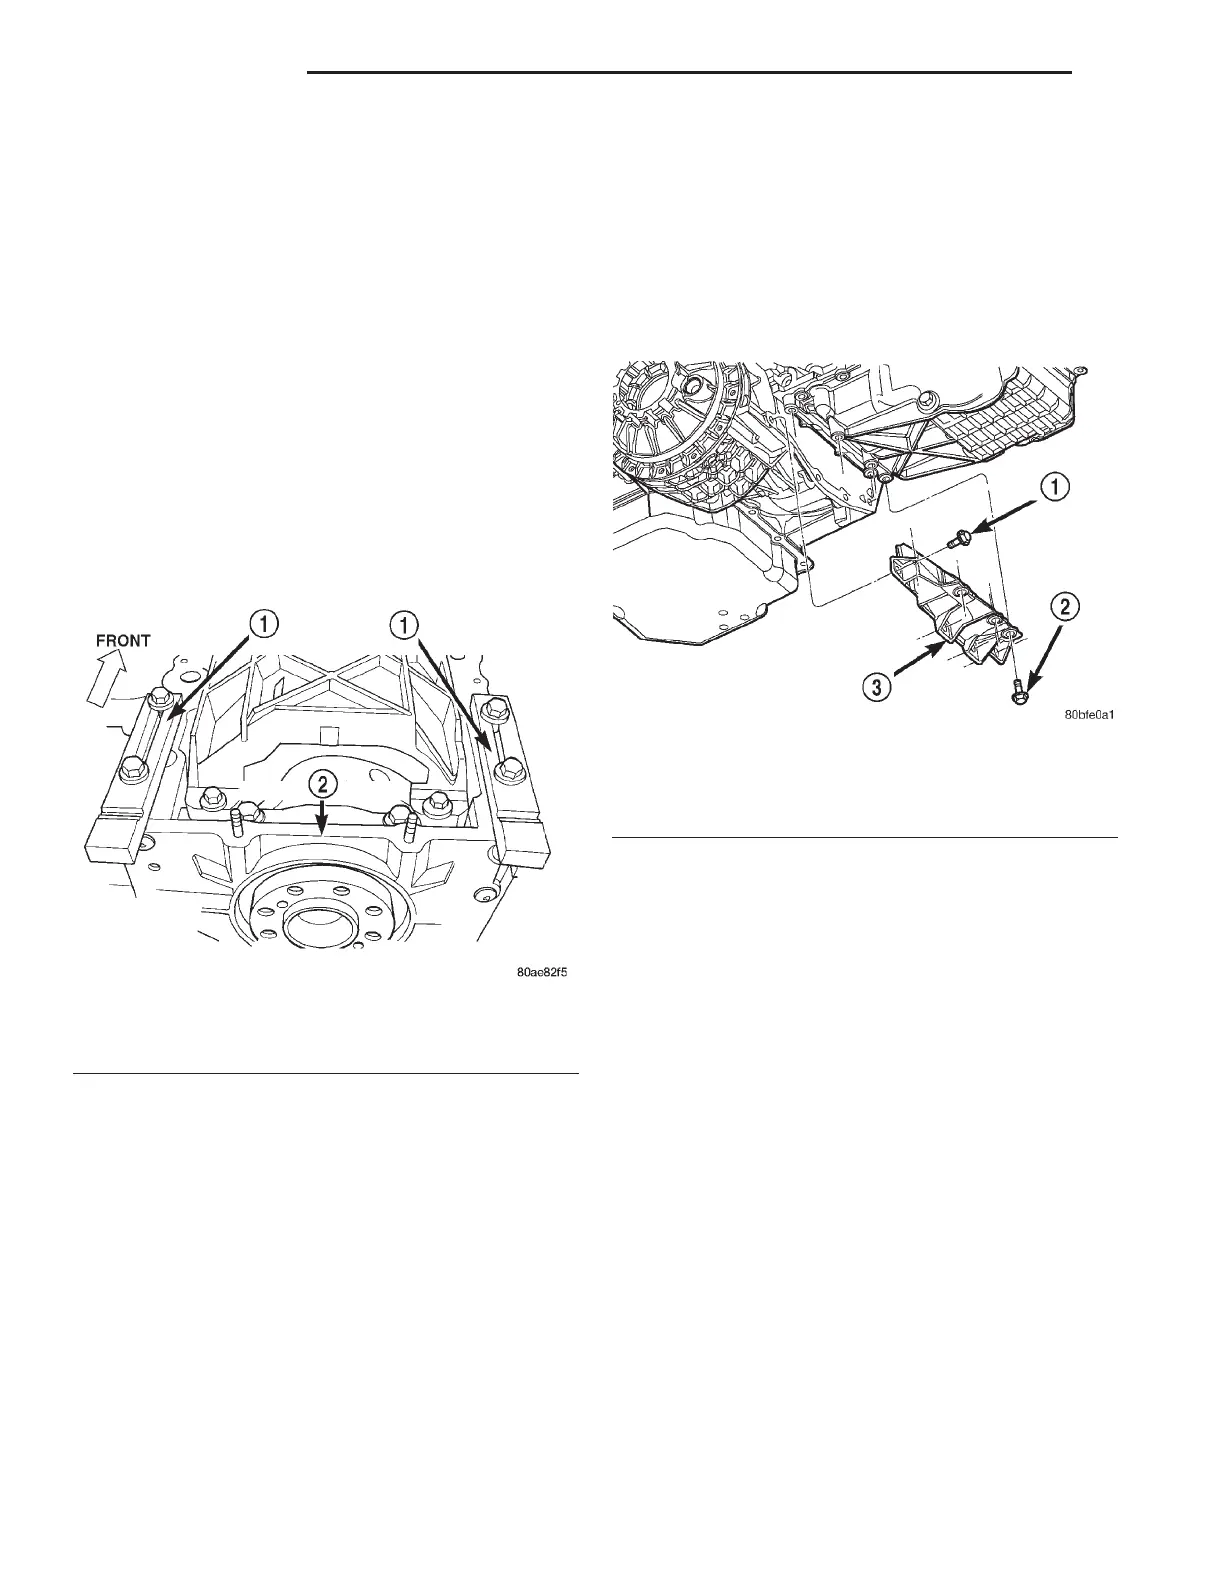
(5) Remove structural collar from oil pan to trans-
mission housing (Fig. 85).
(6) Remove lower bolt attaching the A/C compres-
sor to oil pan.
(7) Disconnect engine oil cooler line from pan (if
equipped).
CAUTION: Assure removal of the two bolts attach-
ing the timing cover to the oil pan, as damage to
the timing cover and/or oil pan may occur.
(8) Remove oil pan attaching fasteners. Remove oil
pan and gasket (Fig. 86).
INSTALLATION
(1) Clean oil pan and sealing surfaces. Inspect oil
pan and timing chain cover gaskets. Replace as nec-
essary.
(2) Apply a 1/8 inch bead of Mopart Engine RTV
GEN II to the front T-joints (oil pan gasket to timing
cover gasket interface) (Fig. 86).
(3) Install oil pan gasket to block.
NOTE: To prevent oil leaks at oil pan to timing
chain cover, the following tightening sequence pro-
cedure must be performed.
(4) Install oil pan and fasteners (Fig. 86) using the
following tightening sequence:
(a) Install oil pan bolts and nuts finger tight
only—just tight enough to compress the gas-
ket’s rubber seal.
(b) Install timing chain cover to pan bolts and
tighten to 12 N·m (105 in. lbs.).
(c) Tighten oil pan bolts to 28 N·m (250 in. lbs.).
(d) Tighten oil pan nuts to 12 N·m (105 in. lbs.).
(5) Install lower bolt attaching the A/C compressor
to oil pan. Tighten bolt to 28 N·m (21 ft. lbs.).
(6) Connect engine oil cooler line to oil pan (if
equipped).
Fig. 84 Rear Crankshaft Seal Retainer Alignment
1 – SPECIAL TOOLS 8225
2 – SEAL RETAINER
Fig. 85 Structural Collar
1 – BOLT-HORIZONTAL
2 – BOLT-VERTICAL
3 – STRUCTURAL COLLAR
9 - 54 2.7L ENGINE LH
REMOVAL AND INSTALLATION (Continued)