(2) Disconnect hood release cable ferrule and cable
end from hood latch assembly (Fig. 20) or (Fig. 21).
(3) Remove left cowl side trim panel.
(4) Remove screws attaching hood latch release
cable handle to the cowl side.
(5) Remove left wheel splash shield.
(6) Disengage release cable from routing clips.
(7) Roll carpet back to expose cable.
(8) Release taped on cable clip from dash liner
(Fig. 22).
(9) Release the rubber grommet from the dash
panel. Pull cable through the dash panel access hole.
(10) Remove cable from vehicle.
INSTALLATION
(1) Place cable in position on vehicle.
(2) Push cable through access hole in dash panel.
(3) Install release cable rubber grommet into
access hole in dash panel.
(4) Install screws to attach hood latch release
cable handle to the cowl side. Tighten screws to 2.3
to 3.4 N·m (20 to 30 in. lbs.) torque.
(5) Install cable clips.
(6) Place carpet into position.
(7) Install left wheel splash shield.
(8) Install left cowl side trim panel.
(9) Connect hood release cable ferrule and cable
end to hood latch.
(10) Verify hood latch operation before closing
hood.
HOOD GAS PROPS
REMOVAL
(1) Open hood.
(2) Support hood with a suitable prop device.
(3) Remove gas prop lock caps on each end (Fig.
23).
(4) Remove gas prop from vehicle.
INSTALLATION
(1) Place gas prop in position on vehicle.
(2) Install the lock caps on the gas prop.
(3) Verify hood lid operation.
HOOD
REMOVAL
(1) Raise hood to full up position.
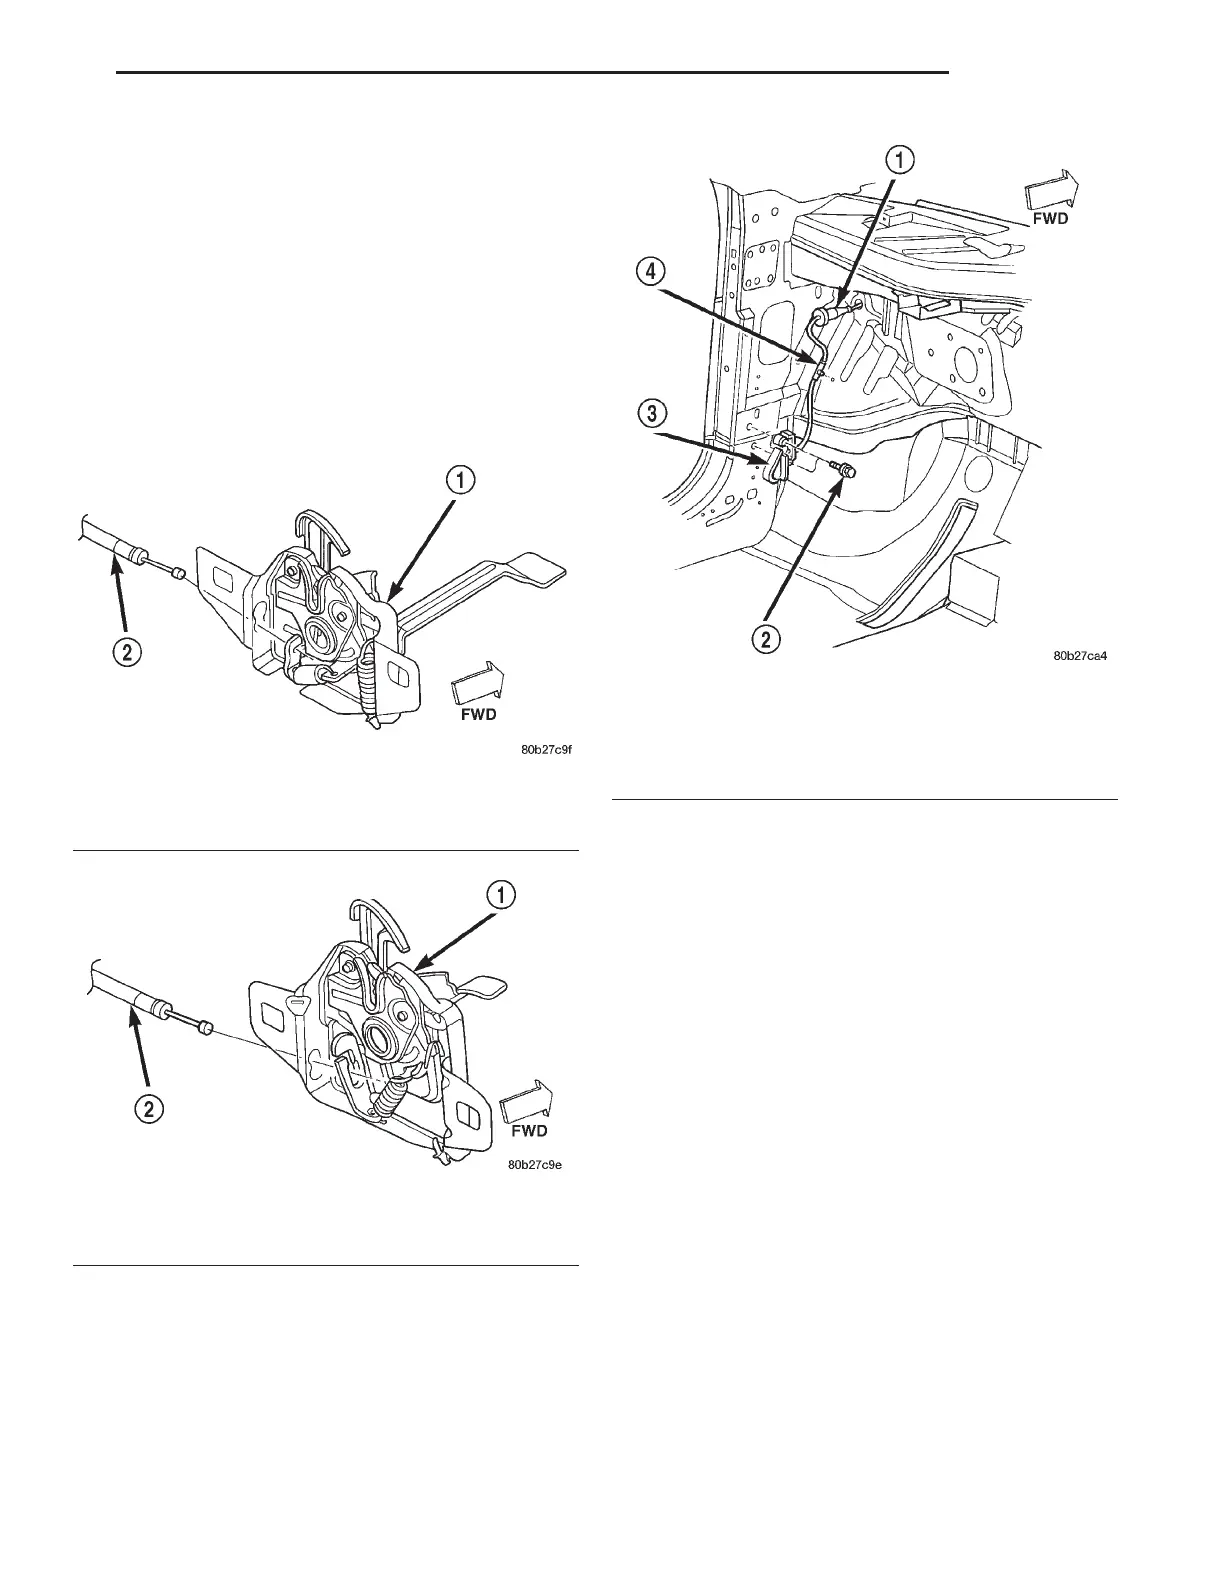
Fig. 20 Hood Release Cable – Concorde/LHS/300M
1 – HOOD LATCH
2 – HOOD RELEASE CABLE
Fig. 21 Hood Release Cable – Intrepid
1 – HOOD LATCH
2 – HOOD RELEASE CABLE
Fig. 22 Hood Release Handle
1 – RUBBER GROMMET
2 – SCREWS
3 – HOOD RELEASE HANDLE
4 – HOOD RELEASE CABLE
LH BODY 23 - 39
REMOVAL AND INSTALLATION (Continued)
 Loading...


