Getting Started
R&S
®
ZNA
34User Manual 1178.6462.02 ─ 29
To access Windows
®
, use the button in the toolbar of the application window.
You can load updated and improved driver versions or new drivers from an installation
disk, USB memory stick or another external storage medium. Alternatively, if the ana-
lyzer is integrated in a network, you can install driver data stored in a network directory.
In either case, use the "Add Printer" wizard to complete the installation.
Printer configuration
Use the "Printer Setup" dialog of the firmware (System – [File Print] > "Print" >
"Print...") or the Windows
®
printer management to configure the printer properties and
printing preferences.
3.1.11.5 Connecting a LAN cable
A LAN cable can be connected to the LAN connector on the rear panel of the analyzer.
To establish a LAN connection, proceed as follows:
1. Refer to Chapter 12.1.2.1, "Assigning an IP address", on page 1775.
2. Connect a CAT6 or CAT7 LAN cable to the LAN port.
The LAN port of the analyzer is an auto-crossover Ethernet port. You can connect it to
a network, but you can also set up a direct connection to a computer or another instru-
ment. For both connection types, you can use either crossover or straight through
(patch) cables.
The IP address information is displayed in the System – [Setup] > "Remote Settings"
softtool tab.
3.1.11.6 Connecting a USB cable for remote control
The R&S ZNA can also be remote controlled via USB. To prepare for remote control
operation, connect a suitable USB cable to the type B "USB Device" port on the rear
panel of the instrument. With direct connection to a master device, a connecting cable
A-B (plug type A onto plug type B) must be used.
For more information, refer to Chapter 6.1, "Introduction to remote control",
on page 931.
3.2 Instrument tour
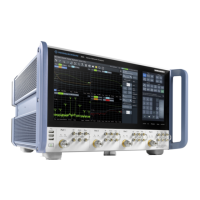
This chapter gives an overview of the control elements and connectors of the
R&S ZNA and gives all information that is necessary to put the instrument into opera-
tion and connect external devices.
Instrument tour
 Loading...


