(3) Engage weatherstrip along the header and
down the C-pillar.
(4) Engage weatherstrip along the sill. There may
be slack material, work the slack material to the
front of the opening.
(5) Verify weatherstrip sealing.
BODY SIDE MOLDING AND APPLIQUE
REMOVAL
(1) Warm the effected stick-on molding and body
metal to approximately 38° C (100° F) using a suit-
able heat lamp or heat gun.
(2) Pull stick-on molding from painted surface.
(3) Remove adhesive tape residue from painted
surface of vehicle.
INSTALLATION
(1) If molding is to be reused, remove tape residue
from molding. Clean back of molding with Mopart
Super Kleen solvent or equivalent. Wipe molding dry
with lint free cloth. Apply new body side molding
(two sided adhesive) tape to back of molding.
(2) Clean body surface with Mopart Super Kleen
solvent or equivalent. Wipe surface dry with lint free
cloth.
(3) Apply a length of masking tape on the body,
parallel to the top edge of the molding to use as a
guide, if necessary.
(4) Remove protective cover from tape on back of
molding. Apply molding to body below the masking
tape guide.
(5) Remove masking tape guide and heat body and
molding, see step one. Firmly press molding to body
surface to assure adhesion.
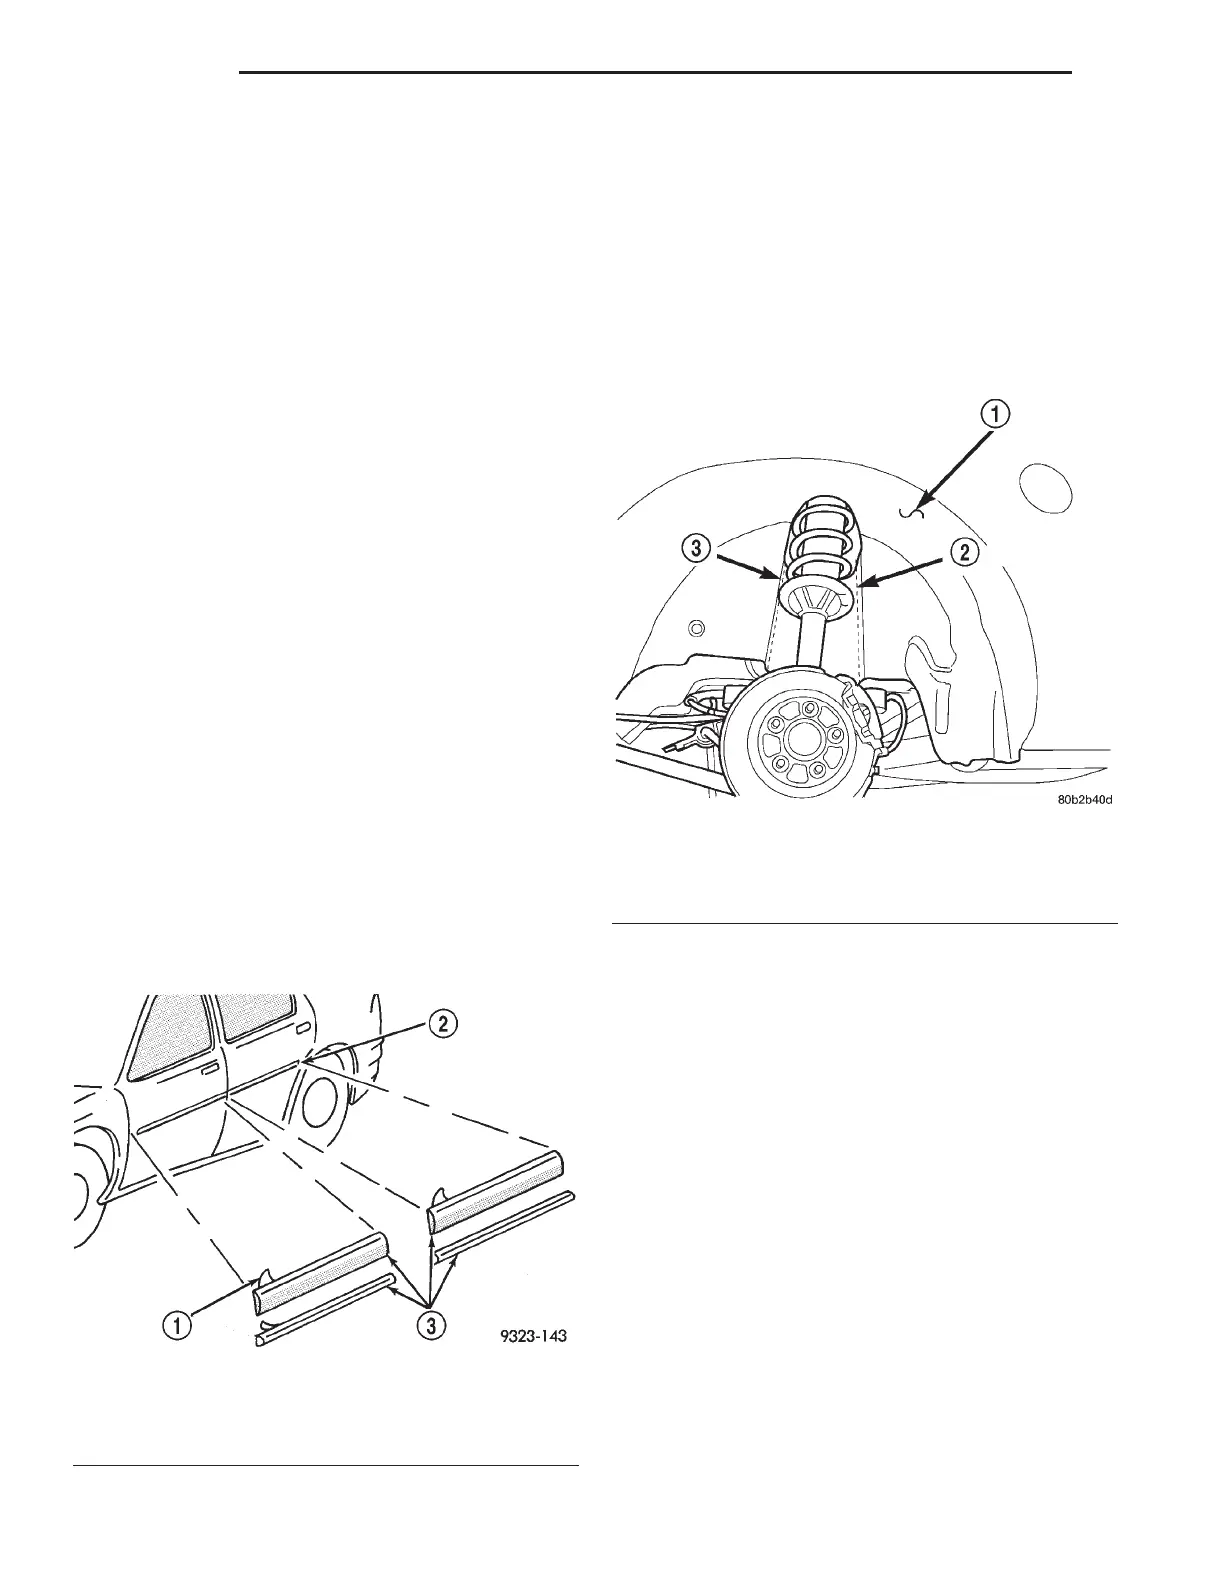
WHEELHOUSE SPLASH SHIELD – REAR
REMOVAL
(1) Hoist and support vehicle on safety stands.
(2) Remove rear wheel.
(3) Remove fasteners attaching splash shield.
(4) The shock tower area will have to be cut out of
the splash shield. This will ease the removal or
Installation of the slash shield.
(5) Remove splash shield from vehicle.
INSTALLATION
(1) Place splash shield in position on vehicle with
the shock tower cut out.
(2) Install fasteners to hold splash shield place.
(3) Install rear wheel.
(4) Lower vehicle.
DECKLID COVER
REMOVAL
(1) Release decklid latch and open decklid.
(2) Remove fasteners attaching decklid cover to
decklid.
(3) Remove decklid cover from vehicle.
INSTALLATION
(1) Place decklid cover in position on vehicle.
(2) Install fastener attaching decklid cover to deck-
lid.
Fig. 59 Body Side Molding
1 – PROTECTIVE COVER
2 – MASKING TAPE GUIDE
3 – MOLDINGS
Fig. 60 Rear Wheelhouse Splash Shield
1 – REAR WHEELHOUSE SPLASH SHIELD
2 – CUT LINE
3 – CUT LINE
23 - 58 BODY LH
REMOVAL AND INSTALLATION (Continued)
 Loading...


