(3) For right side panel, open the glove box door
and remove side panel screws
(4) For left side panel, remove steering column
cover and side panel screws.
(5) Disengage clips from floor console.
(6) Remove floor console side panel(s).
INSTALLATION
(1) Place front floor console side panel in position
on vehicle.
(2) Press on the side panel to seat clips.
(3) Install side panel(s) screws.
(4) Install floor console shift bezel.
(5) Install shift knob.
FRONT FLOOR CONSOLE SIDE PANEL –
INTREPID, LHS, 300M
REMOVAL
(1) Remove shift knob.
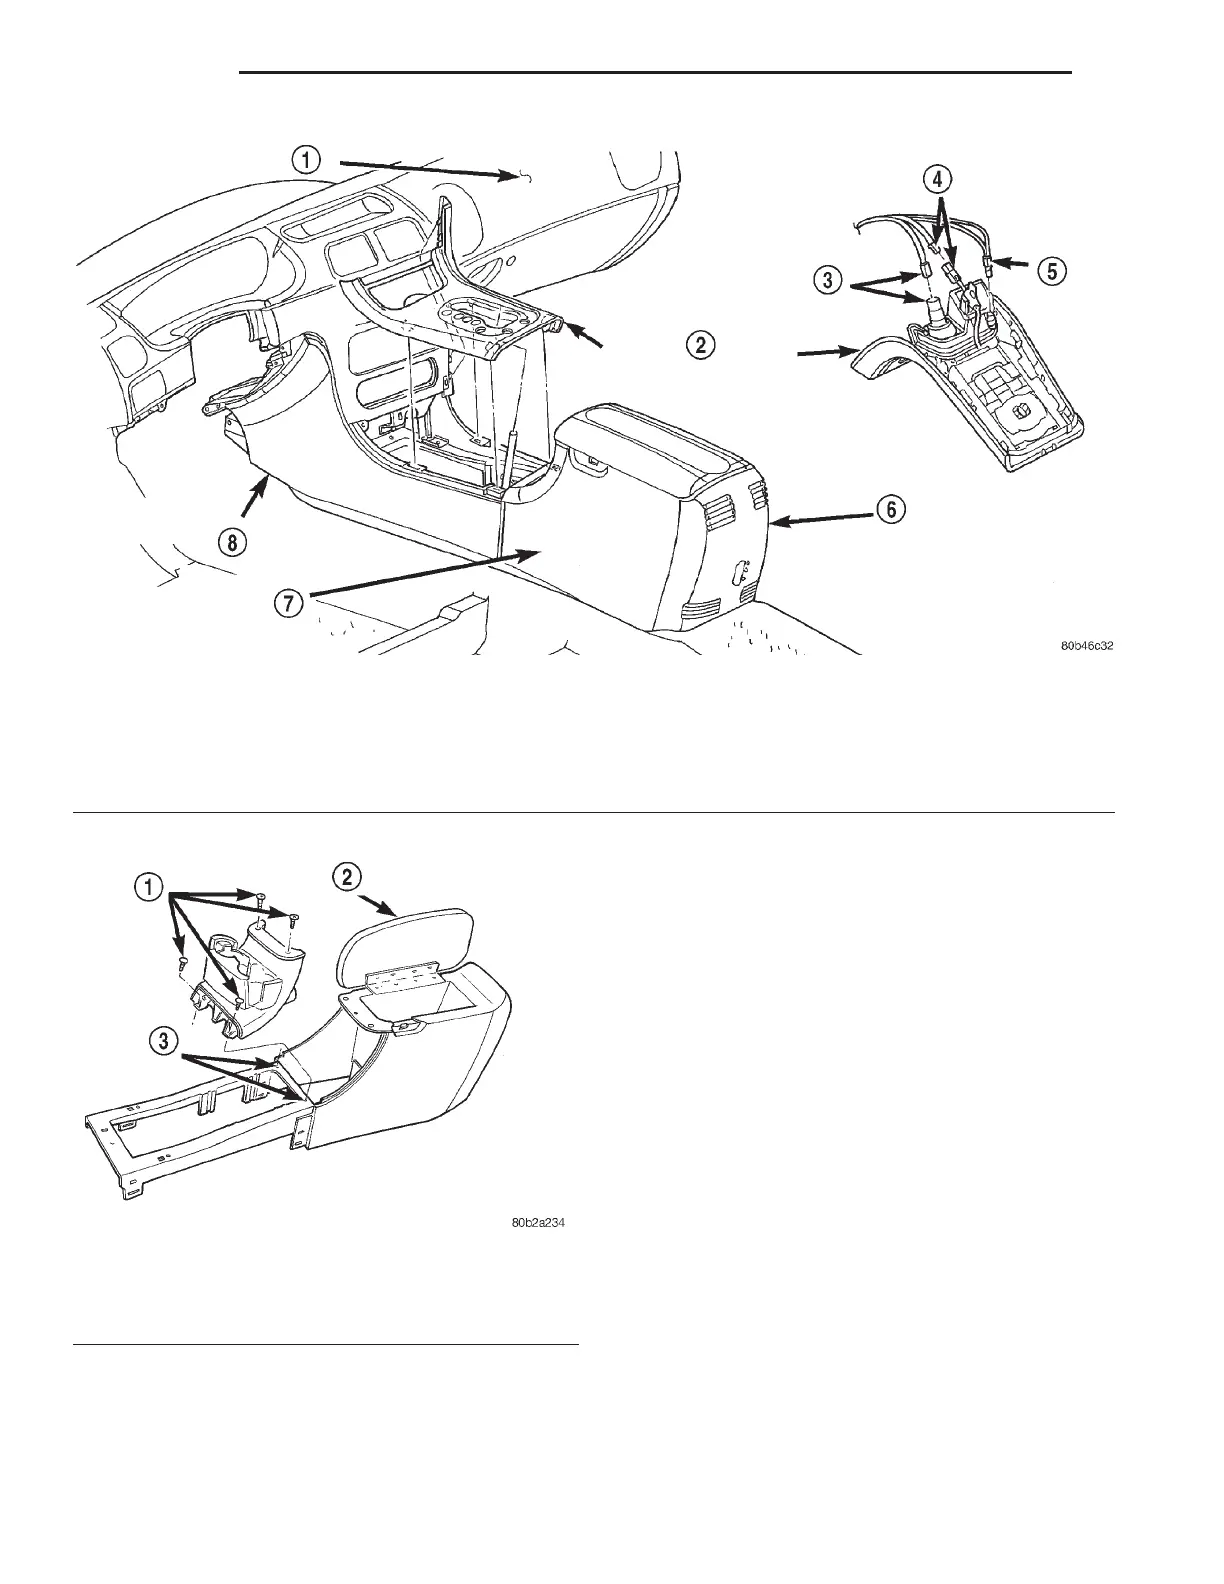
(2) Remove console shift bezel (Fig. 84).
(3) To remove right side panel, open glove box and
remove side panel attaching screws.
(4) To remove left side panel, remove steering col-
umn cover and remove side panel attaching screws.
(5) Disengage clips from center console.
(6) Remove floor console side panel.
INSTALLATION
(1) Place front floor console side panel in position
on vehicle.
Fig. 84 Floor Console Bezel – Intrepid Shown – LHS/300M Similar
1 – INSTRUMENT PANEL
2 – FLOOR CONSOLE BEZEL
3 – POWER OUTLET/CIGAR LIGHTER CONNECTORS
4 – TRANSMISSION RANGE INDICATOR ILLUMINATION
CONNECTORS
5 – ASH RECEIVER LAMP
6 – REAR END CAP
7 – FLOOR CONSOLE
8 – FRONT FLOOR CONSOLE PANEL
Fig. 85 Floor Console Cup Holder Assembly
1 – SCREWS
2 – ARMREST LID
3 – SCREW HOLES
23 - 70 BODY LH
REMOVAL AND INSTALLATION (Continued)

 Loading...


