CENTER REAR SEAT BELT RETRACTOR
CAUTION: Inspect the condition of the shoulder
belt and lap belt. Replace any belt that is cut,
frayed, torn, or damaged in any way. Also replace
the shoulder belt if the retractor is either damaged
or inoperative.
REMOVAL
(1) Remove the rear shelf trim panel. Refer to the
procedure in this group.
(2) Remove the bolt attaching the center rear seat
belt retractor to the rear shelf.
(3) Remove the center rear seat belt retractor
assembly from the vehicle.
INSTALLATION
(1) Install the center rear seat belt retractor
assembly on the rear shelf. Torque the bolt to 60 N·m
(44 ft. lbs.).
(2) Install the rear shelf trim panel. Refer to the
procedure in this group.
NOTE: The rear seat back retaining nut also serves
as the center seat belt anchor (Fig. 5). Be certain to
torque this nut to 60 N·m (44 ft. lbs.).
(3) Install the rear seat back. Be certain rear seat
belts are properly routed to avoid twisted or tangled
belts and/or buckles (Fig. 5).
REAR SEAT BELT BUCKLES
REMOVAL
(1) Remove rear seat cushion.
(2) Remove seat belt anchor nut (Fig. 6).
(3) Remove seat belt buckle(s) from stud on floor.
INSTALLATION
(1) Place seat belt buckle(s) anchor over stud on
floor.
(2) Install rear seat belt anchor nut. Tighten to 60
N·m (44 ft. lbs.).
(3) Install rear seat cushion.
REAR SHELF TRIM PANEL
REMOVAL
(1) Remove the rear seat cushion. Refer to Group
23, Body for the procedure.
(2) Remove the rear seat back. Refer to Group 23,
Body for the procedure.
(3) Remove the upper and lower quarter trim pan-
els. Refer to Group 23, Body for the procedure.
(4)
Remove the rear shelf retaining pushpins (Fig. 7).
(5) Pull rear shelf trim panel away from rear glass
to disengage clips.
(6) If equipped disconnect the CHMSL wire con-
nector,.
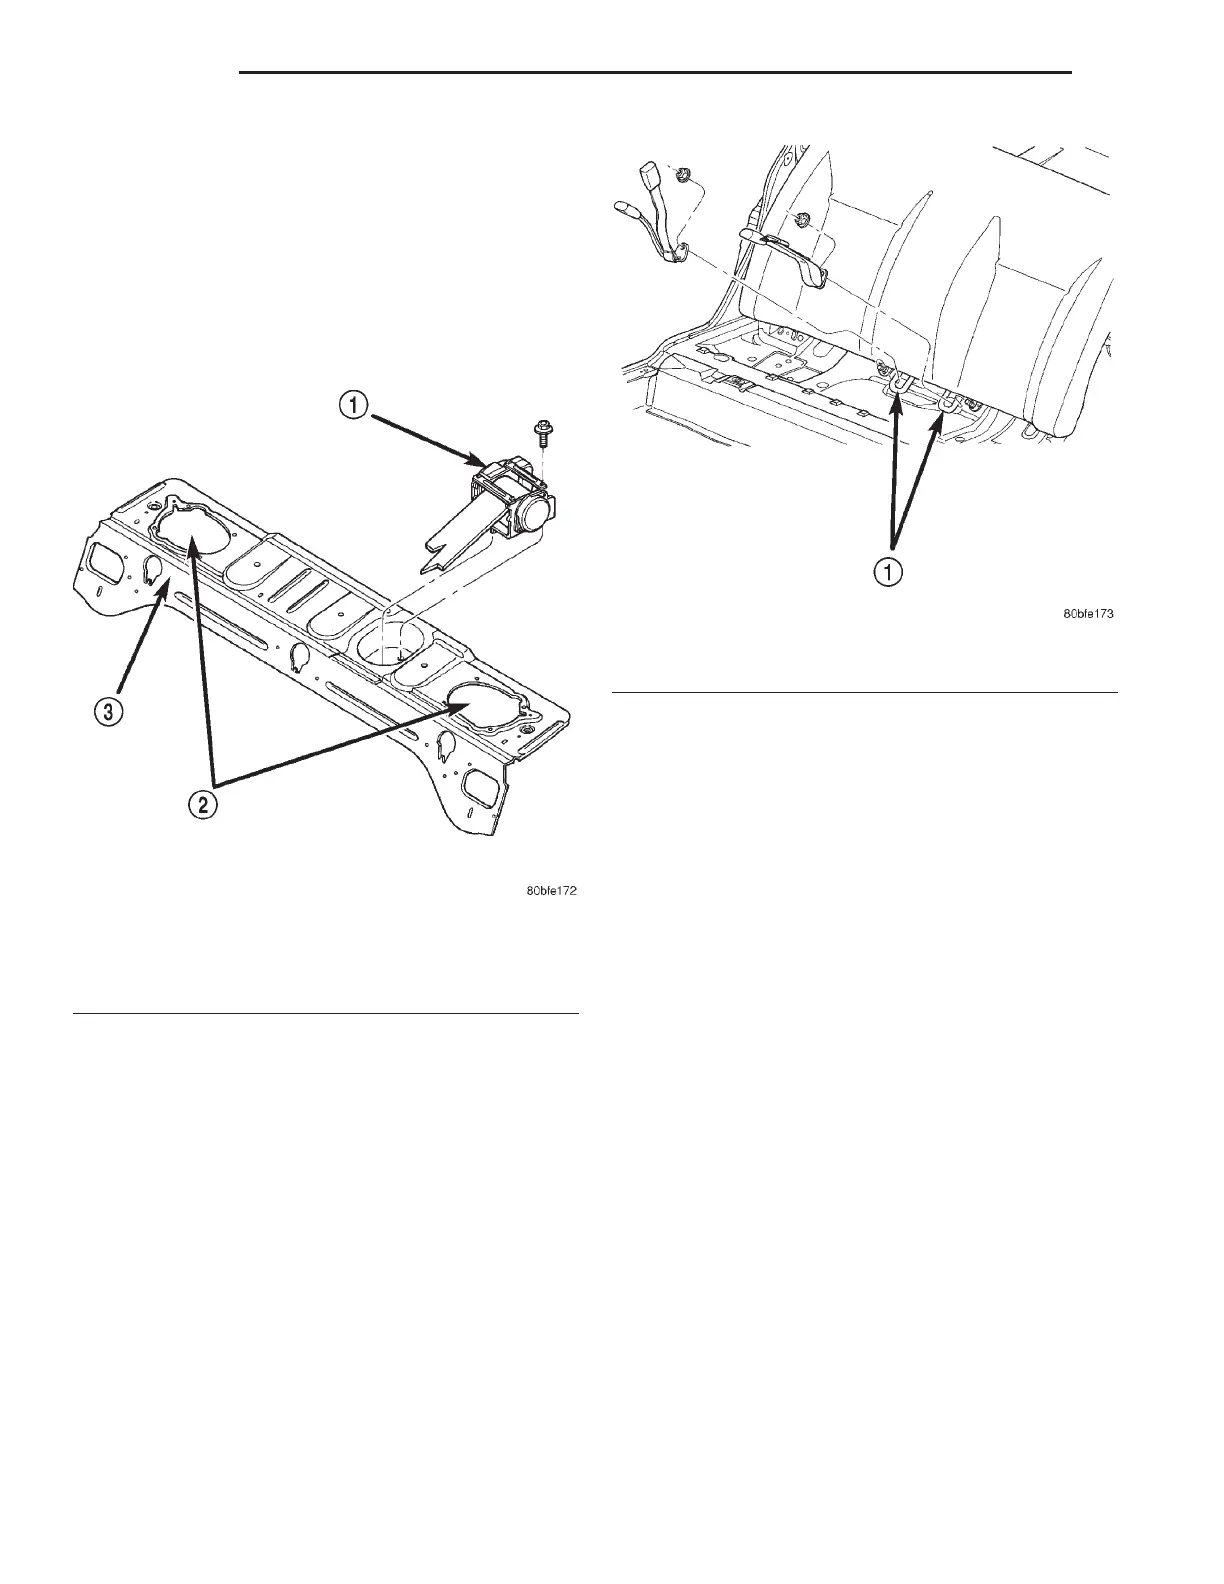
Fig. 4 Center Rear Seat Belt Retractor
1 – CENTER REAR SEAT BELT RETRACTOR
2 – REAR SHELF
3 – REAR SPEAKER LOCATIONS
Fig. 5 Rear Seat Back Retaining Nuts
1 – ELASTIC STRAPS
23 - 14 BODY LH
REMOVAL AND INSTALLATION (Continued)
2000 LHS, 300M, CONCORDE AND INTREPID

 Loading...


