CRANKSHAFT OIL SEAL—FRONT
REMOVAL
(1) Remove timing belt. Refer to procedure in this
section.
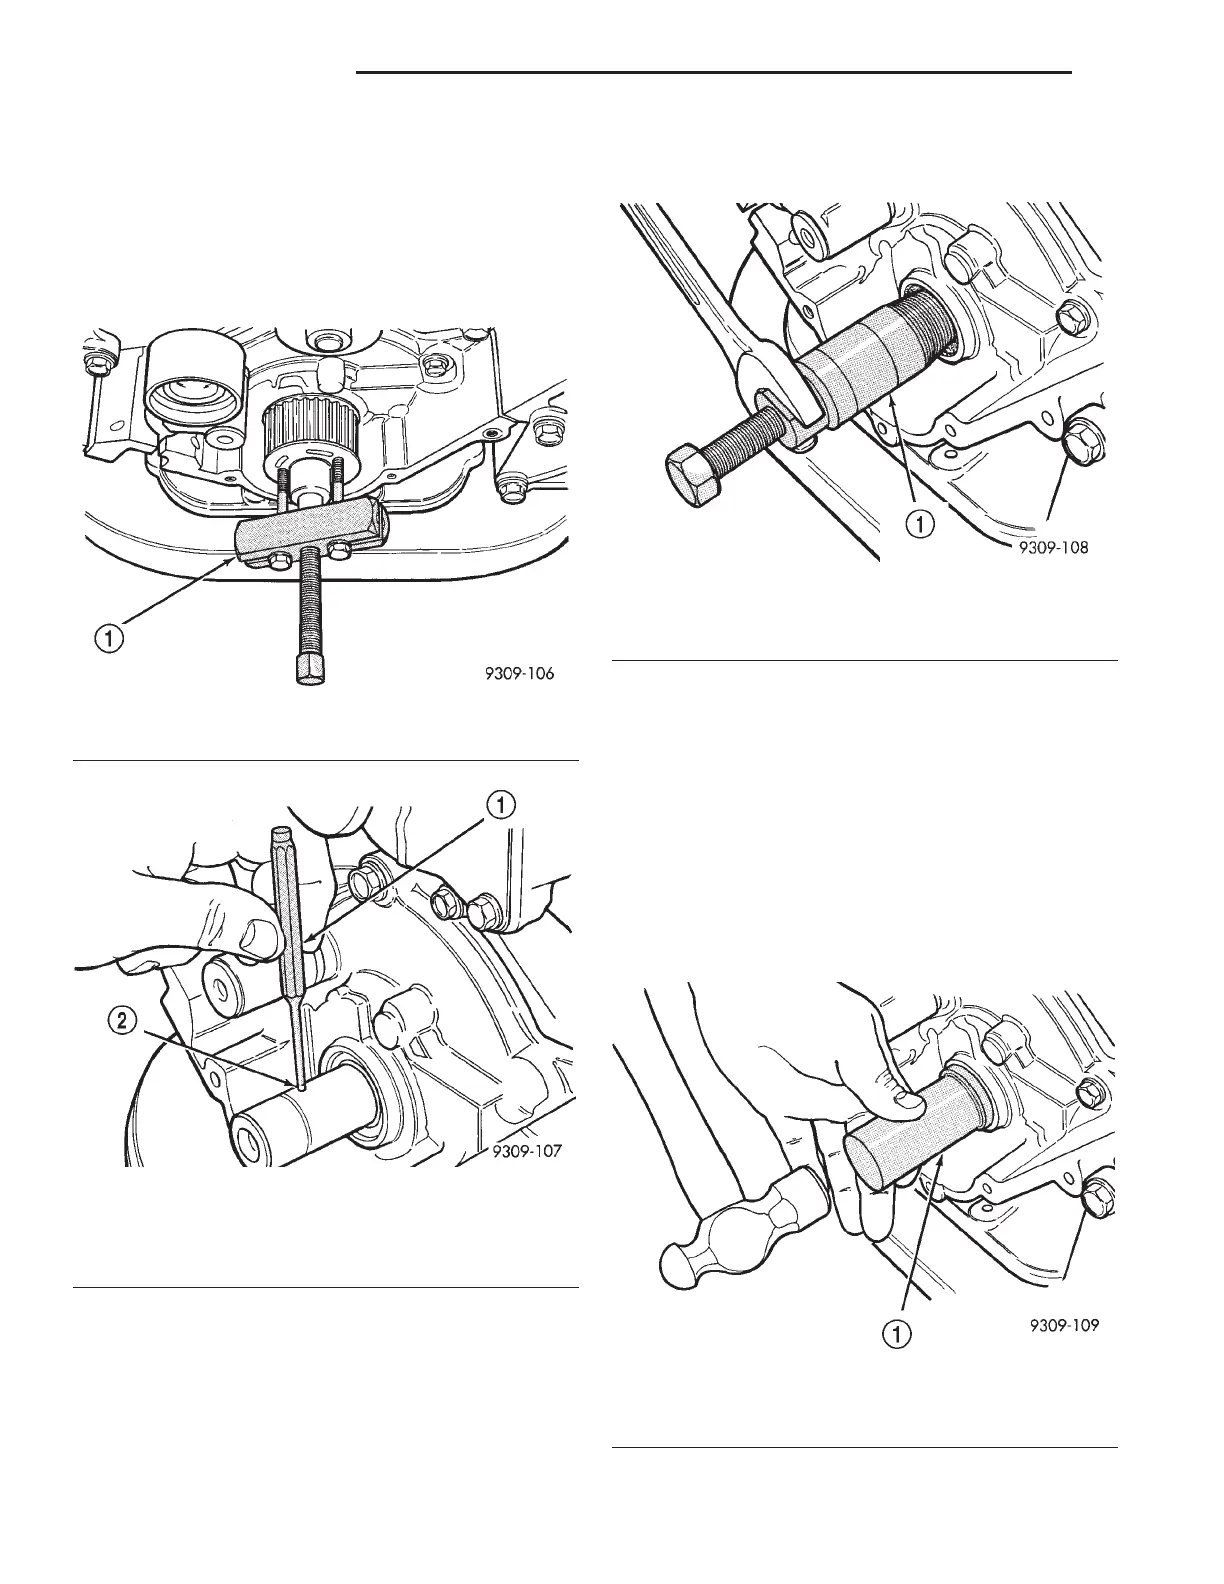
(2) Remove crankshaft sprocket using Special Tool
L-4407-A (Fig. 104).
(3) Tap the dowel pin out of the crankshaft (Fig.
105).
(4) Remove crankshaft seal using Special Tool
6341A (Fig. 106).
CAUTION: Do not nick shaft seal surface or seal
bore.
(5) Shaft seal lip surface must be free of varnish,
dirt or nicks. Polish with 400 grit paper if necessary.
INSTALLATION
(1) Install crankshaft seal using Special Tool 6342
(Fig. 107).
(2) Install the dowel pin into the crankshaft to 1.2
mm (0.047 in.) protrusion (Fig. 105).
NOTE: To assure proper installation depth of crank-
shaft sprocket, Special Tool 6641 must be used.
(3) Install crankshaft sprocket using Special Tools
6641 and C-4685-C1 (Fig. 108).
(4) Install timing belt.
Fig. 104 Crankshaft Sprocket—Removal
1 – SPECIAL TOOL L-4407–A
Fig. 105 Crankshaft Sprocket Dowel Pin—Removal/
Installation
1 – PIN PUNCH
2 – DOWEL
Fig. 106 Crankshaft Oil Seal with Special Tool
6341A—Removal
1 – SPECIAL TOOL 6341A
Fig. 107 Crankshaft Oil Seal with Special Tool
6342—Installation
1 – SPECIAL TOOL 6342
9 - 128 3.2/3.5L ENGINE LH
REMOVAL AND INSTALLATION (Continued)
 Loading...


