CRANKSHAFT OIL SEAL—REAR
REMOVAL
(1) Remove transaxle from vehicle. Refer to TRAN-
SAXLE for procedure.
(2) Remove drive plate.
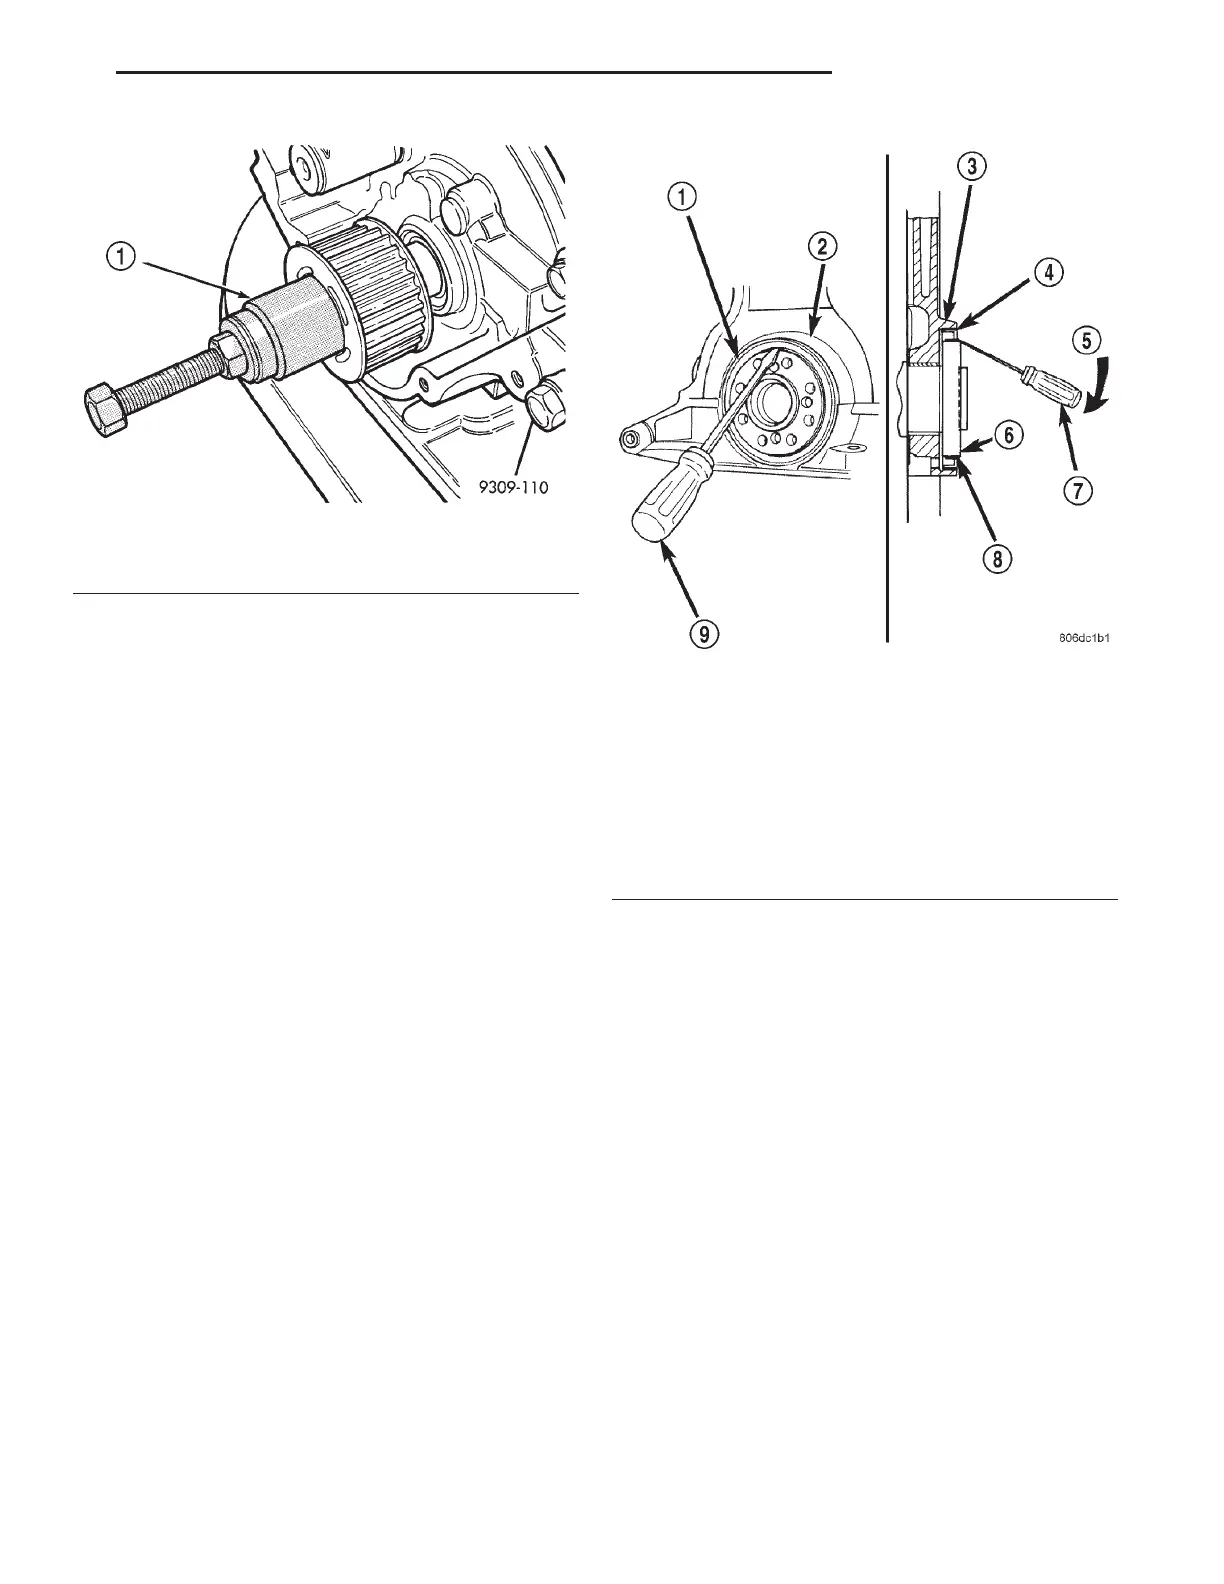
(3) Insert a 3/16” wide flat bladed screwdriver
between the dust lip and the metal case of the crank-
shaft seal. Angle the screwdriver (Fig. 109) through
the dust lip against the metal case of the seal. Pry
out seal.
CAUTION: Do not allow the screwdriver blade to
contact the crankshaft seal surface. Contact of the
screwdriver blade against crankshaft edge (cham-
fer) is permitted.
INSTALLATION
CAUTION: If a burr or scratch is present on the
crankshaft edge (chamfer), clean surface using 400
grit sand paper to prevent seal damage during
installation.
(1) Place Special Tool 6926-1 Guide on crankshaft
(Fig. 110). This is a pilot tool with a magnetic base.
(2) Position seal over pilot tool. Assure that lip of
seal is facing towards the crankshaft during installa-
tion. The pilot tool remains on crankshaft during seal
installation.
(3) Using Special Tool 6926-2 Installer, and C-4171
Handle (Fig. 110), drive seal into the retainer hous-
ing until seal is flush with housing surface.
(4) Install drive plate and transaxle. Refer to
TRANSAXLE for procedures.
CRANKSHAFT OIL SEAL RETAINER—REAR
REMOVAL
(1) Remove crankshaft rear oil seal and oil pan.
Refer to procedure in this section.
(2) Remove seal retainer attaching screws.
(3) Remove seal retainer (Fig. 111).
NOTE: Seal retainer gasket is bonded to the
retainer and must be replaced as an assembly.
INSTALLATION
(1) Clean all sealing surfaces. Replace retainer
assembly if gasket is torn or damaged.
(2) Install seal retainer to block, but do not tighten
attaching screws at this time.
NOTE: The following steps must be performed to
prevent oil leaks at sealing joints.
(3) Attach Special Tools 8225 to pan rail using the
oil pan fasteners.
Fig. 108 Crankshaft Sprocket—Installation
1 – INSTALL WITH SPECIAL TOOL 6641 WITH 12mm SCREW
C-4685–C1 AND THRUST BEARING AND WASHER
Fig. 109 Rear Crankshaft Oil Seal Removal—Typical
1 – REAR CRANKSHAFT SEAL
2 – ENGINE BLOCK
3 – ENGINE BLOCK
4 – REAR CRANKSHAFT SEAL METAL CASE
5 – PRY IN THIS DIRECTION
6 – CRANKSHAFT
7 – SCREWDRIVER
8 – REAR CRANKSHAFT SEAL DUST LIP
9 – SCREWDRIVER
LH 3.2/3.5L ENGINE 9 - 129
REMOVAL AND INSTALLATION (Continued)