3.3.1 Clean Air Tubes
Description
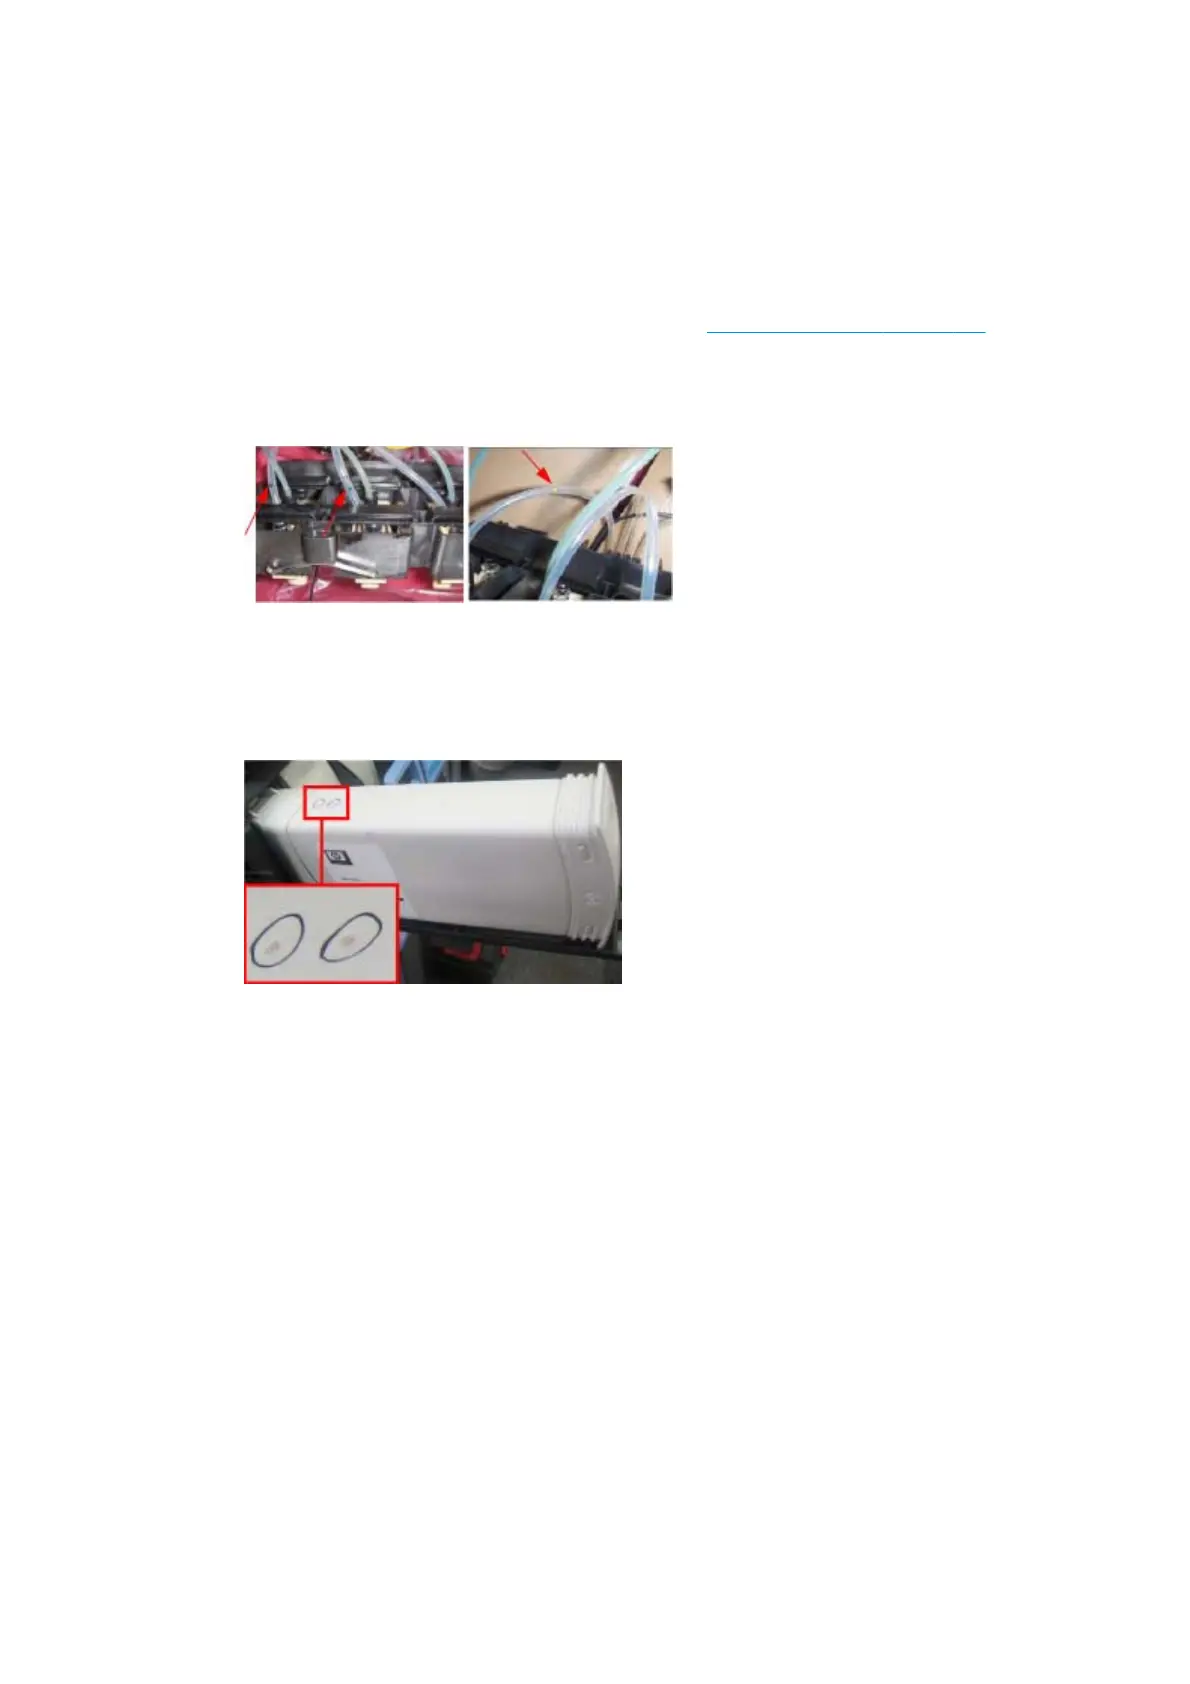
The procedures and menu selections must be performed if there is ink visible in the air tubes of the APS.
Procedure
1. Remove the Left Cover and check if the tubes from the APS to the ISS are clean. If the tubes are clean of
ink this procedure does not need to be performed, go to
3.3.3 Refill Ink Tubes on page 152 and perform
the Refill Ink Tubes to clear any air bubbles from the ink tubes.
However if there are sections of tubing that have ink in them, like the examples indicated below with
the red arrows.
2. Remove all the Ink Cartridges and install the dummy Ink Cartridges from the Broken Bag Fixing Tools
kit.
3. One of the dummy Ink Cartridges has two holes at the top, this dummy Ink Cartridge must be inserted
into the color slot with the Broken Bag error.
4. Go to Diagnostic test > 3. Ink System Menu > 3.3 Broken Bag Recovery Menu > 3.3.1 Clean Air Tubes, and
press OK.
5. The front panel asks for confirmation. Select Yes and press OK.
6. The front panel asks whether the dummy cartridge is installed. Press OK to continue.
7. The front panel reports on the pumping of air through the tubes.
Air is now pumping through the air tubes system, pushing any ink that may be there from the Air tubes
into the Dummy Ink Cartridge with the two holes at the top. When this is finished, press any key to
continue.
8. The front panel asks whether you want to repeat the test with another cartridge.
9. Remove the dummy ink cartridge with the two holes and insert it into the other slots that may also have
ink in their air tubes, press OK to continue removing ink from the other air tubes.
When you are sure there is no more ink from the broken bag blocking any of the air tubes, select Cancel.
3.3.2 Recover Broken Bag
Description
ENWW Diagnostic Menu 151
 Loading...


