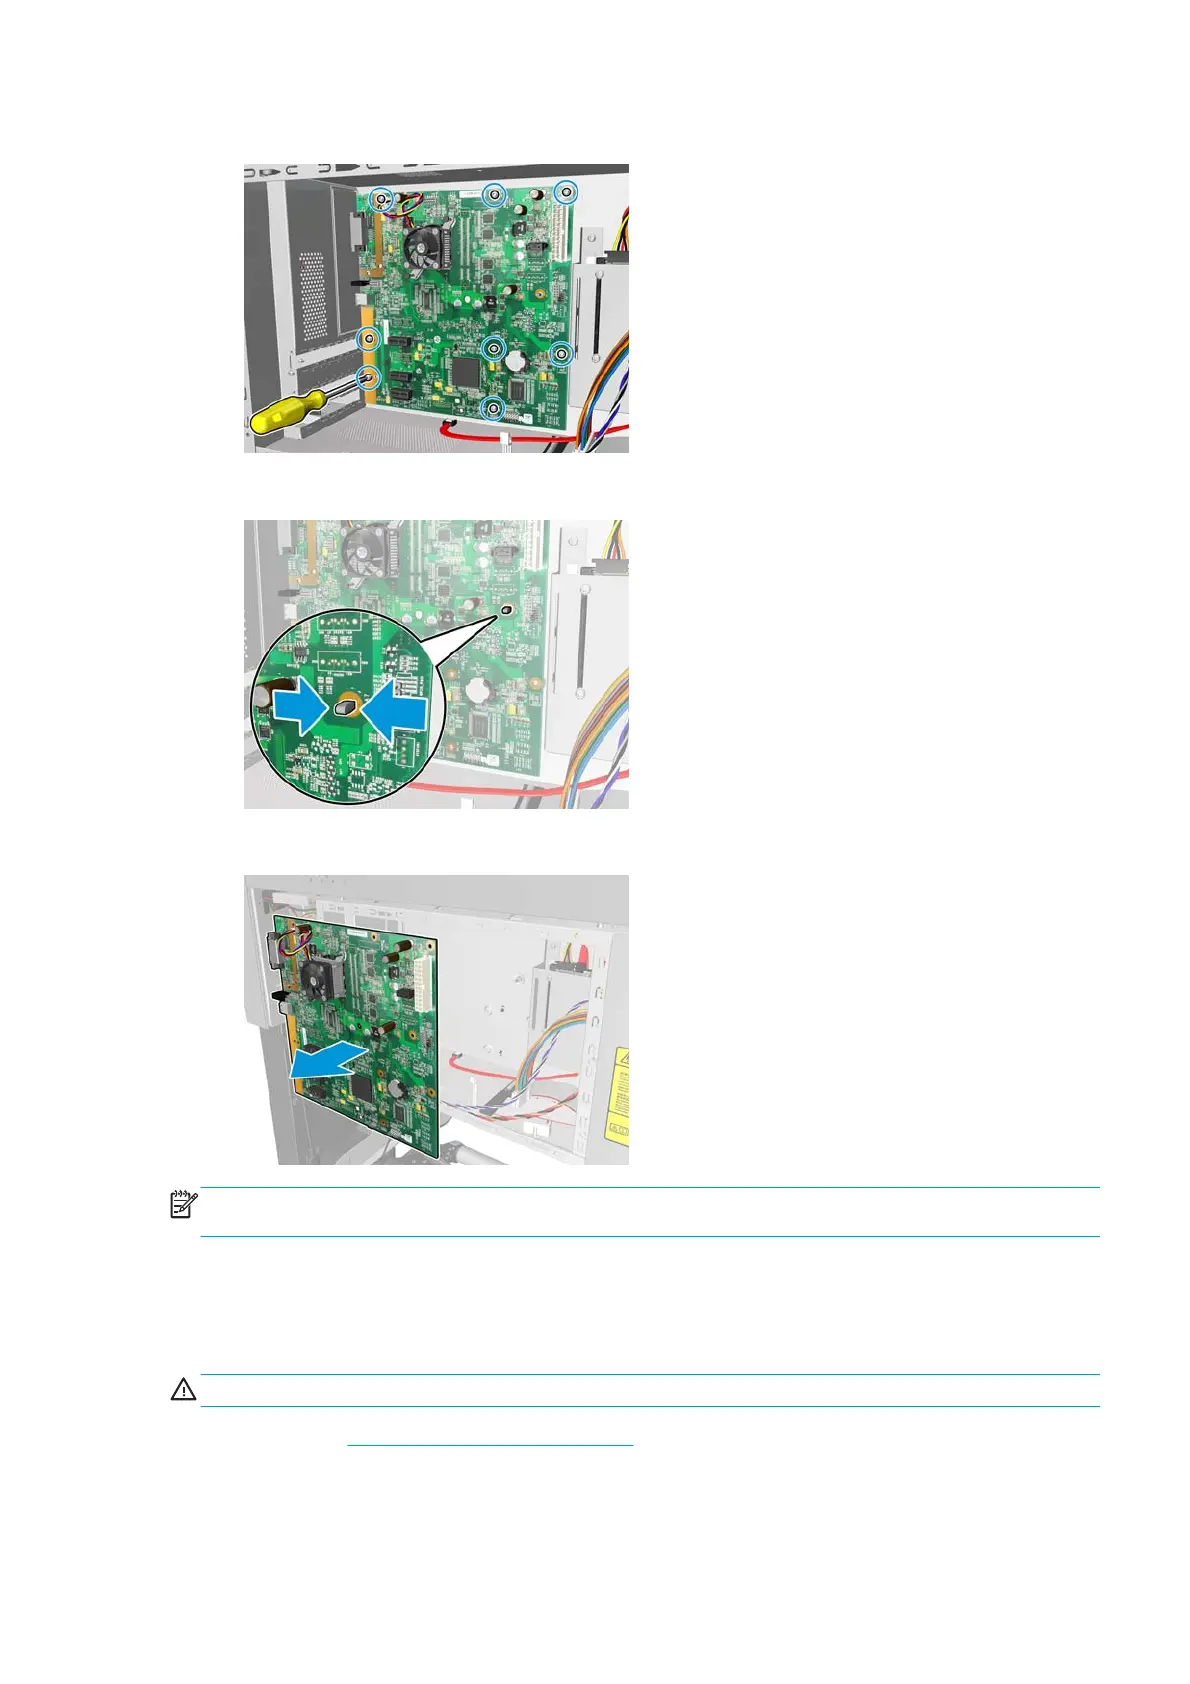
4. Remove eight T-10 screws that secure the formatter PCA.
5. Release the plastic locating pin that secures the formatter PCA.
6. Remove the formatter PCA.
NOTE: When installing the formatter PCA, make sure that you first locate it on the plastic locating pin and
then install the screws.
OMAS controller PCA
Removal
WARNING! Turn off the printer and disconnect both power cords.
1. Remove the Right connector cover on page 258.
2. Remove three T-20 screws (Type A) that secure the formatter PCA cover.
3. Remove the formatter PCA cover from the printer.
ENWW OMAS controller PCA 431
 Loading...


