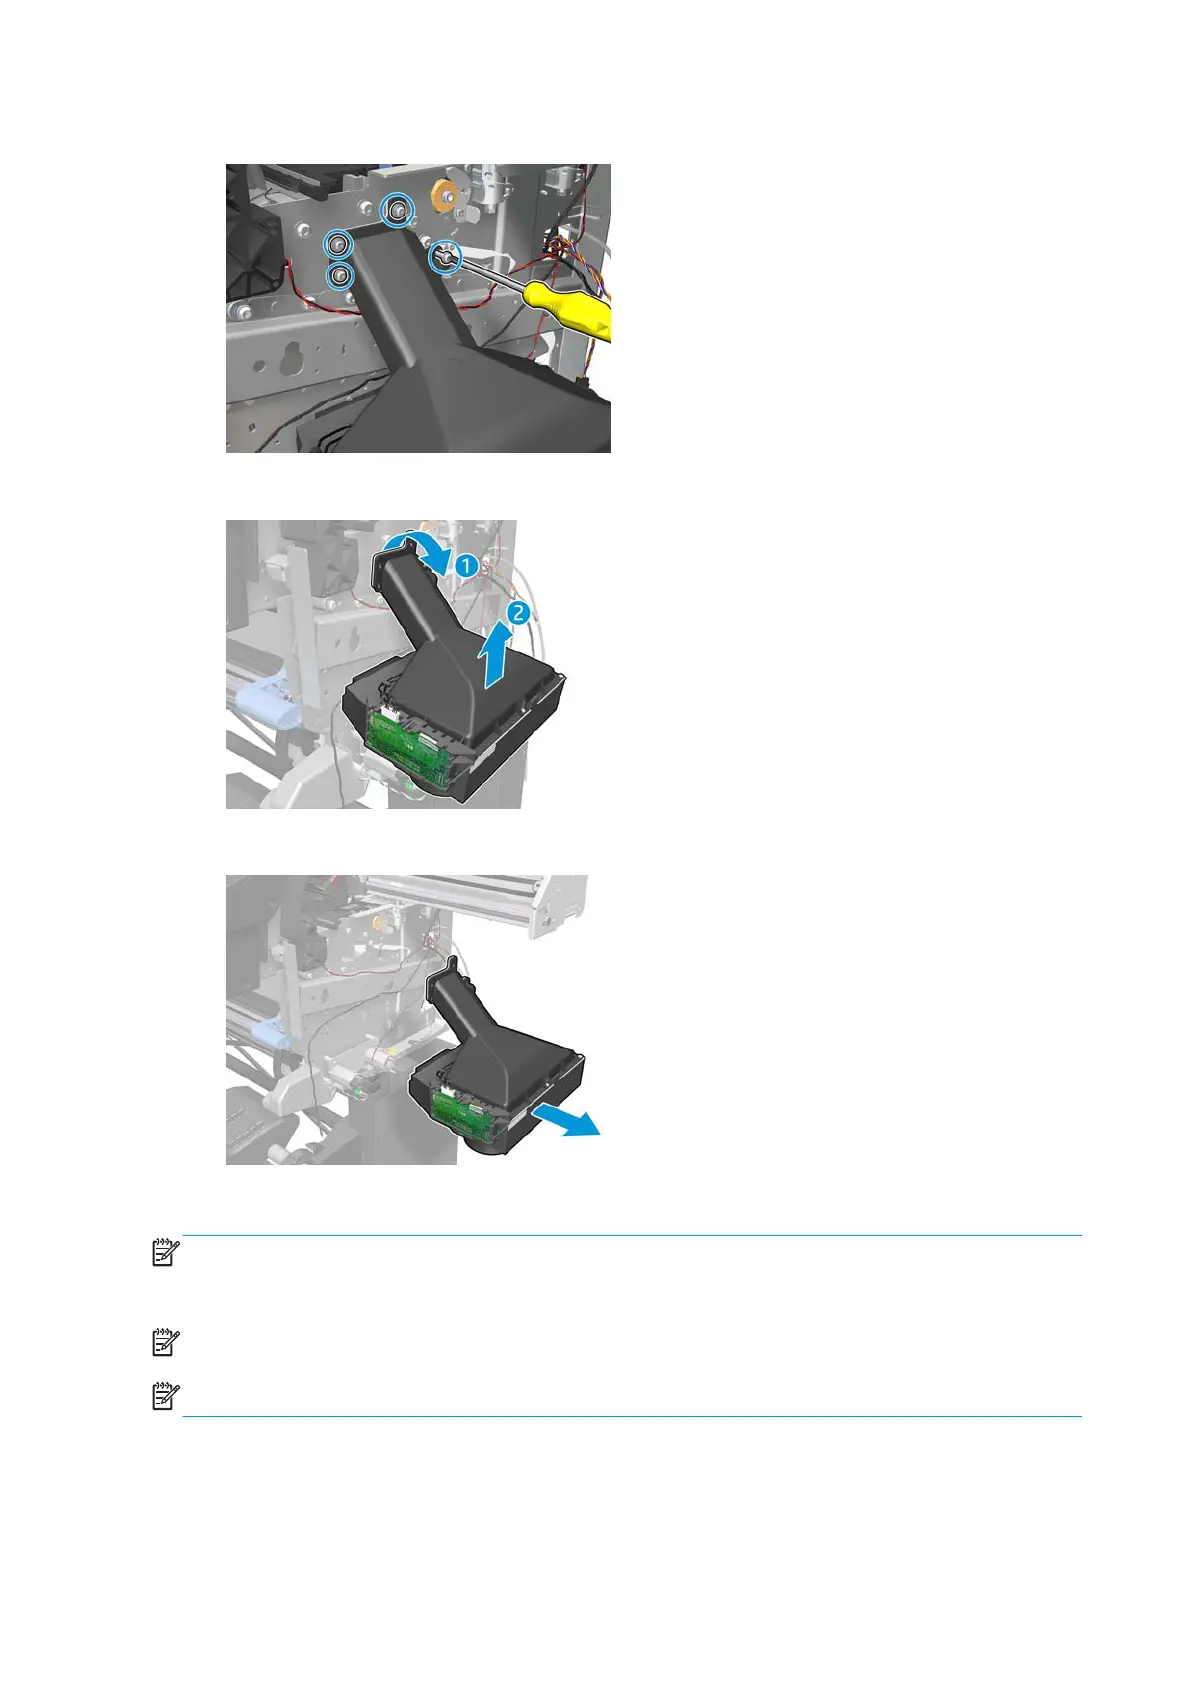
9. Remove four T-20 screws (Type B) that secure the Vacuum Fan to the printer.
10. Lower then lift the Vacuum Fan out of its attachment.
11. Remove the Vacuum Fan from the printer.
Installation
NOTE: When connecting the Vacuum Fan cables to the Interconnect PCA, make sure you connect the cable
with the label marked Vacuum Fan 1 to connector 1 and the cable with the label marked Vacuum Fan 2 to
connector 2. You can verify if both cables are labelled correctly by the actual markings on the Vacuum Fan.
NOTE: Make sure that the OMAS ribbon cable is free of slack when you install the cable.
NOTE: After installing the NEW Vacuum Fan, perform the following Service Calibration:
1. Vacuum Calibration
2. Reset Vacuum Fan Cycle
416 Chapter 8 Removal and installation ENWW
 Loading...


