Repair information 4-127
5062
5. Attach the three mounting brackets loosely to the printhead.
Note: Do not tighten the six screws in the mounting brackets yet. The printhead needs to be able to move
as you align it.
6. Align the printhead to the printer frame until the gaps between the printhead and the four slots in the frame
are as equal as possible.
7. Enter the Diagnostic menu: Plug into the outlet, press and hold 3 and 6, turn on the printer, and release the
buttons when the splash screen appears.
8. From the Diagnostic menu, navigate to:
REGISTRATION > Quick Test
An alignment page prints.
Note: If you cannot see the triangles on the top of the test page, go to “Top Margin” on page 4-130, and
adjust the top margin until the triangles are visible.
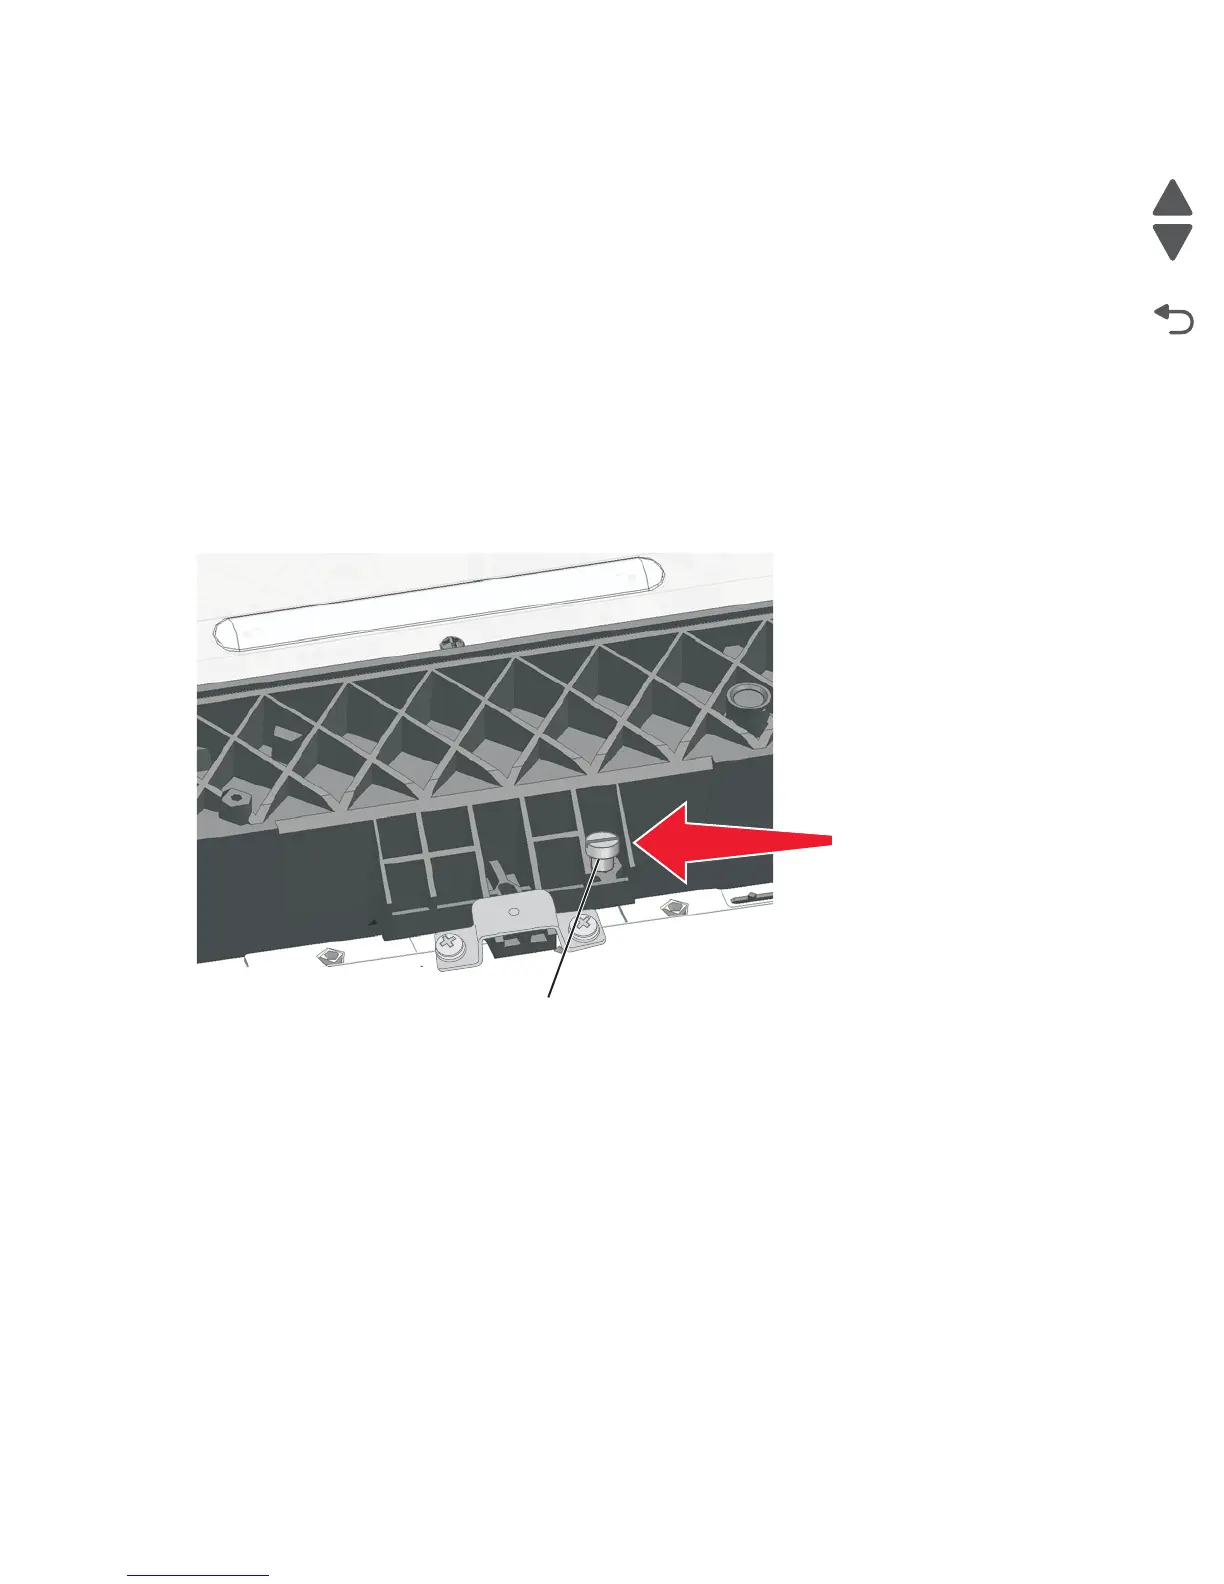
9. Use a flat-blade screwdriver to adjust the coarse alignment screw (C) until the triangles on the sheet are
parallel to the edges of the paper. Turning the screw clockwise moves the left triangles lower and the right
triangles higher (tilts the printed image to the left on the page). Turning the screw counterclockwise
requires pushing the printhead in the direction of the arrow as shown, for the printhead to move.
10. Reprint the alignment page and continue adjusting the screw until the black plane is aligned.
11. Once the black plane is aligned, tighten the screws in the right two printhead brackets (D), and then turn
the coarse alignment screw a half turn counterclockwise.
C
Push the printhead here.
 Loading...