Diagnostic information 2-7
5062
201 paper jam
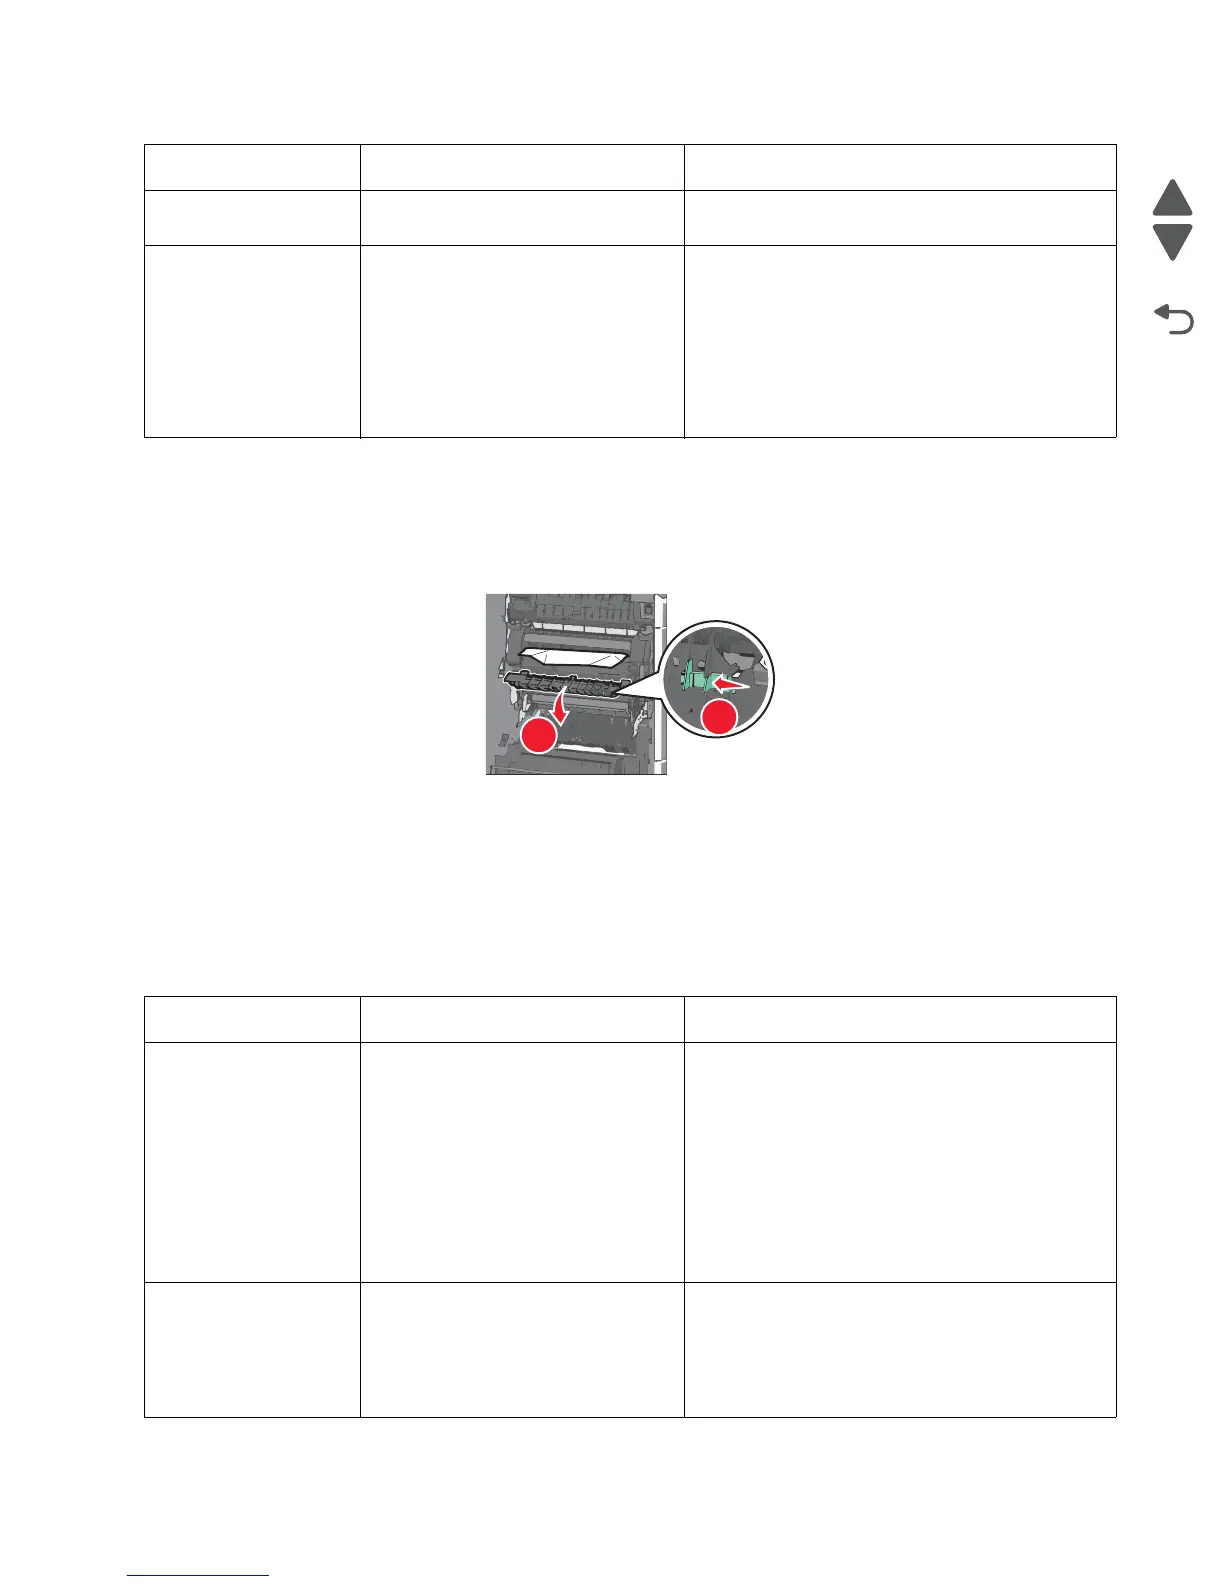
1. Open the side door.
2. Determine where the jam is located, and then remove it:
a. If paper is inside the fuser, then open the fuser access door.
b. Firmly grasp the jammed paper on each side, and then gently pull it out.
Warning: Do not touch the center of the fuser unit. Doing so will damage the fuser.
Note: Make sure all paper fragments are removed.
3. Close the side door.
4. From the operator panel, touch Continue, jam cleared.
Additional checks—201 paper jam
200.48 Narrow media sensor is never made
or is made late.
See “200.43” on page 2-6.
200.49 S1 sensor is made when printer tries
to print from an idle state.
Possible causes:
• Paper jam leaving paper over the
sensor
• Defective near narrow media
sensor
• Faulty system board
1. Clear away anything in the paper path that might
cause the paper to jam.
2. If clearing a paper jam does not fix the problem,
go to “Input, S1, narrow media, and near
narrow media sensor service check” on
page 2-153.
Error code Description Action
201.01 Bubble sensor active when printer
powers up or a cover is closed.
Possible causes:
• Paper jam leaving paper over the
sensor
• Damaged bubble sensor
• Damaged fuser autoconnect
• Faulty fuser DC cable connection
• Faulty fuser
• Faulty system board
1. Clear away anything in the paper path that might
cause the paper to jam.
2. Be sure the paper settings match the media.
3. Flex the media, and stack it flat in the tray.
4. Properly set the paper guides in the paper tray.
5. If the problem persists, go to ““Bin-full sensor
service check” on page 2-144.
201.02 Bubble sensor is made early.
Possible causes:
• Incorrect paper settings
• Defective near narrow media
sensor
1. Clear away anything in the paper path that might
cause the paper to jam.
2. Be sure the paper settings match the media.
3. If clearing a paper jam does not fix the problem,
replace the fuser. See “Fuser assembly
removal” on page 4-63.
Error code Description Action