Enabling the FCP
ATM Services Configuration Guide for CBX 3500, CBX 500, GX 550, and B-STDX 9000 1/19/056-3
Beta Draft Confidential
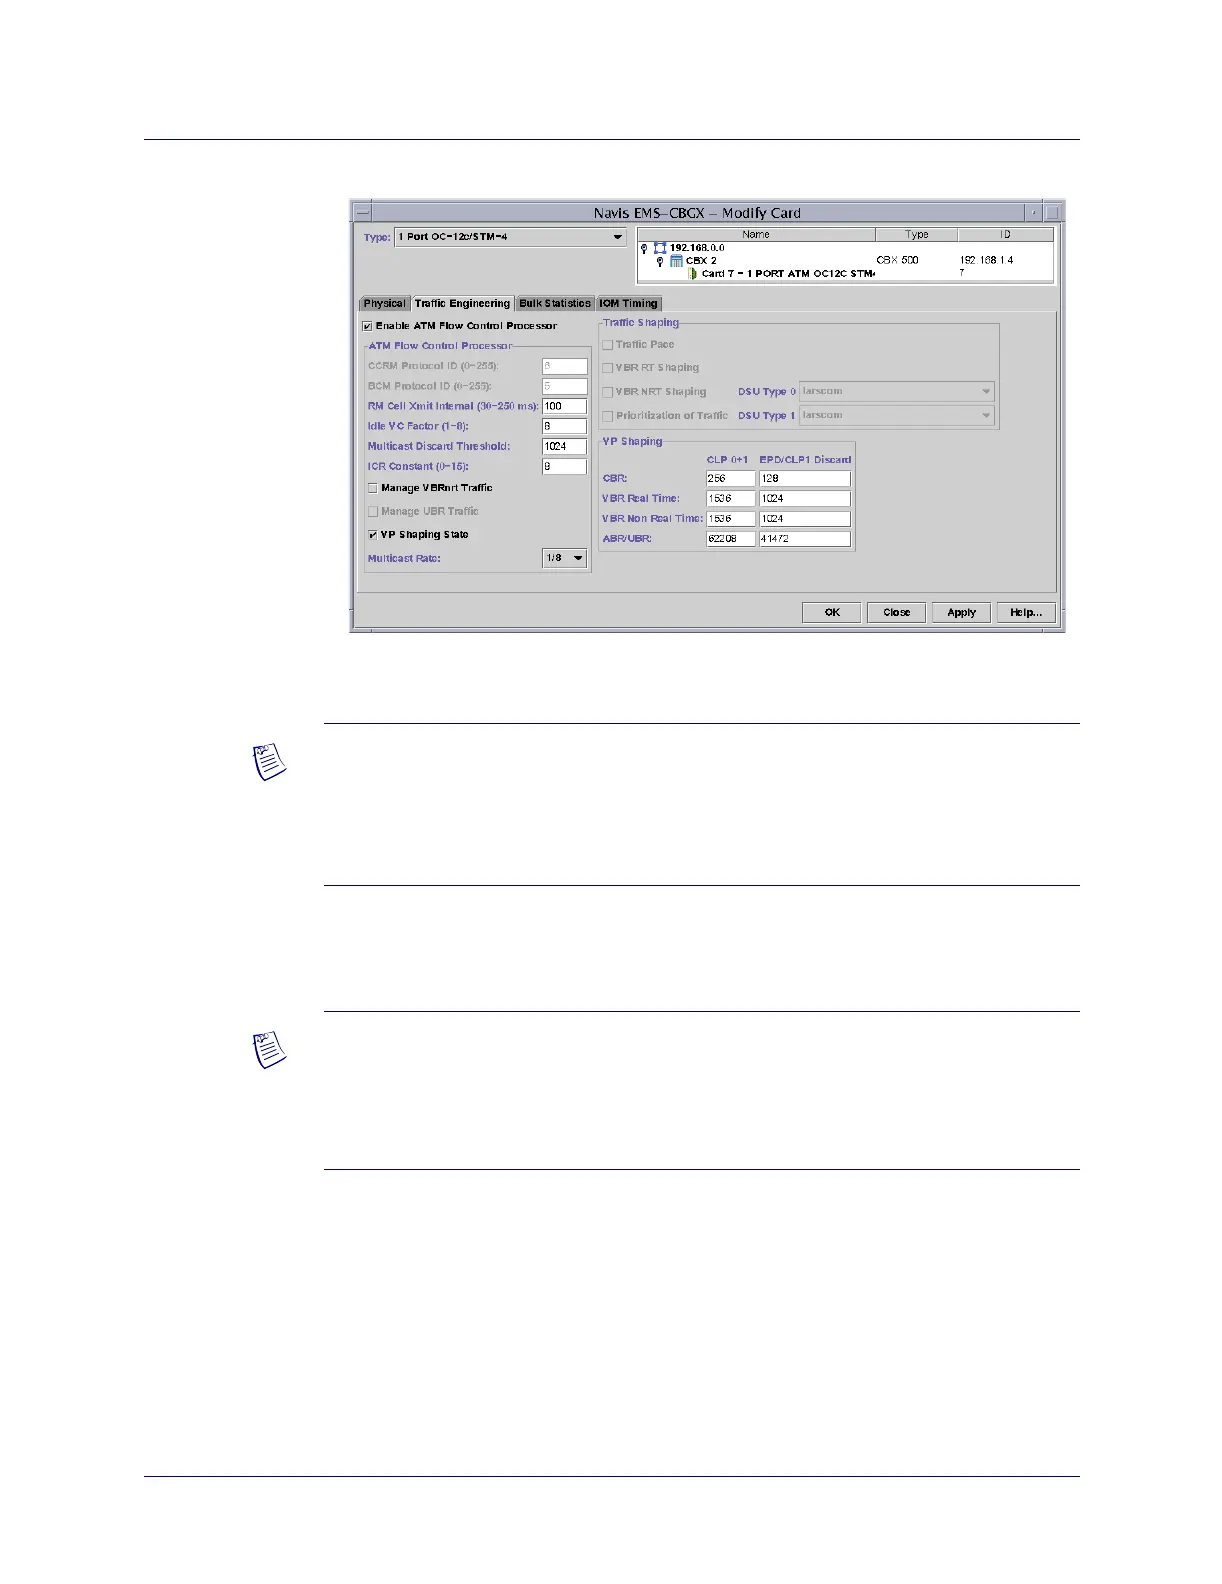
Figure 6-1. Modify Card Dialog Box
6. Select the Traffic Engineering tab (see Figure 6-1).
7. In the ATM Flow Control Processor field, check the box to enable FCP.
8. Complete the fields as described in Table 6-1.
For more information about the ATM FCP fields, see “Closed-loop Flow Control”
on page 5-5.
For information about other fields on the Modify Card dialog box, see the Switch
Module Configuration Guide
for CBX 3500, CBX 500, GX 550, and B-STDX 9000.
Note – You can also access the card via the Back Panel view (see the Switch Module
Configuration Guide for CBX 3500, CBX 500, GX 550, and B-STDX 9000 for more
information). Slots 1 and 2 in a CBX 500 switch are reserved for the main switch
processor (SP) module and the optional redundant SP module. Slot 1 is always
configured as the main SP module.
Note – Enabling the ATM FCP will make the IOM out of sync. Perform a PRAM
Sync after loading the profile tables (described on page 6-8) to enable the ATM FCP
on an IOM.
See the Navis EMS-CBGX Getting Started Guide
for PRAM Sync instructions.