13-30 Sun Blade 1500 Service, Diagnostics, and Troubleshooting Manual • December 2004
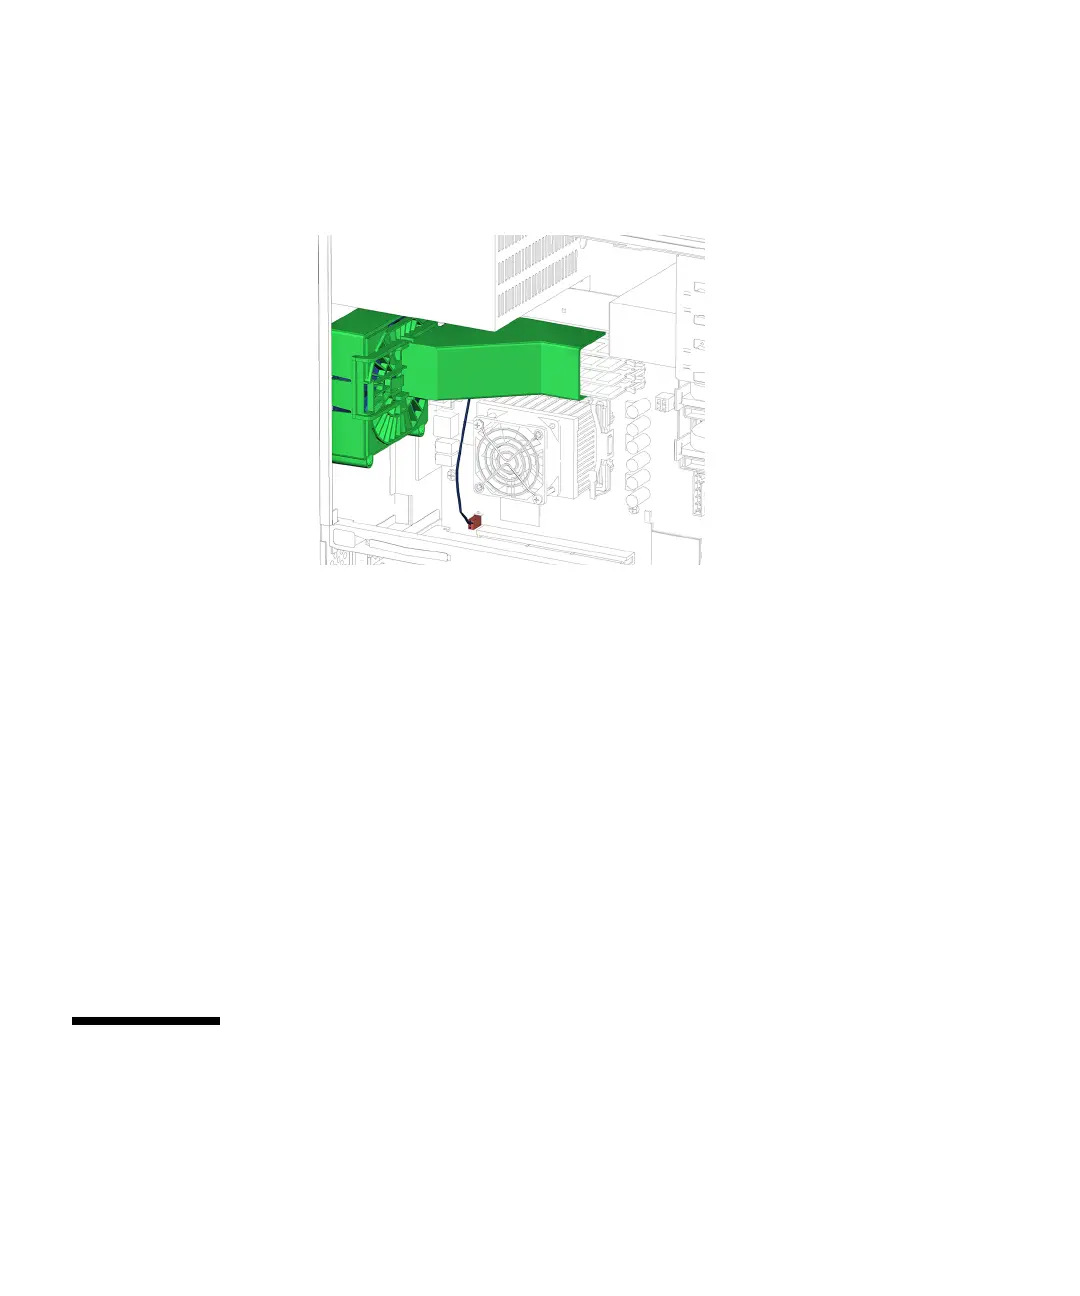
8. Continue to slide the duct to the right until the catch on the rear fan bracket
clicks.
See FIGURE 13-32.
FIGURE 13-32 Duct Clicks Into Place
9. Inspect the DIMM cooling duct to verify that:
■ The duct covers the DIMMs and is not in a bind with the DIMMs.
■ The guide rails of the duct are matched with the guide rails of the rear fan
bracket.
10. Choose your next step:
■ If you installed the DIMM cooling duct after installing the rear fan, return to
Step 8 of “Installing the Rear Fan” on page 13-18.
■ If you installed the DIMM cooling duct after installing the motherboard, return to
Step 18 of “Installing the Motherboard” on page 11-50.
■ Otherwise, install the access panel and power on the system. Refer to:
■ “Installing the Access Panel” on page 15-5
■ “Powering On the Workstation” on page 15-8
13.5 Replacing the Audio USB Board
This section describes removal and installation of the audio and USB card. Topics
include: