13-6 Sun Blade 1500 Service, Diagnostics, and Troubleshooting Manual • December 2004
2. Remove the new power supply from its package.
3. Locate where the power supply is to be installed.
See FIGURE 13-1.
4. Align the power supply IEC-320 connector (power cord socket) and fan with the
chassis rear panel opening.
See FIGURE 13-5.
5. Position the power supply with the chassis power supply brackets.
6. Rotate the power supply down and into the chassis.
See FIGURE 13-5.
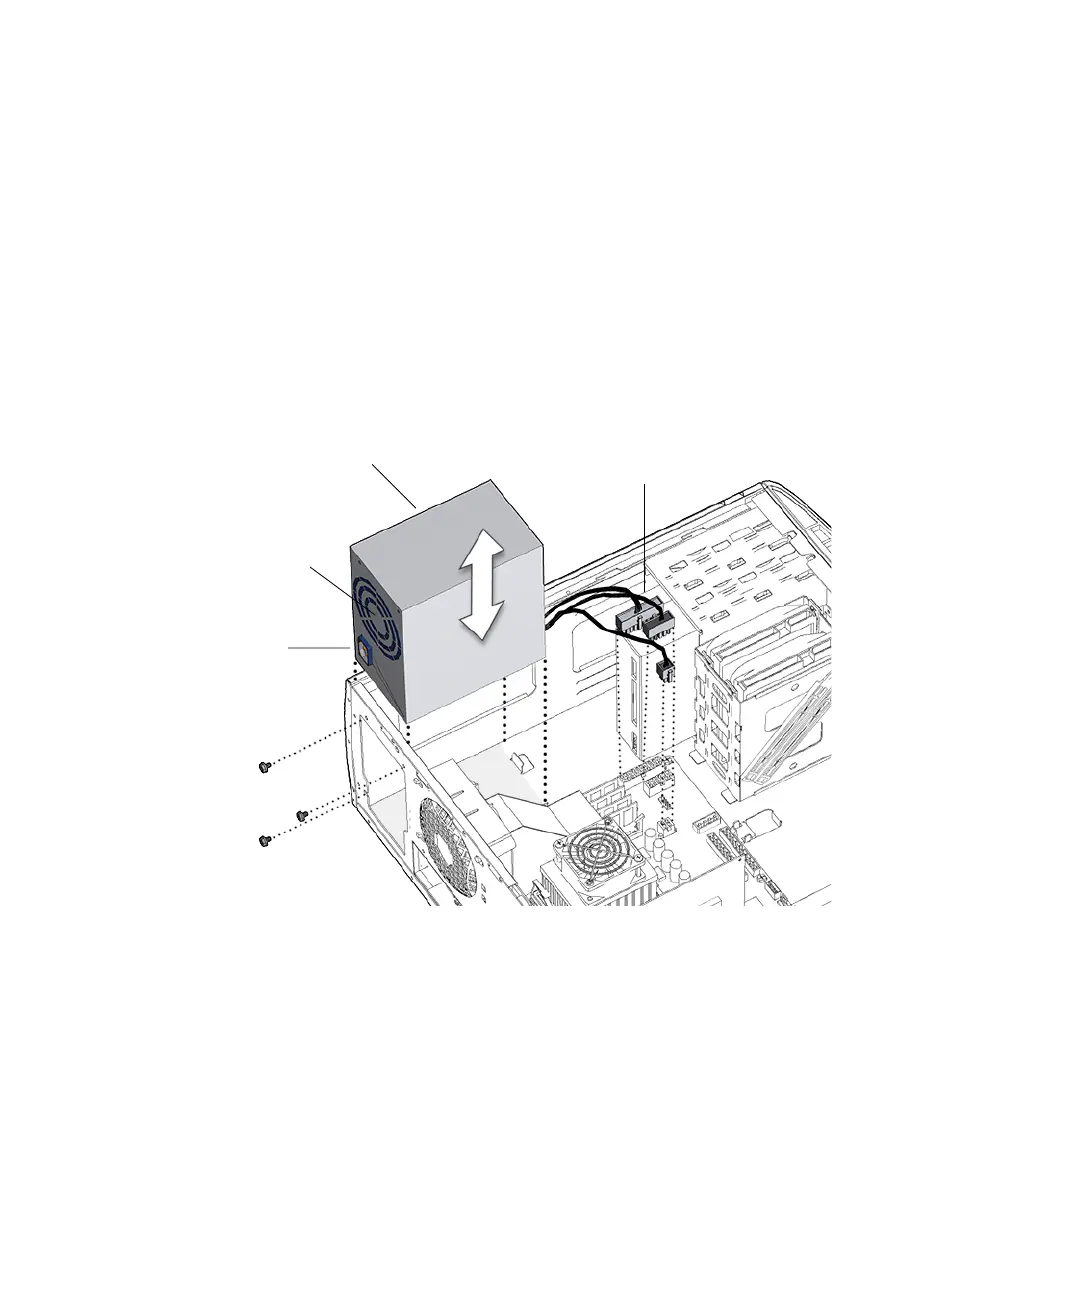
FIGURE 13-5 Installing the Power Supply
7. Using a No. 2 Phillips screwdriver, fasten the three screws that secure the power
supply to the chassis.
See FIGURE 13-5
8. Feed the cables through the cable routing clips and close the cable routing clips.
See
FIGURE 13-6.
Screws (3)
Power supply
Connectors
PS0, PS1, PS2
IEC-320
connector
Power supply
fan