Chapter 14 Replacing Internal Cables 14-17
FIGURE 14-15 Connecting the IDE Power Cable to the Hard Drive(s)
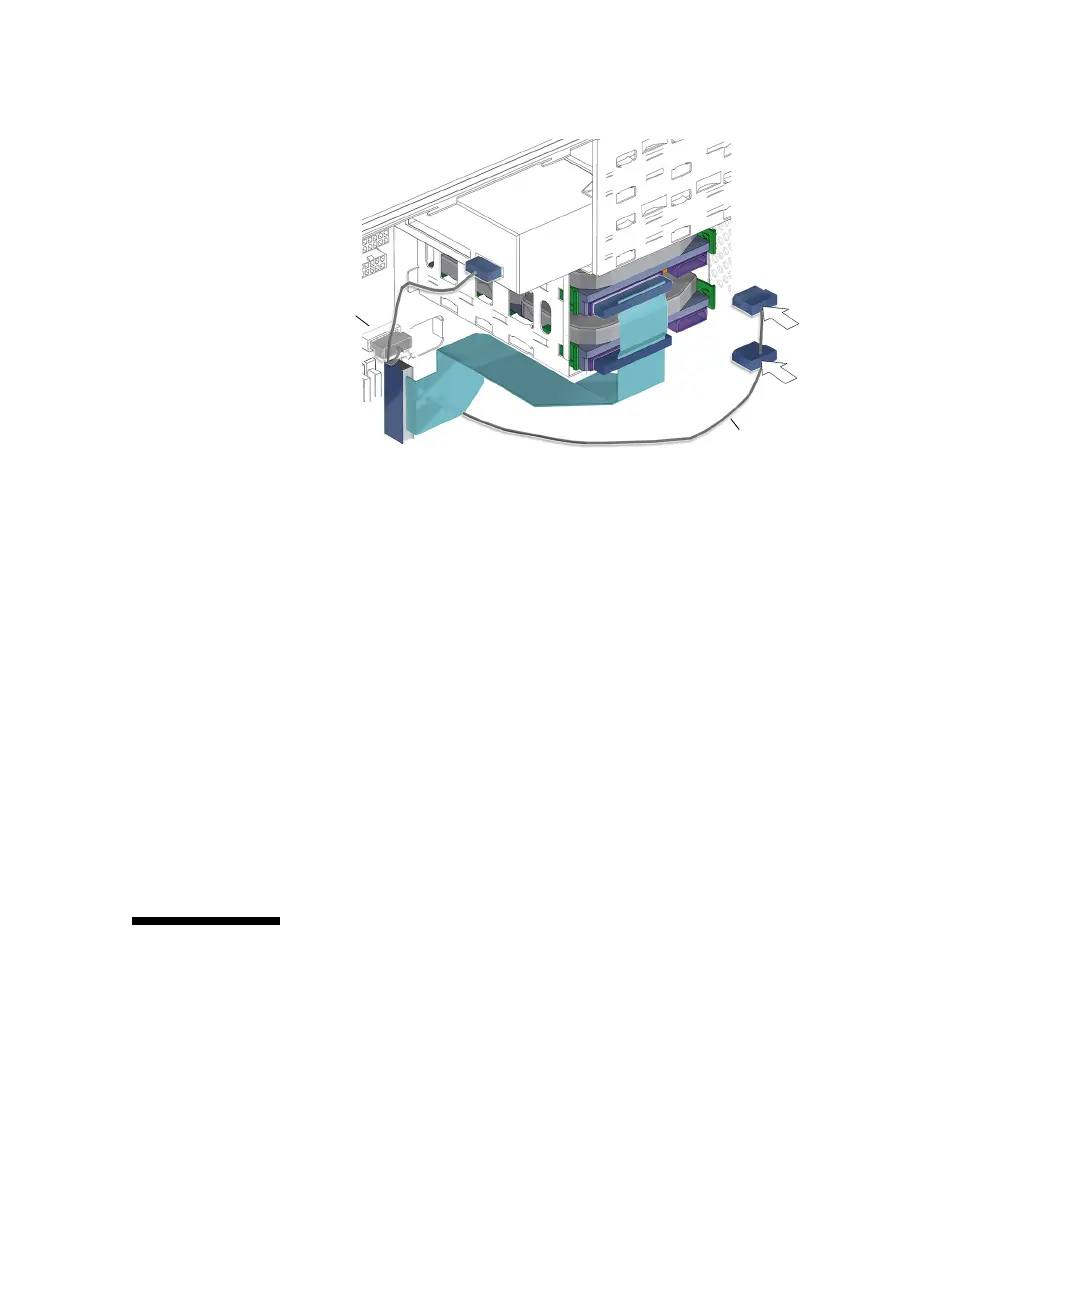
6. If installed, attach the remaining connector to the lower hard drive HDD1.
See FIGURE 14-15.
7. Inspect the cabling to verify that:
■ The IDE power cable is secure in the optical drive connector.
■ The IDE power cable is secure in the hard drive connector(s).
■ The IDE power cable is secure in the motherboard connector IDE PWR.
8. Install the access panel, power on the system, and verify the IDE power cable
installation.
Refer to:
■ “Installing the Access Panel” on page 15-5
■ “Powering On the Workstation” on page 15-8
■ “Verifying an Installation” on page 15-11
14.5 Replacing the Power Switch Assembly
This section describes removal and installation of the power switch assembly. Topics
include:
■ “Identifying the Power Switch Assembly” on page 14-18
■ “Removing the Power Switch Assembly” on page 14-18
■ “Installing the Power Switch Assembly” on page 14-21
IDE power cable
Connector
IDE PWR