Chapter 13 Replacing Chassis Components 13-61
13.9.3 Installing the Drive Rails
1. Power off the system and open the chassis.
Refer to:
■ “Powering Off the Workstation” on page 10-4
■ “Removing the Access Panel” on page 10-12
2. Remove the spare drive rails from their storage position, if needed.
The drive rails are stored on the underside of the hard drive bay. Unsnap them from
their storage location. See
FIGURE 13-61.
3. Locate the hard drive.
Whether you are replacing an existing hard drive or installing a new second hard
drive, refer to
“Replacing a Hard Drive” on page 12-2.
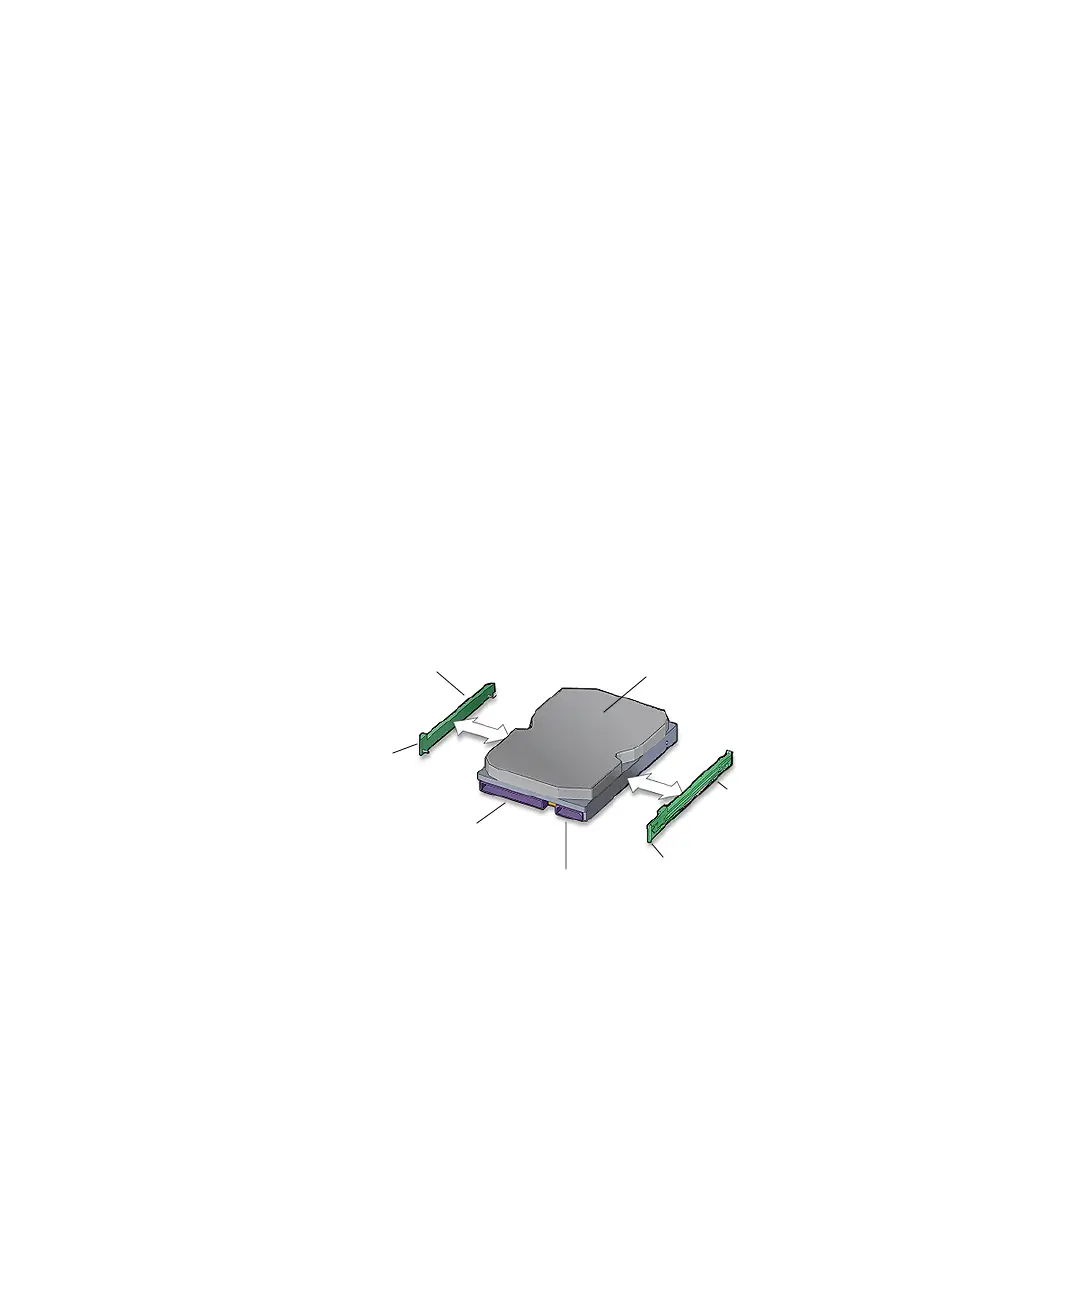
4. Snap both drive rails into the holes on both sides of the hard drive.
The lettering on the drive rails (HDD-L and HDD-R) is upright and the drive rail tabs
are toward the hard drive power and interface connectors. See
FIGURE 13-63.
FIGURE 13-63 Installing the Drive Rails to the Hard Drive
Proceed to and complete “Replacing a Hard Drive” on page 12-2.
Drive rail
HDD-L
Drive rail
HDD-R
Interface
connector
IDE power connector
Tab R
Tab L
Hard drive