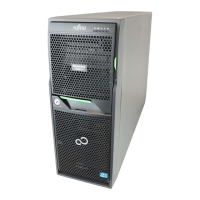
Upgrade and Maintenance Manual TX2560 M2 / RX2560 M2
5.2.7.2 Processors . . . . . . . . . . . . . . . . . . . . . . . . . 127
5.2.8 Performing a fan test . . . . . . . . . . . . . . . . . . . . . . 129
5.2.9 Enabling SVOM boot watchdog functionality . . . . . . . . . . 130
5.2.10 Enabling replaced components in the system BIOS . . . . . . 131
5.2.11 Verifying the memory mode . . . . . . . . . . . . . . . . . . . 132
5.2.12 Verifying the system time settings . . . . . . . . . . . . . . . 132
5.2.13 Viewing and clearing the System Event Log (SEL) . . . . . . . 133
5.2.13.1 Viewing the SEL . . . . . . . . . . . . . . . . . . . . . . . 133
5.2.13.2 Clearing the SEL . . . . . . . . . . . . . . . . . . . . . . 134
5.2.14 Updating the NIC configuration file in a Linux and VMware
environment . . . . . . . . . . . . . . . . . . . . . . . . . . . 134
5.2.15 Resuming BitLocker functionality . . . . . . . . . . . . . . . . 136
5.2.16 Performing a RAID array rebuild . . . . . . . . . . . . . . . . 137
5.2.17 Looking up changed MAC / WWN addresses . . . . . . . . . 137
5.2.17.1 Looking up MAC addresses . . . . . . . . . . . . . . . . . 138
5.2.17.2 Looking up WWN addresses . . . . . . . . . . . . . . . . 138
5.2.18 Using the Chassis ID Prom Tool . . . . . . . . . . . . . . . . 139
5.2.19 Configuring LAN teaming . . . . . . . . . . . . . . . . . . . . 140
5.2.19.1 After replacing / upgrading LAN controllers . . . . . . . . . 140
5.2.19.2 After replacing the system board . . . . . . . . . . . . . . 140
5.2.20 Switching off the ID indicator . . . . . . . . . . . . . . . . . . 141
5.2.21 Specifying the chassis model . . . . . . . . . . . . . . . . . . 141
6 Power supply unit (PSU) . . . . . . . . . . . . . . . . . . . 143
6.1 Basic information . . . . . . . . . . . . . . . . . . . . . . . 144
6.1.1 PSU configurations . . . . . . . . . . . . . . . . . . . . . . . 145
6.1.2 Assembly rules . . . . . . . . . . . . . . . . . . . . . . . . . 145
6.2 Installing a PSU . . . . . . . . . . . . . . . . . . . . . . . . 146
6.2.1 Preliminary steps . . . . . . . . . . . . . . . . . . . . . . . . 146
6.2.2 Removing the PSU dummy module . . . . . . . . . . . . . . 146
6.2.3 Installing a PSU . . . . . . . . . . . . . . . . . . . . . . . . . 147
6.2.4 Concluding steps . . . . . . . . . . . . . . . . . . . . . . . . 147
6.3 Removing a PSU . . . . . . . . . . . . . . . . . . . . . . . . 148
6.3.1 Preliminary steps . . . . . . . . . . . . . . . . . . . . . . . . 148
6.3.2 Removing a PSU . . . . . . . . . . . . . . . . . . . . . . . . 149
6.3.3 Installing a PSU dummy module . . . . . . . . . . . . . . . . 149
6.4 Replacing a PSU . . . . . . . . . . . . . . . . . . . . . . . . 150
6.4.1 Preliminary steps . . . . . . . . . . . . . . . . . . . . . . . . 150
6.4.2 Removing the defective PSU . . . . . . . . . . . . . . . . . . 151
 Loading...
