TX2560 M2 / RX2560 M2 Upgrade and Maintenance Manual
247
Hard disk drive (HDD) / solid state drive (SSD)
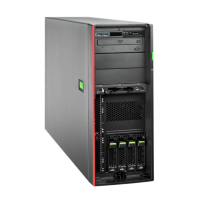
7.4.5 Installing the 4x 3.5-inch HDD extension box
7.4.5.1 Preliminary steps
Ê
"Suspending BitLocker functionality" on page 111
Ê
"Shutting down the server" on page 58
Ê
"Disconnecting the power cord" on page 59
Ê
"Getting access to the component" on page 61
Ê
"Removing the system air duct" on page 91
Ê
"Removing the system fan holder" on page 93
7.4.5.2 Removing accessible drive dummy covers
Ê
Remove accessible drive filler covers from the required bays as described
in section "Accessible drive filler covers" on page 104.
Ê
Remove accessible drive covers as described in section "Accessible drive
covers" on page 106.
7.4.5.3 Installing the ultraslim ODD into the HDD extension box
Ê
If applicable, install the ultraslim ODD into the new 4x 3.5-inch HDD
extension box as described in section "Installing the ultraslim ODD" on
page 418.
7.4.5.4 Installing the HDD backplane
Ê
If applicable, install the HDD backplane on the 4x 3.5-inch HDD extension
box as described in section "Installing the new HDD backplane" on
page 255.
Upgrade and Repair Unit
(URU)
Hardware: 10 minutes
Tools:
Slotted screw driver (for bending in or out accessible drive mounting
brackets)
 Loading...
