If the contrast level in the image is insucien
t, the contour may not be correctly dened. You can
manually edit the contour to correct it: see Eding the Contour (page 176).
Dening the ES Contour Manually
To dene a contour manually, you place points along the ventricle wall.
Aer dening the ES contour, both the ED and ES contours are displayed in each image in the series.
The contours are highlighted when you view the image used to dene the contour. The main analysis
results are also displayed in a panel in the lower right corner.
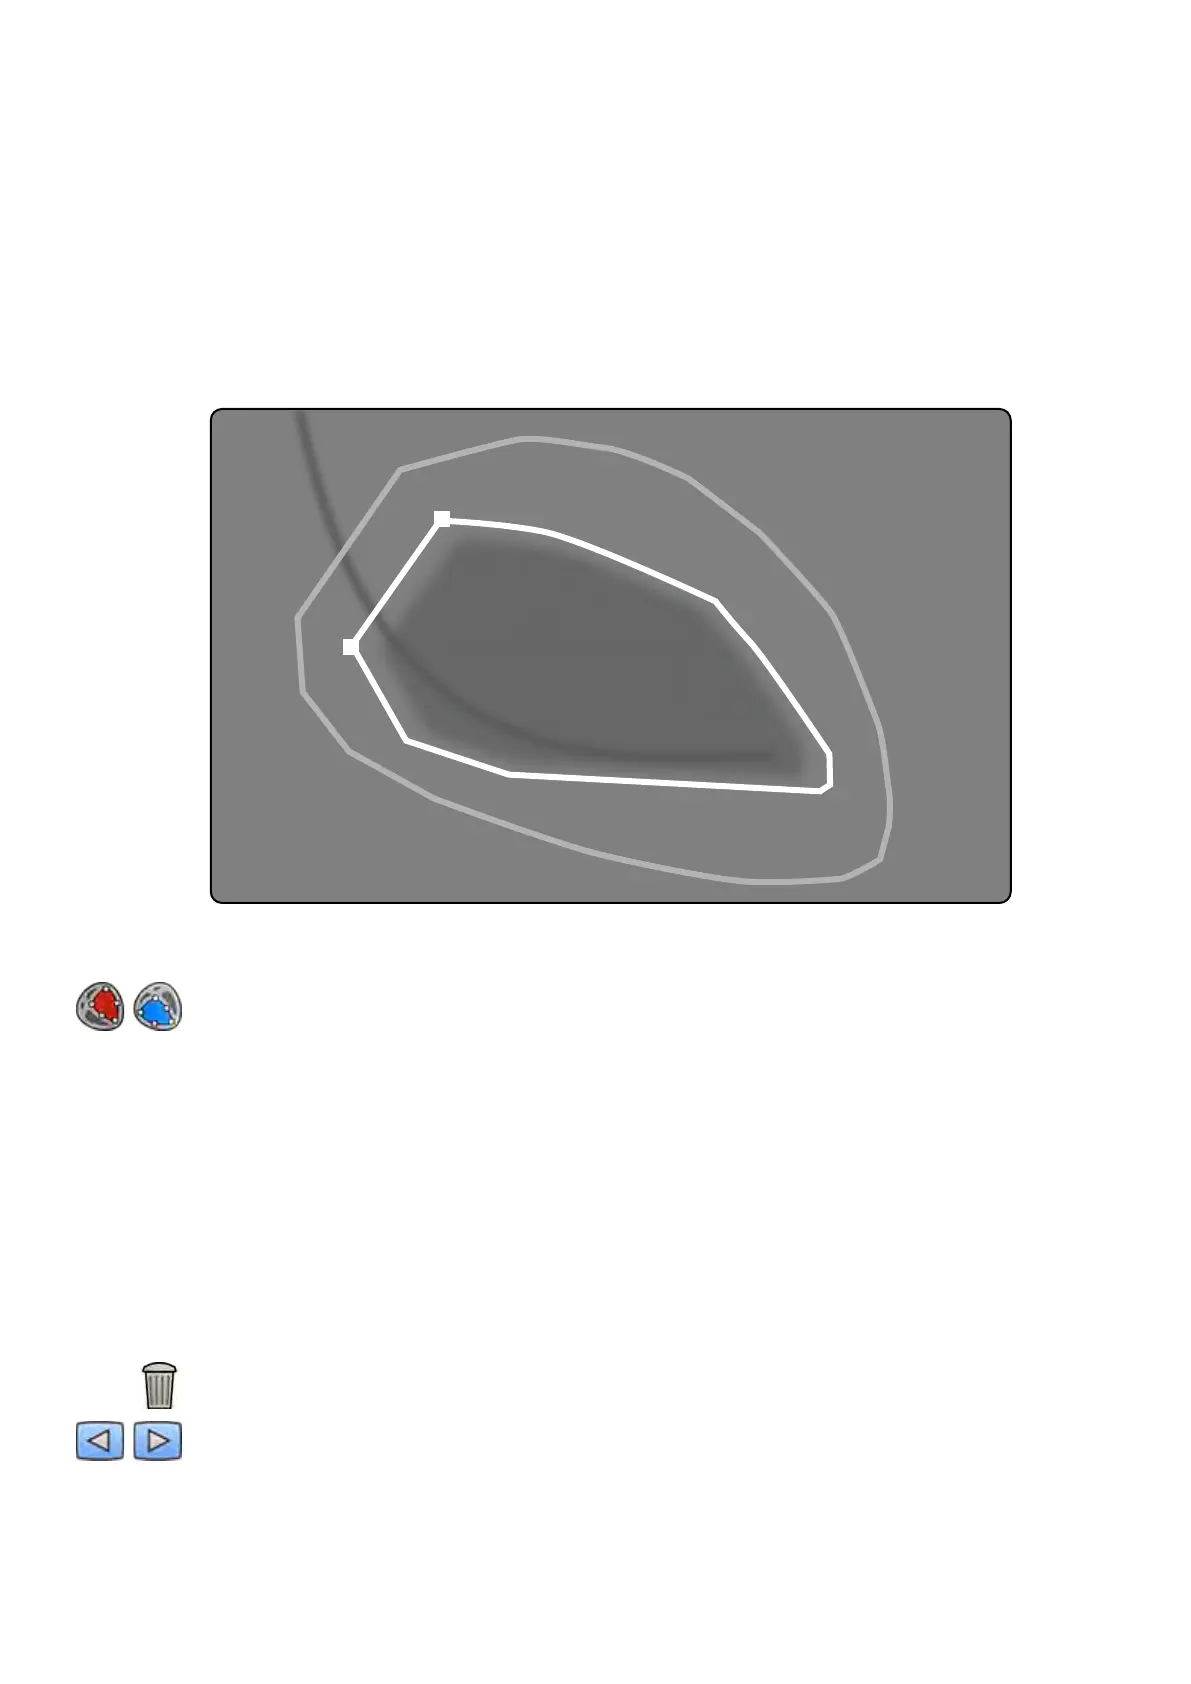
Figure 78 E
S manual contour denion
1 Click Manual in the control panel.
2 Click on the superior border of the aorc root (LVA) or the pulmonary root (RVA) to start the
contour.
3 Click further along the ventricle wall to place the next point of the contour.
4 Connue placing points along the ventricle wall through the cardiac apex unl you reach the
inferior border of the aorc root (LVA) or the pulmonary root (RVA).
5 Double-click on the inferior border of the aorc root (LVA) or the pulmonary root (RVA) to complete
the contour.
6 If you are using Biplane LVA/RVA: Perform this process on both the frontal image and the lateral
image so that the contour is detected in each image.
7 If you want to delete the contour and start over, click Delete in the control panel.
8 Use the navigaon toolbar to check the accuracy of the ED and ES contours in each image of the
series.
2D Quant
ave Analysis (Opon) LVA / RVA
Azurion Release 1.2 Ins
trucons for Use 175 Philips Healthcare 4522 203 52421