Wireless Indicator Descripon
Red Wireless c
onnecon is not available. Do not use the foot switch.
Wait for the wireless connecon indicator to go out before using the foot
switch. If the red indicator light is on for longer than 10 seconds, switch the
foot switch o and then on again.
3 T
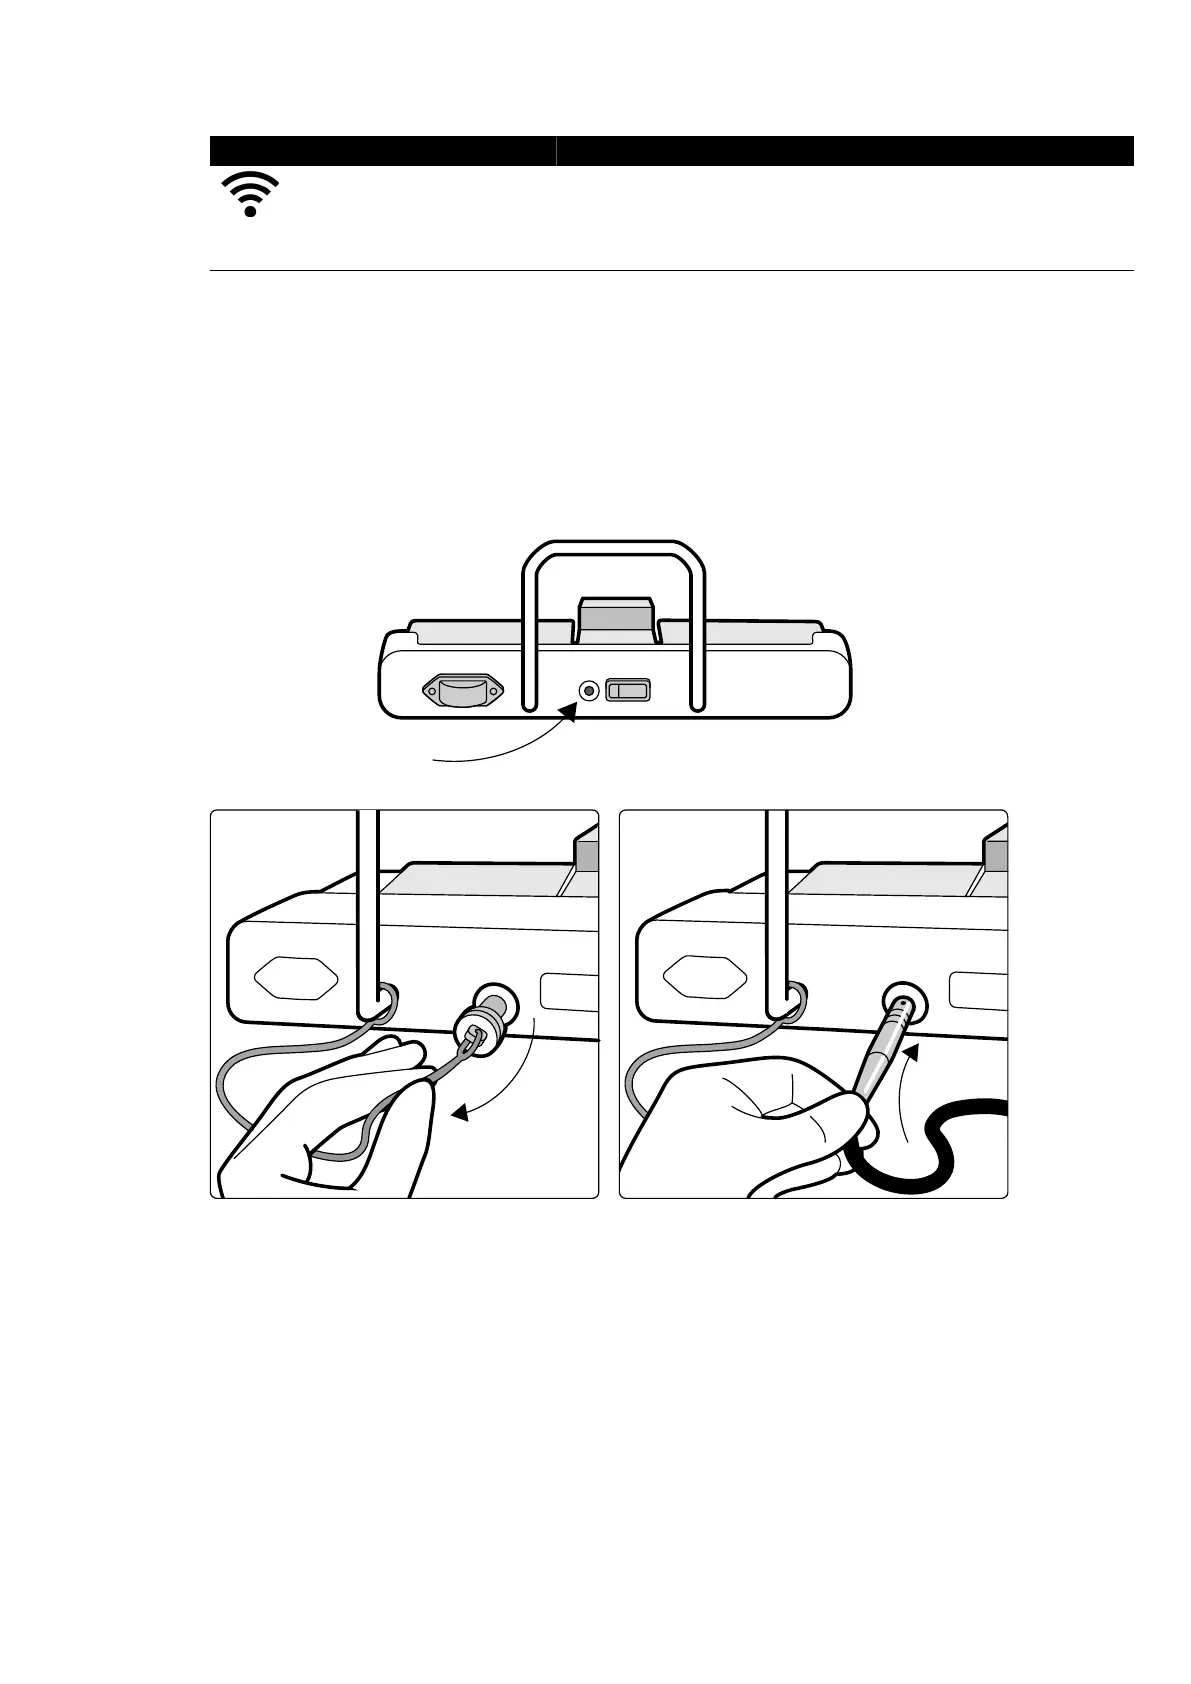
o switch the wireless foot switch o, use the power switch on the back of the foot switch.
Charging the Wireless Foot Switch Baery
A charging unit is supplied to recharge the baery of the wireless foot switch.
NOTE Use only the charging unit supplied with the wireless foot switch. Using any other charging
unit may cause damage to the foot switch and void the warranty.
1 Remove the cap from the charging port on the back of the wireless foot switch.
Figure 107 Wir
eless foot switch charging port (monoplane foot switch shown as an example, also
applicable for the biplane foot switch)
2 Connect the charging unit to the charging port.
The baery indicator on the wireless foot switch ashes while the foot switch is charging. A
complete charge cycle takes up to 8 hours.
A complete charge on the wireless foot switch lasts for one week of use. We recommend that you
charge the baery every week, or when the baery status indicator turns red (indicang that the
charge level is below 25%). The baery has built-in safety devices to protect it from overcharging.
NOTE If the baery is depleted within 2 days aer a complete charge, contact technical support for
a replacement baery. The baery may only be replaced by a qualied service engineer.
Using Other Equipment Accessories
Azurion Release 1.2 Ins
trucons for Use 202 Philips Healthcare 4522 203 52421