Figure 50 Adjusng wedges on the touch screen module (biplane system shown)
The le wedge is displayed in blue. The right wedge is displayed in green.
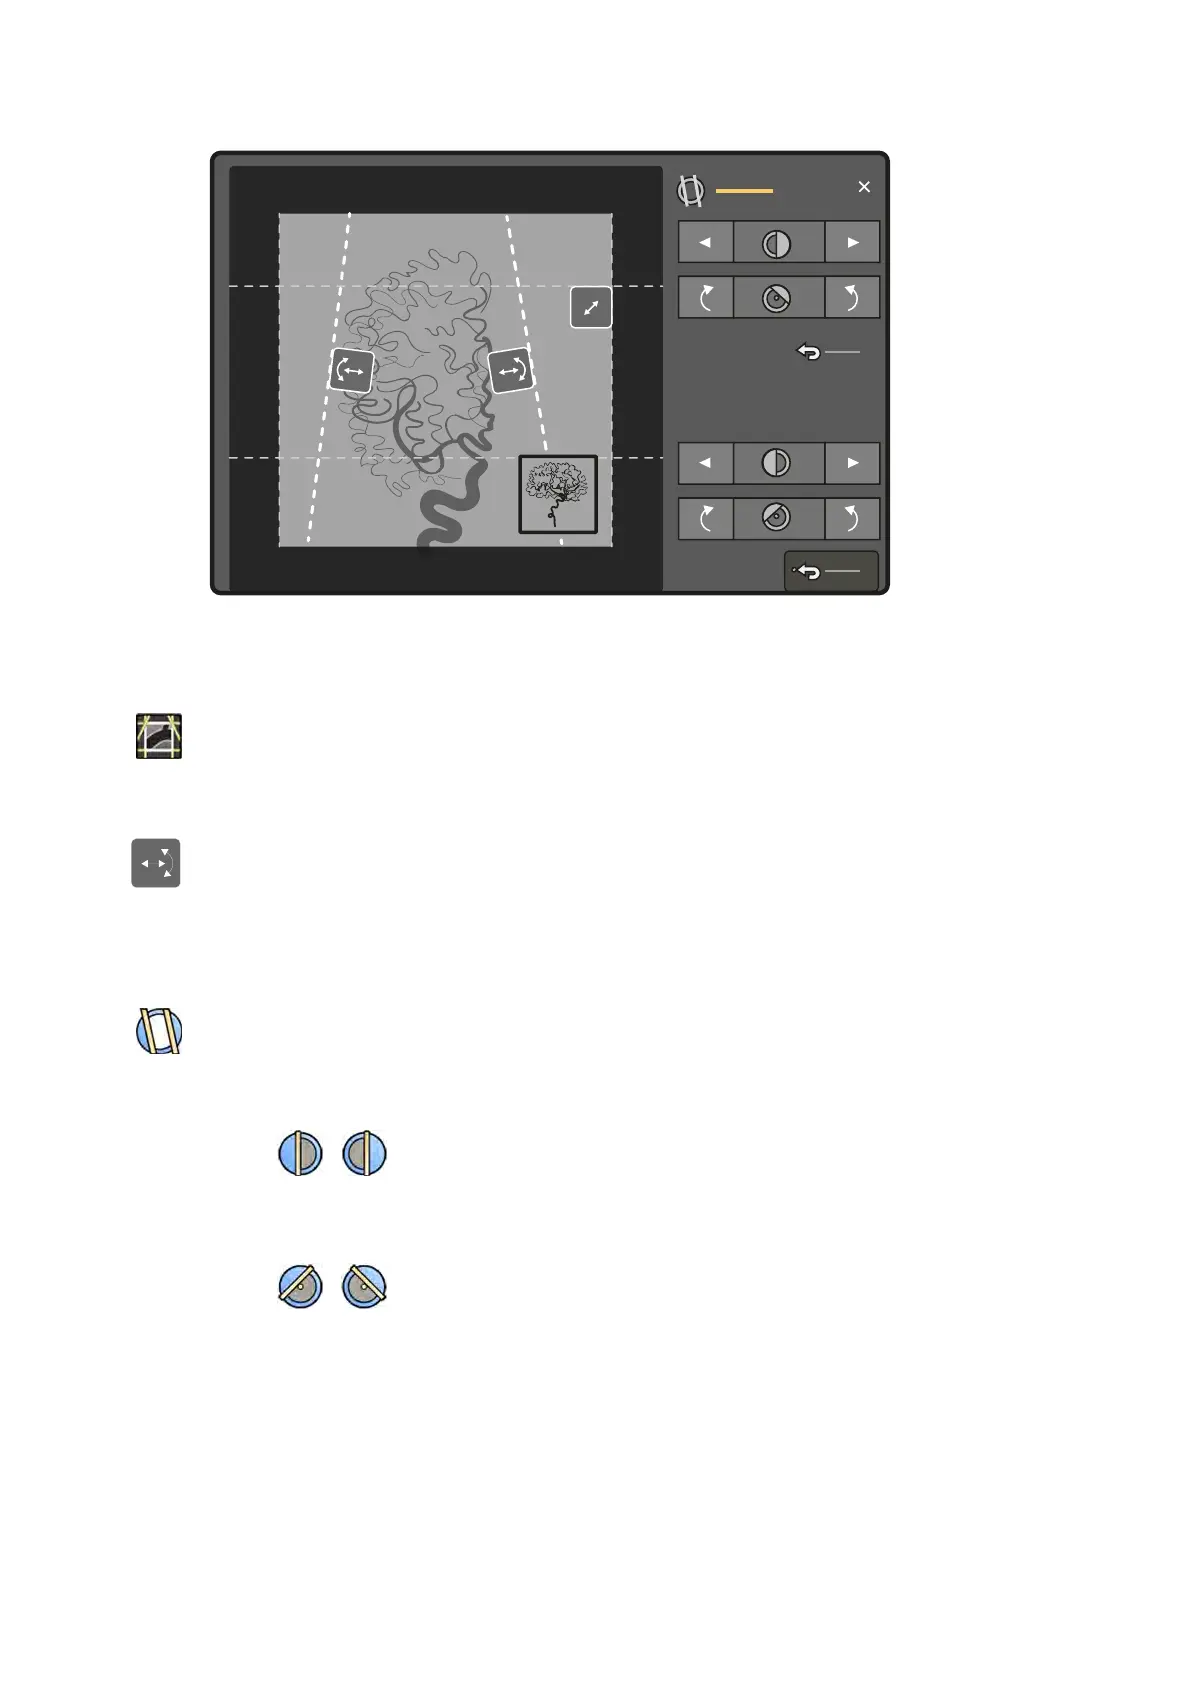
1 Select the Collimaon task.
2 When using a biplane system, adjustments are applied to the channel represented by the main
image. To change the channel, tap the mini viewport.
3 To adjust the posion of each wedge by dragging, drag the handle for the desired wedge to a new
posion.
Dragging the wedge allows you to move the wedge laterally and to rotate the wedge
simultaneously. Dragging the wedge up and down while dragging le and right, rotates the wedge.
4 To adjust the posion of the le or right wedges using the control buons, do the following:
a Tap Wedges.
b Tap the le or right arrow buons to move each wedge le or right unl the desired posion is
reached.
c Tap the rotaon buons to rotate each wedge clockwise or counterclockwise unl the desired
posion is reached.
5 Tap Reset to reset the desired wedge lter to the default posion.
Using Automac Wedge Following
The system can automacally posion the wedges according to the C-arm rotaon and angulaon
angles.
Performing Procedures Acquiring Images
Azurion Release 1.2 Ins
trucons for Use 86 Philips Healthcare 4522 203 52421