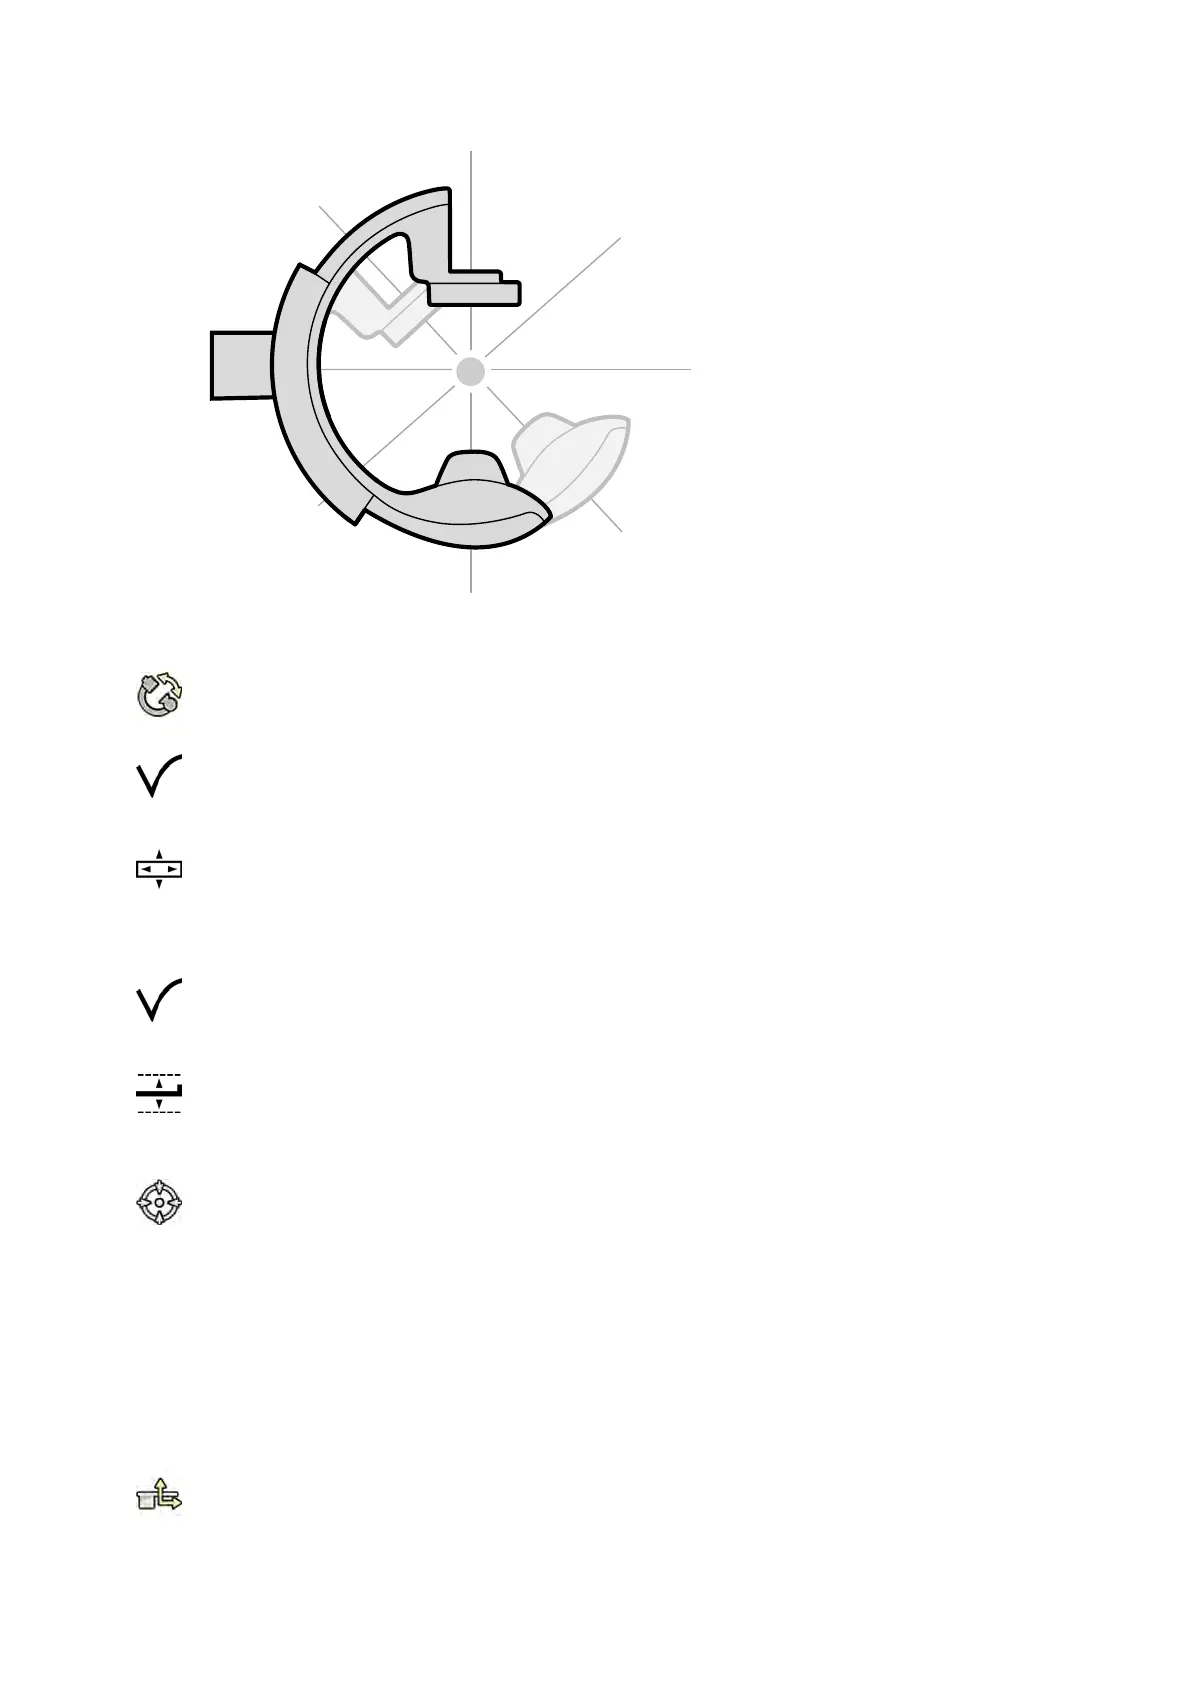
Figure 53 Isocen
ter of the C-arm
1 On the touch screen module, tap the Projecons task.
2 If the C-arm is not already in the anterior-posterior posion, do one of the following:
• Tap the Stored tab, select AP, then press Accept on the control module to move the C-arm.
• Posion the C-arm at 0 degrees of rotaon.
3 Using the control module, oat the table and center the region of interest in the middle of the eld
of view.
This can be aided with uoroscopy.
4 Reposion the C-arm by doing one of the following:
• Select LAT on the touch screen module, then press Accept on the control module to move the
C-arm.
• Rotate the C-arm to 90 degrees
5 Using the control module, adjust the table height unl the region of interest is in the middle of the
eld of view.
This can be aided with uoroscopy.
6 In the Table task on the touch screen module, tap Set ROI.
The region of interest is in the isocenter and this table posion is s
tored. A message is displayed in the
status area of the acquision window when this table posion, the isocenter, is recalled.
6.7.1 Recalling the Isocenter Posion
Aer saving the isocenter posion, you can recall it if you have moved the table to another posion.
You recall the isocenter posion using the touch screen module.
1 On the touch screen module, tap the Table task.
2 Ensure that all table movement locks are o.
Performing Procedures Isocentering
Azurion Release 1.2 Ins
trucons for Use 91 Philips Healthcare 4522 203 52421