Figure 126 P
osioning the detector for removal of the an-scaer grid
2 Move the tabletop just below the detector.
3 Move the spring-loaded locking sliders toward the center of the an-scaer grid.
4 Carefully remove the grid from the detector.
14.2.2 Replacing the An-Scaer Grid
Take care to avoid damaging either the detector or the an-scaer grid during the following procedure.
NOTE Before replacing the an-scaer grid, ensure that it is clean and free from debris.
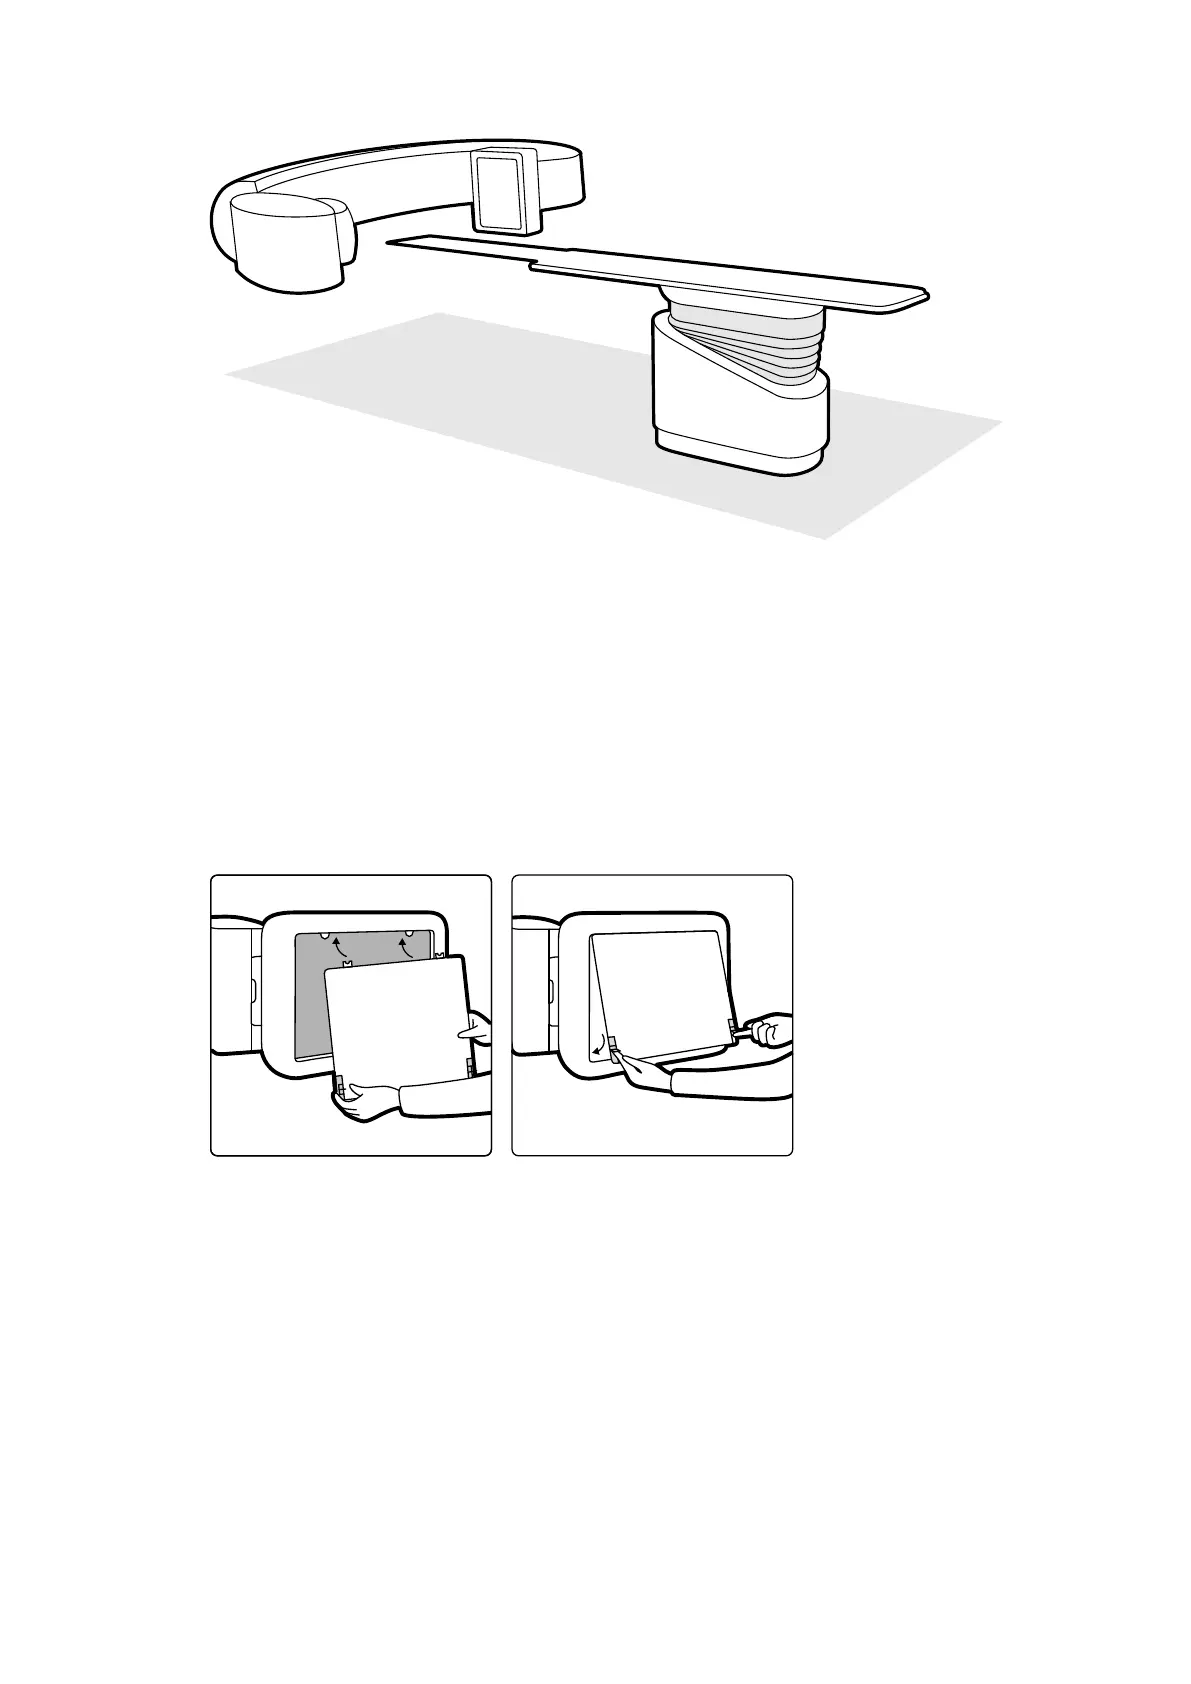
Figure 127 R
eplacing the an-scaer grid
1 Insert the locang tabs on the an-scaer grid in the corresponding slots of the detector casing.
2 Pull back the locking sliders and push the grid towards the detector unl it is ush with the detector
casing and release the locking sliders.
3 Ensure that the locang tabs are correctly posioned in the detector casing and the grid locking
sliders are correctly engaged.
14.3 Replacing Baeries
For safe operaon, you should replace the baeries in baery-operated equipment at regular intervals.
The baeries of the following items should be replaced regularly:
Maintenance Replacing Baeries
Azurion Release 1.2 Ins
trucons for Use 254 Philips Healthcare 4522 203 52421