a Select the desir
ed preset group in the Presets Group list.
b Click New.
The New Preset dialog box is displayed.
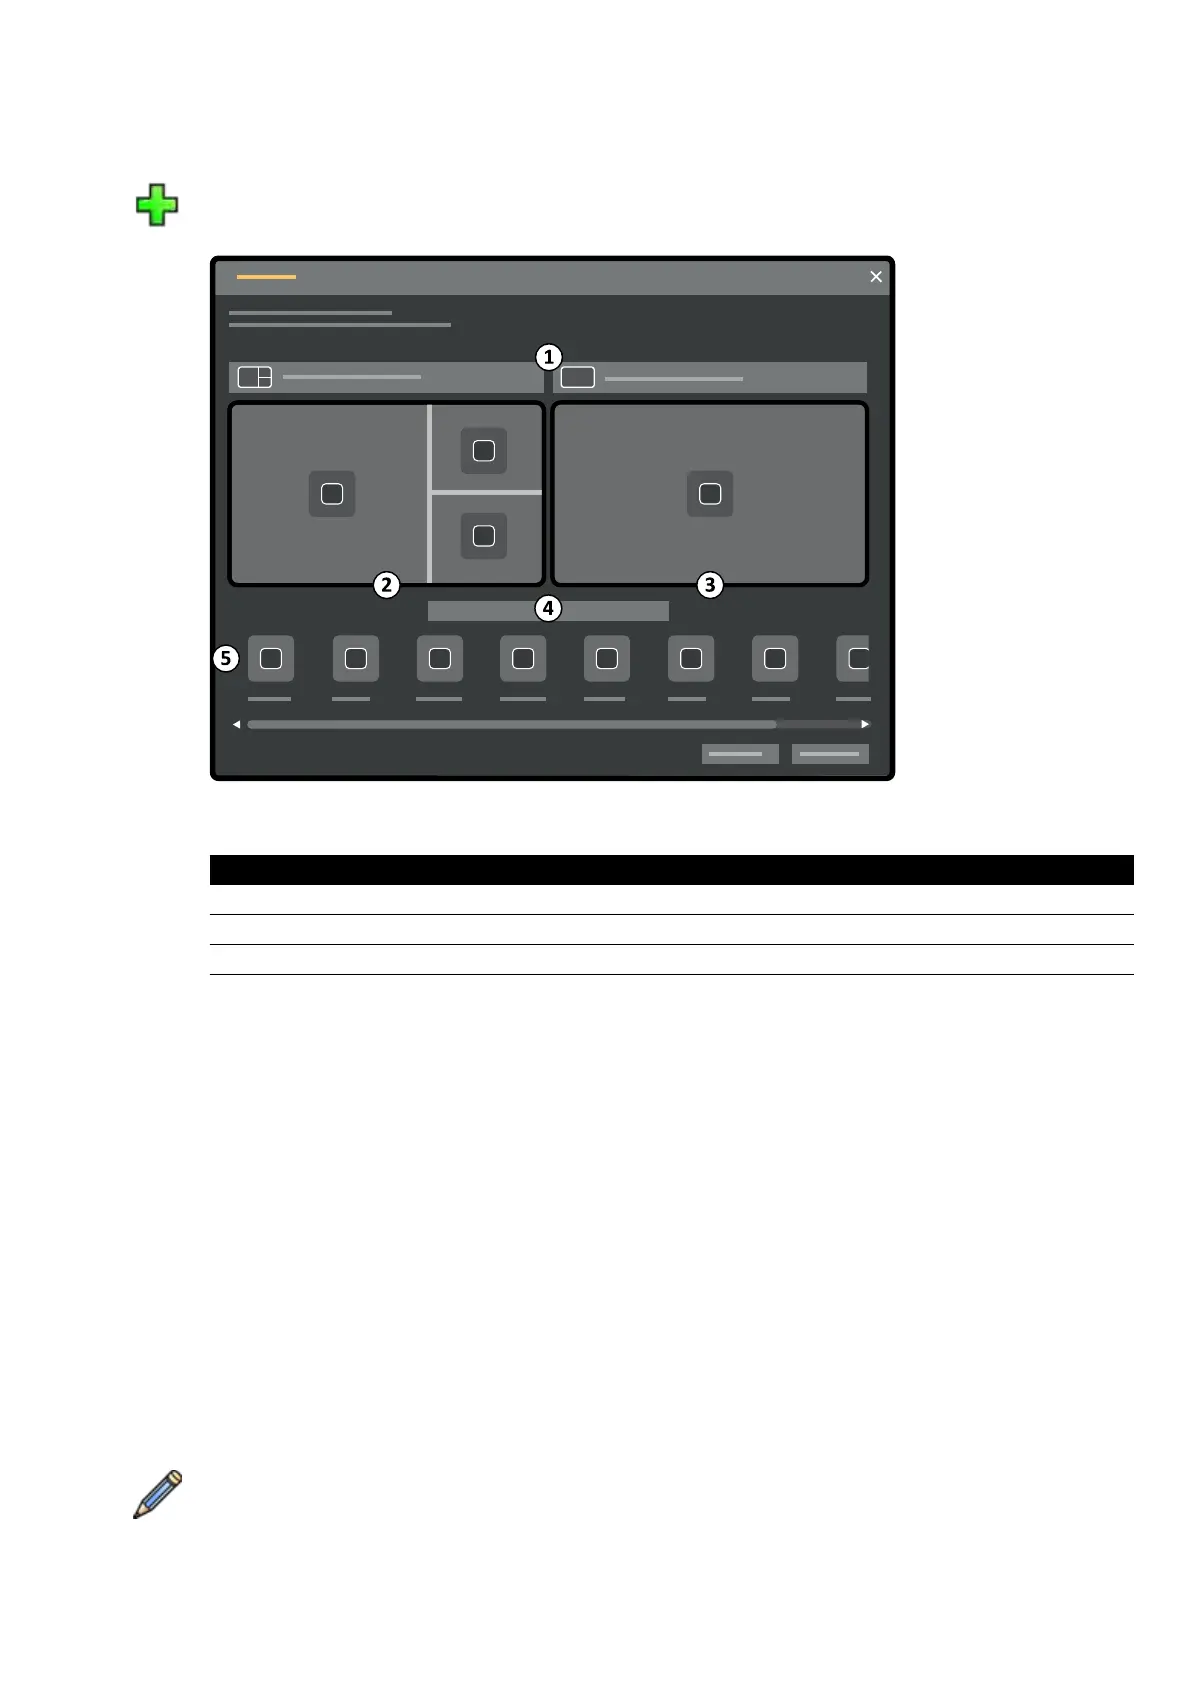
Figure 121 New Preset dialog bo
x
Legend
1 Layout selecon lis
ts 4 Preset name
2 Acquision window 5 Applicaon list
3 Review window
Your monitor c
onguraon is depicted in the dialog box as thumbnail images. For FlexVision,
only one monitor is shown.
c For each monitor depicted, select the desired layout using the lists above each monitor
thumbnail image.
d Enter a name for your preset.
e Drag the applicaons you want to be displayed in your preset, from the applicaon list to the
desired posions on the monitors.
f To save your preset, click Save.
Your preset is saved within the selected preset group.
g To close the dialog box without saving your preset, click Cancel.
4 To edit a preset, do the following:
a Select the preset group containing the preset you want to edit.
b Select the preset you want to edit, in the list.
c Click Edit.
A dialog box is displayed.
User Cus
tomizaon Managing Presets from the Control Room
Azurion Release 1.2 Ins
trucons for Use 216 Philips Healthcare 4522 203 52421