EasyManuals Logo

Toshiba e-STUDIO4500c Service Manual

Toshiba e-STUDIO4500c
1120 pages
To Next Page IconTo Next Page
To Previous Page IconTo Previous Page
Page #100 background imageLoading...
Page #100 background image
August, 2006 81/2" X 14"/B4 PAPER SIZE TRAY (B474)
1-61
Installation
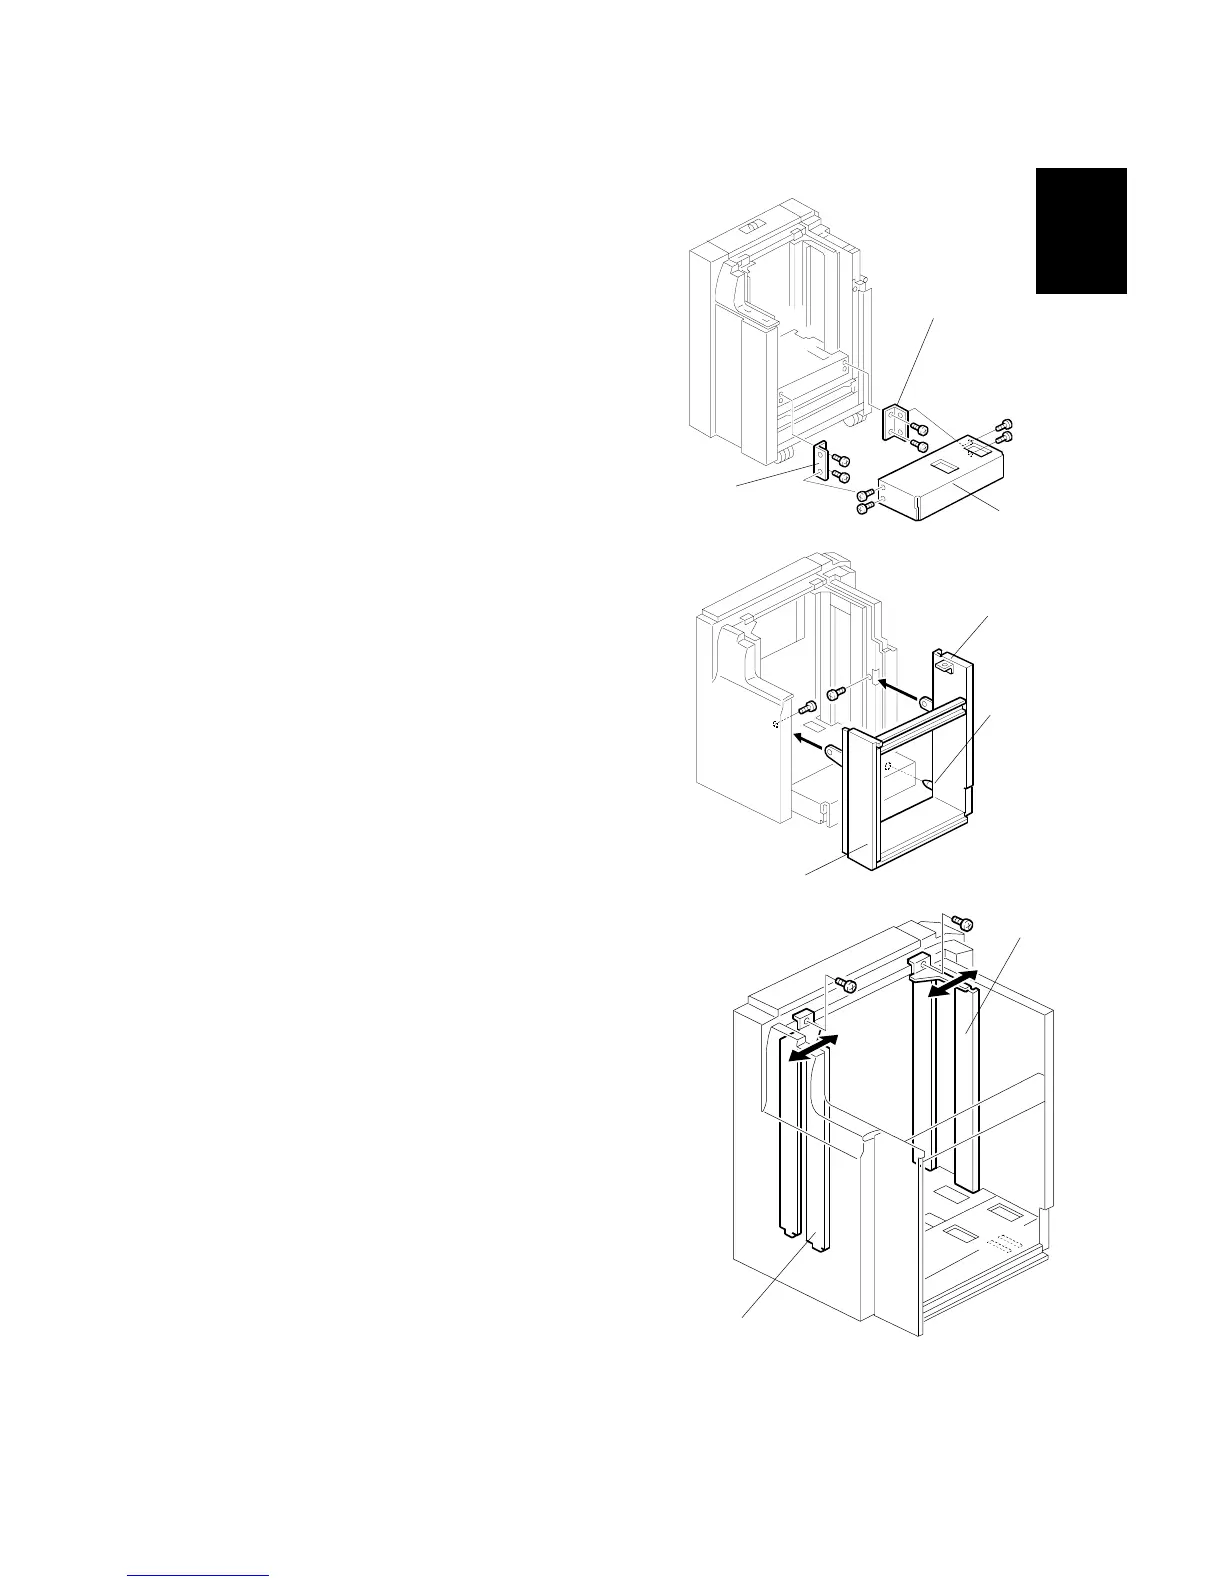
7. Attach the front bracket [A] with the
beveled corner down ( x 2).
NOTE: If the brackets are not easy to
install, lift the bottom plate with your hand.
8. Attach the rear bracket [B] with the
beveled corner down ( x 2).
9. Attach the bottom plate extension [C] with
the hex screws ( x 4).
10. Remove the casters from the bottom of
the B4/LG frame [D]
11. Align the positioning pin [E].
12. Attach the B4/LG frame [F] with the hex
screws ( x 2).
13. Move the front side fence [G] and rear
side fence [H] to the B4 or 81/2" position
and attach it ( x 1).
B474I502.WMF
B474I553.WMF
B474I555.WMF
[G]
[H]
[F]
[E]
[D]
[A]
[B]
[C]

Table of Contents

Other manuals for Toshiba e-STUDIO4500c

Questions and Answers:

Question and Answer IconNeed help?

Do you have a question about the Toshiba e-STUDIO4500c and is the answer not in the manual?

Toshiba e-STUDIO4500c Specifications

General IconGeneral
BrandToshiba
Modele-STUDIO4500c
CategoryAll in One Printer
LanguageEnglish

Related product manuals