EasyManuals Logo

Toshiba e-STUDIO4500c Service Manual

Toshiba e-STUDIO4500c
1120 pages
To Next Page IconTo Next Page
To Previous Page IconTo Previous Page
Page #492 background imageLoading...
Page #492 background image
ADDITIONAL INFORMATIONS April 2007
4-114
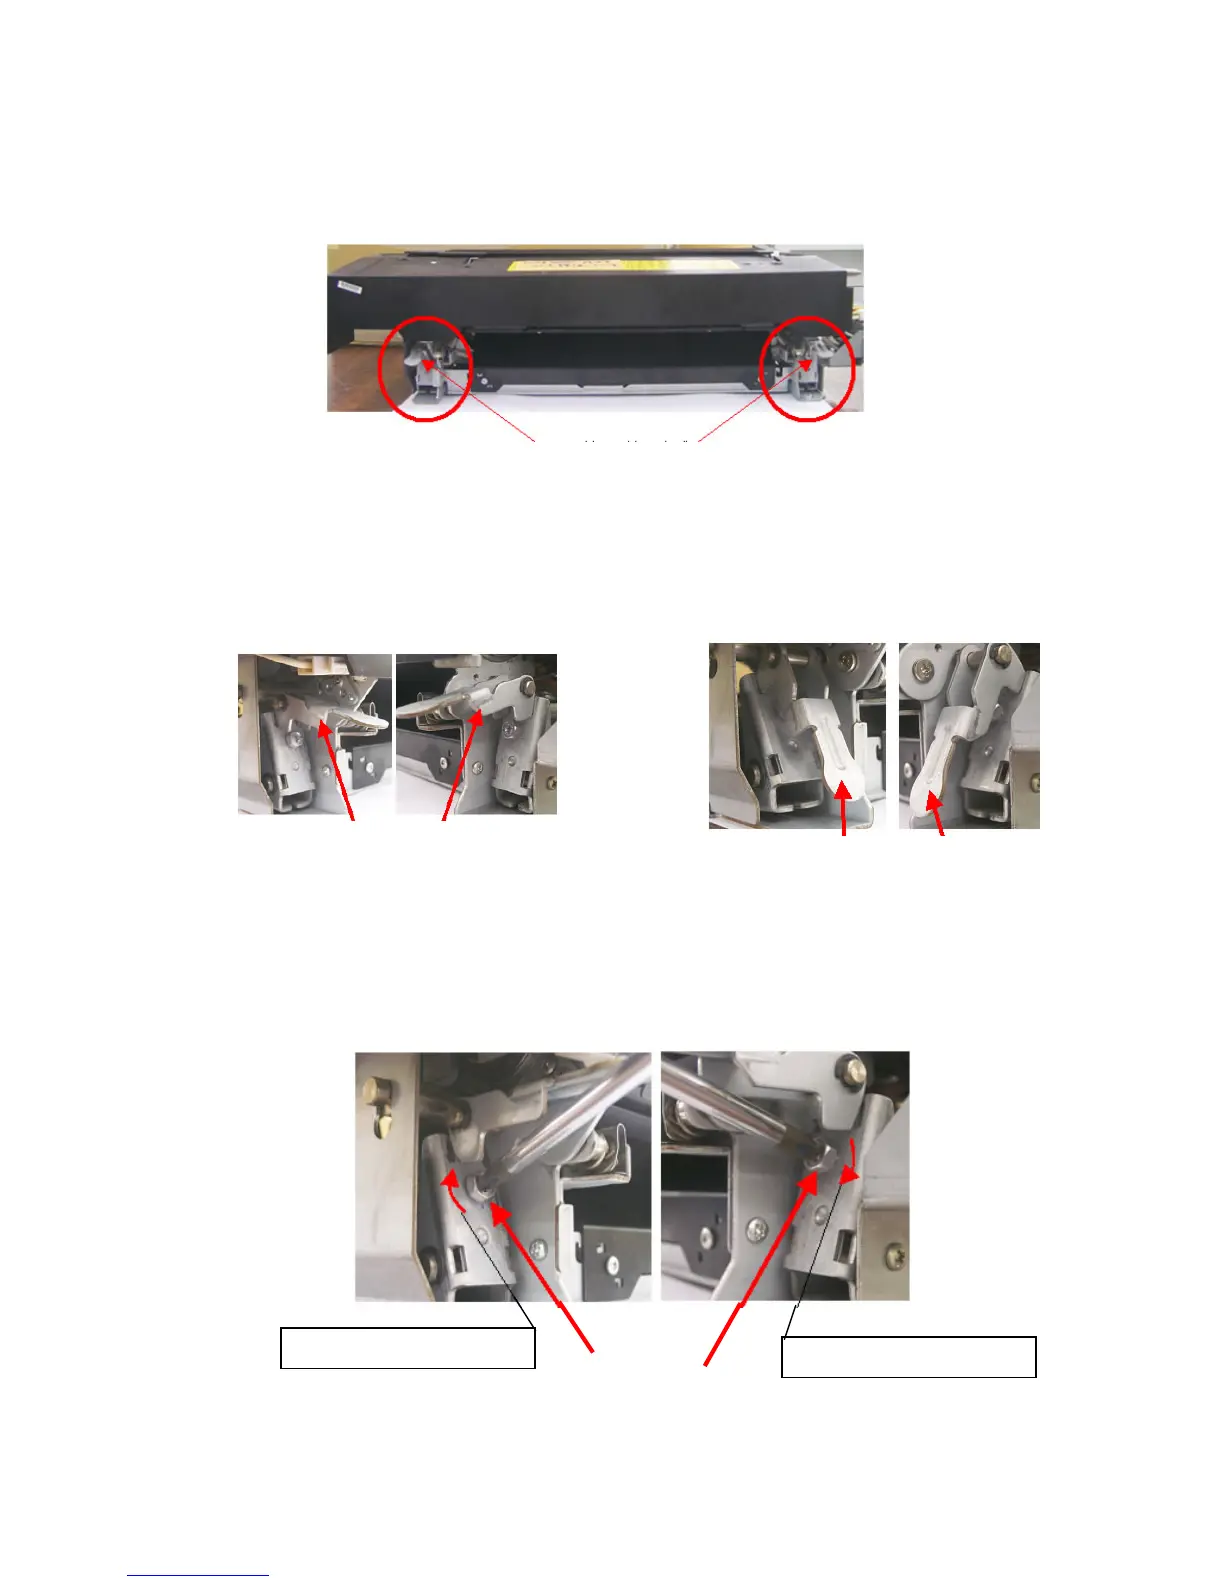
ADJUSTING THE NIP WIDTH:
1. Remove the fusing unit from the copier and place it on the table.
2. Make sure the pressure levers ([I], [J]) are in the upper position as shown in
Photo A.
NOTE: If the levers are not in the upper position, pressure will not be applied
between the fusing belt and pressure roller.
3. Turn screws [G] and [H] to bring the nip width to within specification.
To increase the nip width, turn the screws clockwise.
To decrease the nip width, turn the screws counter-clockwise.
NOTE: One turn of the screw changes the nip width about 0.3mm.
[G]
[H]
[G]
[H]
Clockwise direction
Clockwise direction
[I]
[J]
Photo A: OK
[I]
[J]
Photo B: NG
07/04

Table of Contents

Other manuals for Toshiba e-STUDIO4500c

Questions and Answers:

Question and Answer IconNeed help?

Do you have a question about the Toshiba e-STUDIO4500c and is the answer not in the manual?

Toshiba e-STUDIO4500c Specifications

General IconGeneral
BrandToshiba
Modele-STUDIO4500c
CategoryAll in One Printer
LanguageEnglish

Related product manuals