EasyManuals Logo

Toshiba e-STUDIO4500c Service Manual

Toshiba e-STUDIO4500c
1120 pages
To Next Page IconTo Next Page
To Previous Page IconTo Previous Page
Page #150 background imageLoading...
Page #150 background image
August 2006 COVER INTERPOSER TRAY (B704)
1-111
Installation
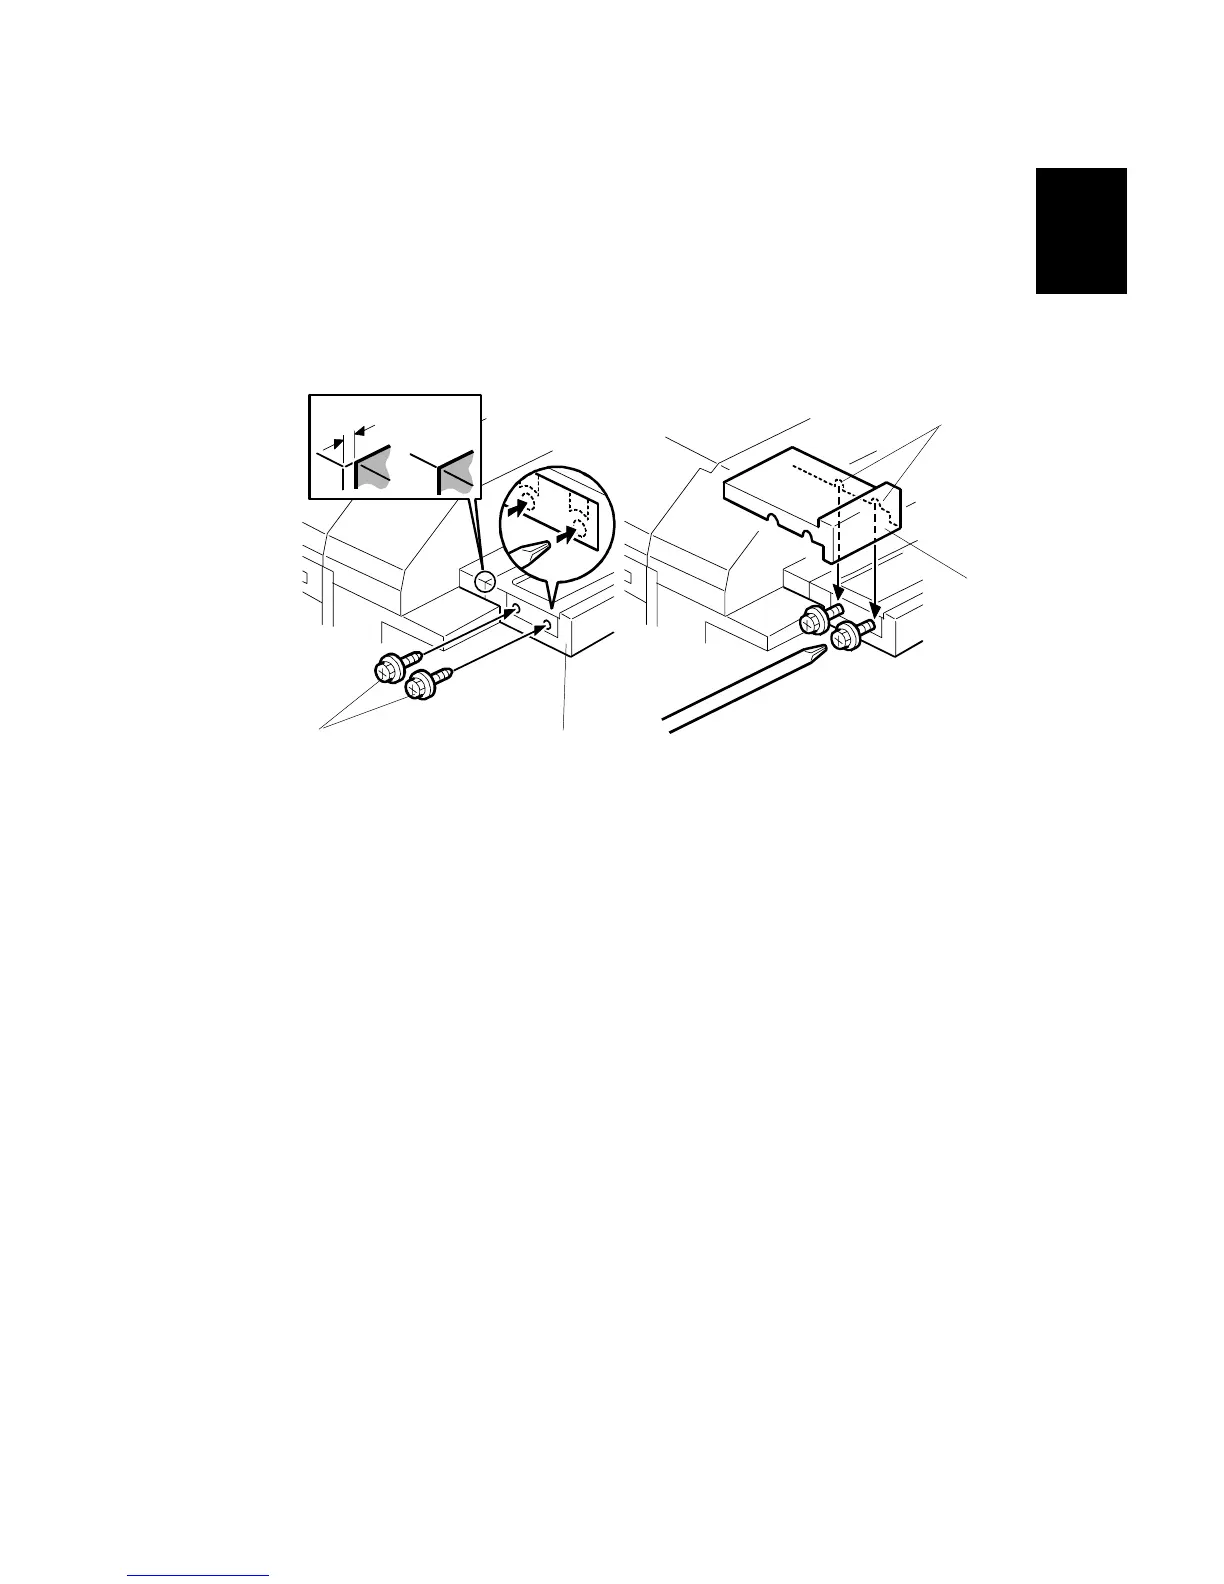
Attaching the Corner Plates for the B706
Important:
The corner plates are installed on the B706 only.
Right Rear Corner Plate (B706 only)
1. Temporarily attach the screws [A] (with about two turns) to the right end of the
finisher extension table [B] ( x 2, tapping M4 x 8)
NOTE: The holes are not visible because they are covered with tape. Just
punch the screws through the holes.
2. Align the cutouts [C] of the right rear corner plate [D] with the screws and attach
the plate.
3. With a long screwdriver inserted through the cutouts in the right rear corner
plate [D], tighten the screws to fasten the right rear corner plate to the table
extension [B].
NG
OK
B704I112.WMF
[A]
[B]
[C]
[D]

Table of Contents

Other manuals for Toshiba e-STUDIO4500c

Questions and Answers:

Question and Answer IconNeed help?

Do you have a question about the Toshiba e-STUDIO4500c and is the answer not in the manual?

Toshiba e-STUDIO4500c Specifications

General IconGeneral
BrandToshiba
Modele-STUDIO4500c
CategoryAll in One Printer
LanguageEnglish

Related product manuals