MFP CONTROLLER OPTIONS August 2006
1-124
Installation
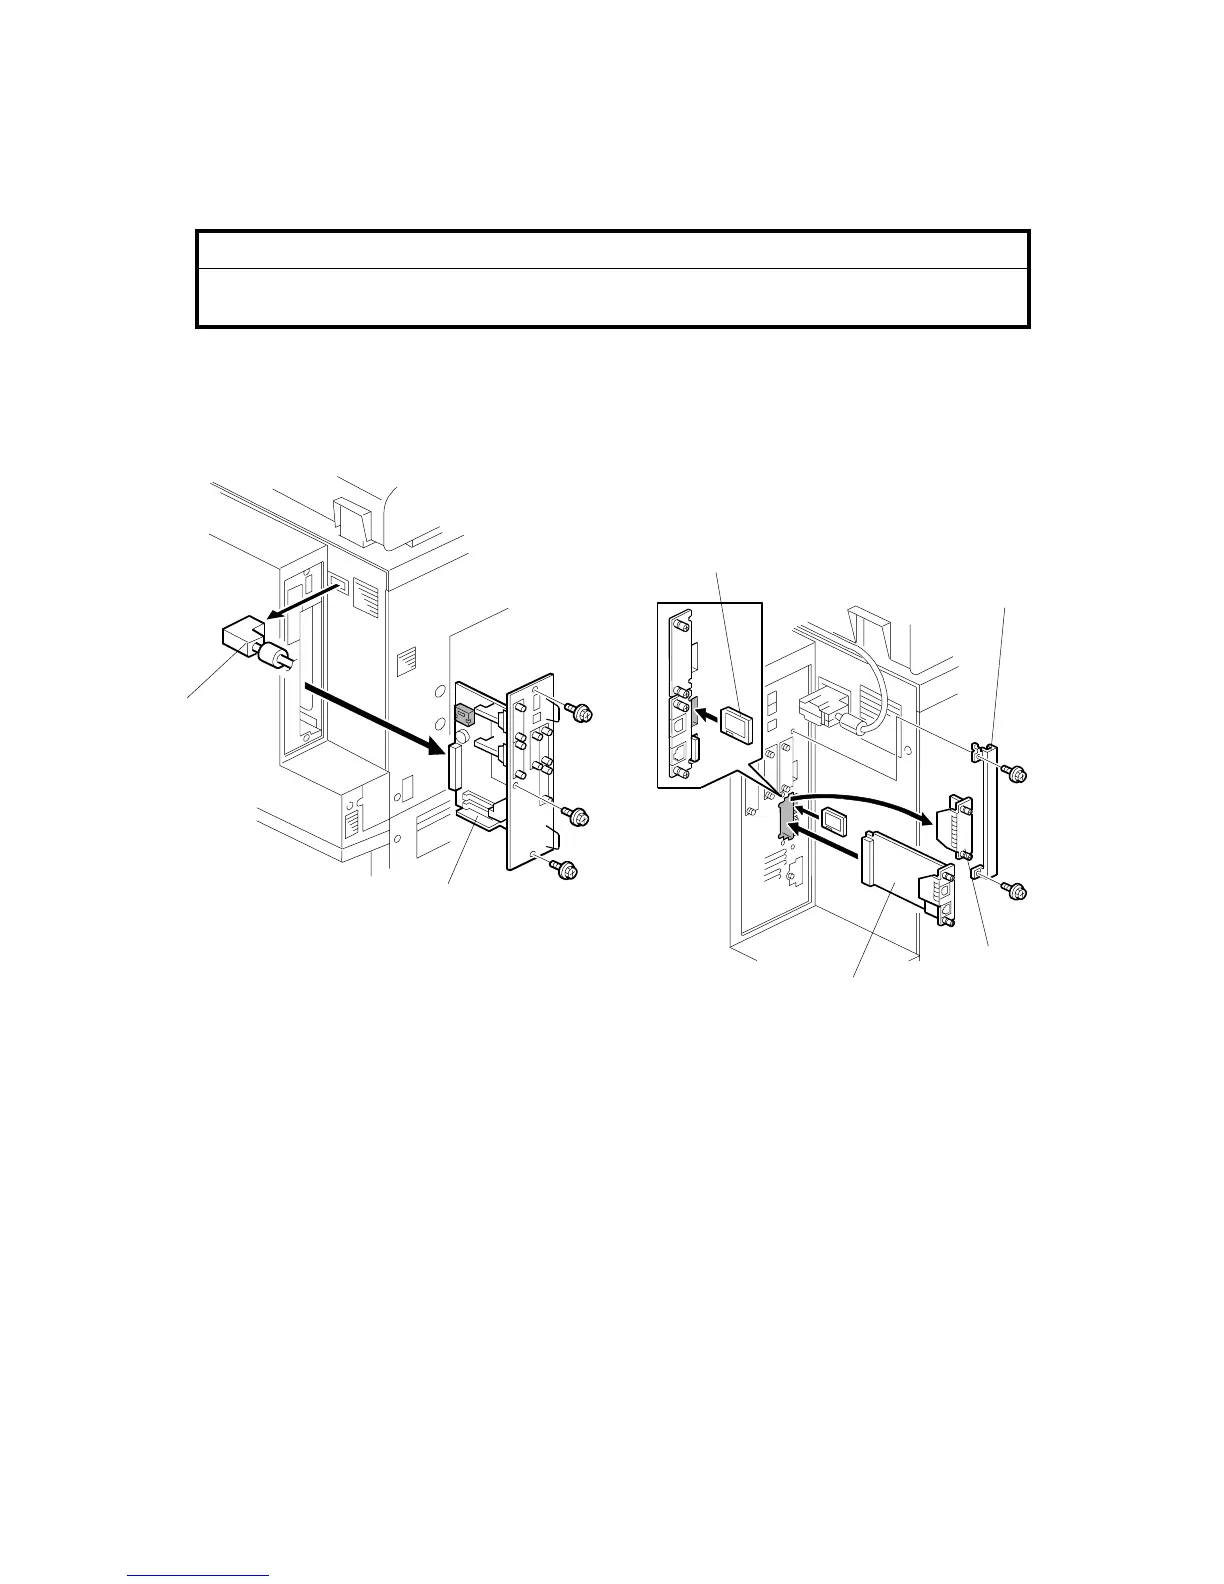
WARNING!
Turn the machine off and disconnect the machine power cord before you
start this procedure.
NOTE: For the printer/scanner unit, the machine must have a minimum of 128 MB
of memory (more is recommended). Memory chips are not supplied with
this option.
1. Disconnect the ARDF cable [A] ( x1).
2. Remove the controller board [B] ( x3).
3. Connect the Scanner/Printer DIMM (128 MB expansion memory) into RAM slot
CN501 on the controller board.
4. Attach the controller board ( x3).
5. Remove the I/F Slot Cover E [C] ( x2).
6. Install the NIB [D] (NIC/USB) in Slot E.
7. Remove the SD card slot cover [E] ( x2)
8. Install the Printer/Scanner SD card [F] in SD Card Slot 2 (middle slot).
9. Attach the SD card slot cover ( x2).
B132I710.WMF
B737I107.WMF
[A]
 Loading...


