August, 2006 ARDF
3-171
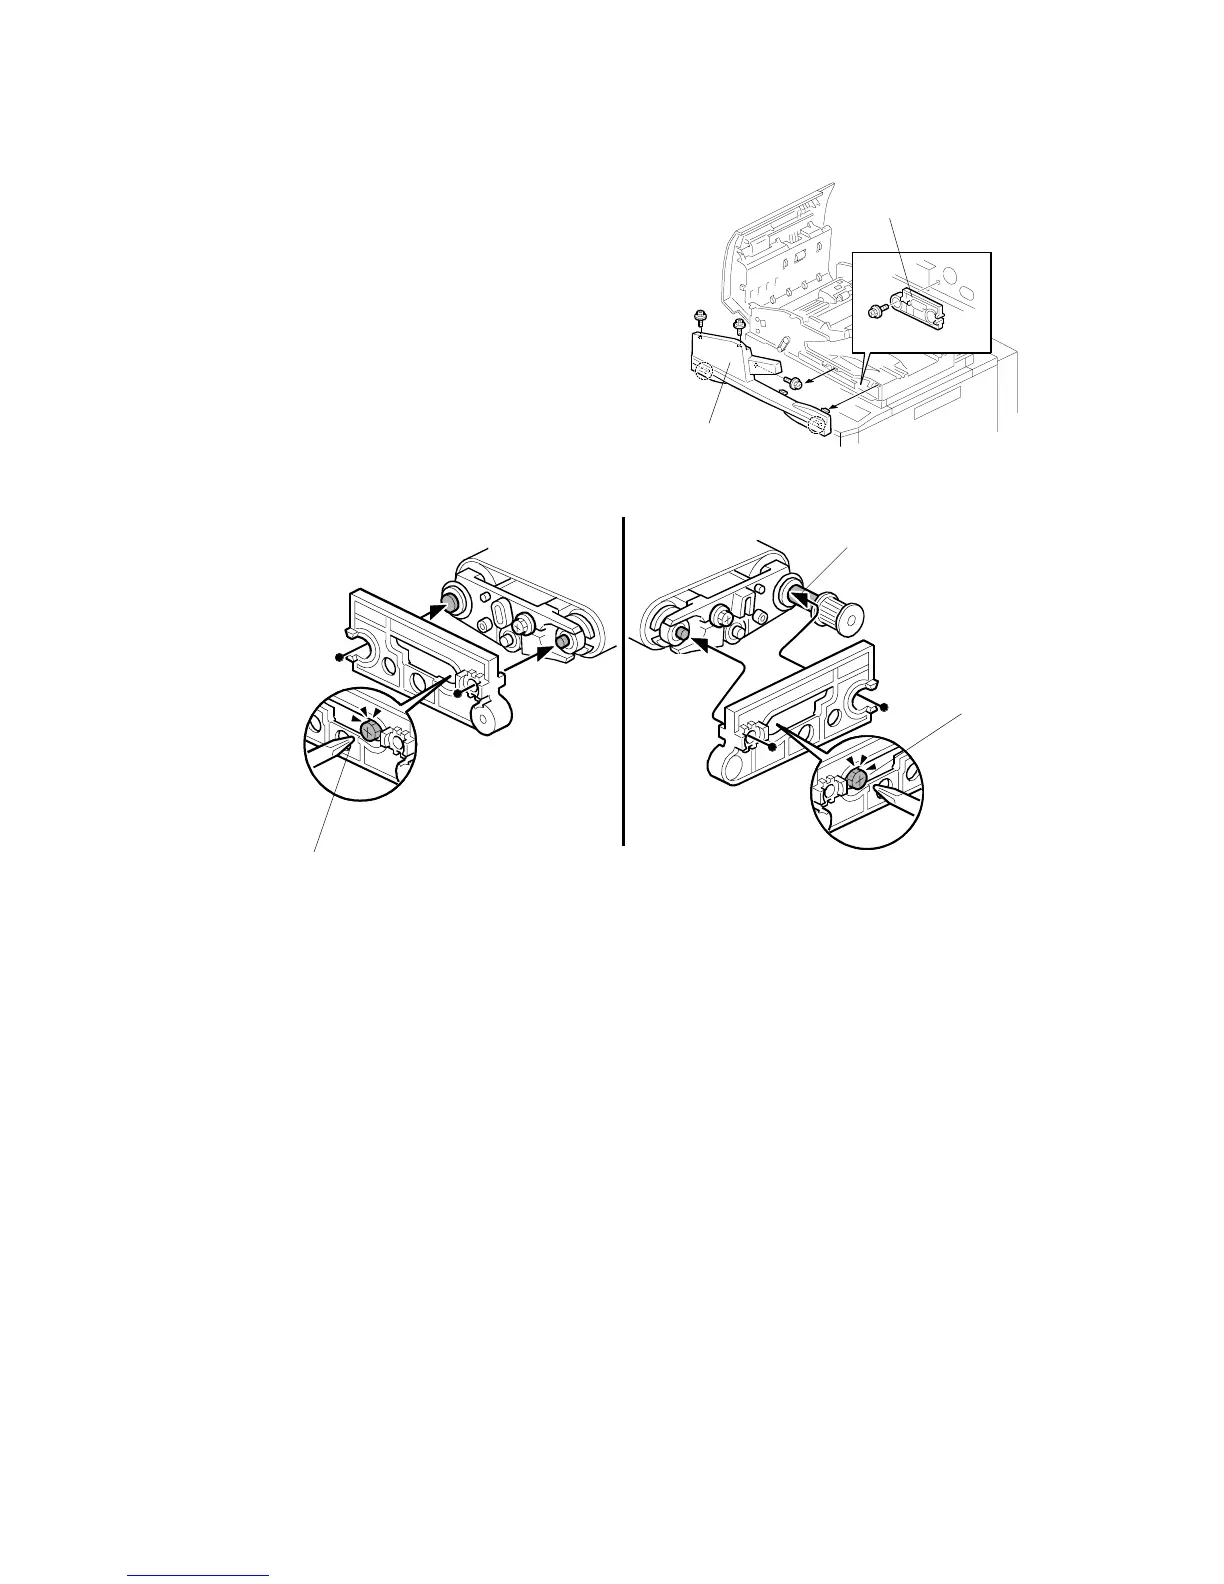
Reinstalling the Belt
1. Remove the ARDF front cover [A]
(3.18.1)
2. Take out the special tool [B]. ( x1)
NOTE: The special tool [B] is attached to
the front side plate. It is used to
adjust the tension on the belt on
both ends of the shaft.
3. Fit the special tool onto the FRONT.
4. Slowly loosen the front lock screw [C] until you see the tip of the shaft
aligned with the hole , then tighten the screw.
Important
• To avoid stripping the threads of the screws, do not apply excessive torque.
5. Remove the special tool and fit it onto the REAR.
NOTE: If the Teflon sleeve has been reattached at [D], remove it. Do not
reattach the sleeve until after adjusting the belt tension. (The special
tool does not fit over the rear end with the Teflon sleeve attached.)
6. Slowly loosen the rear lock screw [E] until you see the tip of the shaft aligned
with the hole then tighten the screw.
7. Re-install the Teflon sleeve.
8. Re-install the front and rear plastic cover.
9. Reinstall the transport belt assembly in the ARDF.
B132R104A.WMF
FRONT REAR
 Loading...


