EasyManuals Logo

Toshiba e-STUDIO4500c Service Manual

Toshiba e-STUDIO4500c
1120 pages
To Next Page IconTo Next Page
To Previous Page IconTo Previous Page
Page #1000 background imageLoading...
Page #1000 background image
September 2006 Replacement and Adjustment
B706-9
Peripherals
3.3 STACK FEED-OUT BELT
1. Open the front door.
2. Pull out the jogger and stapler unit.
3. Remove the inner cover [A] ( x 2).
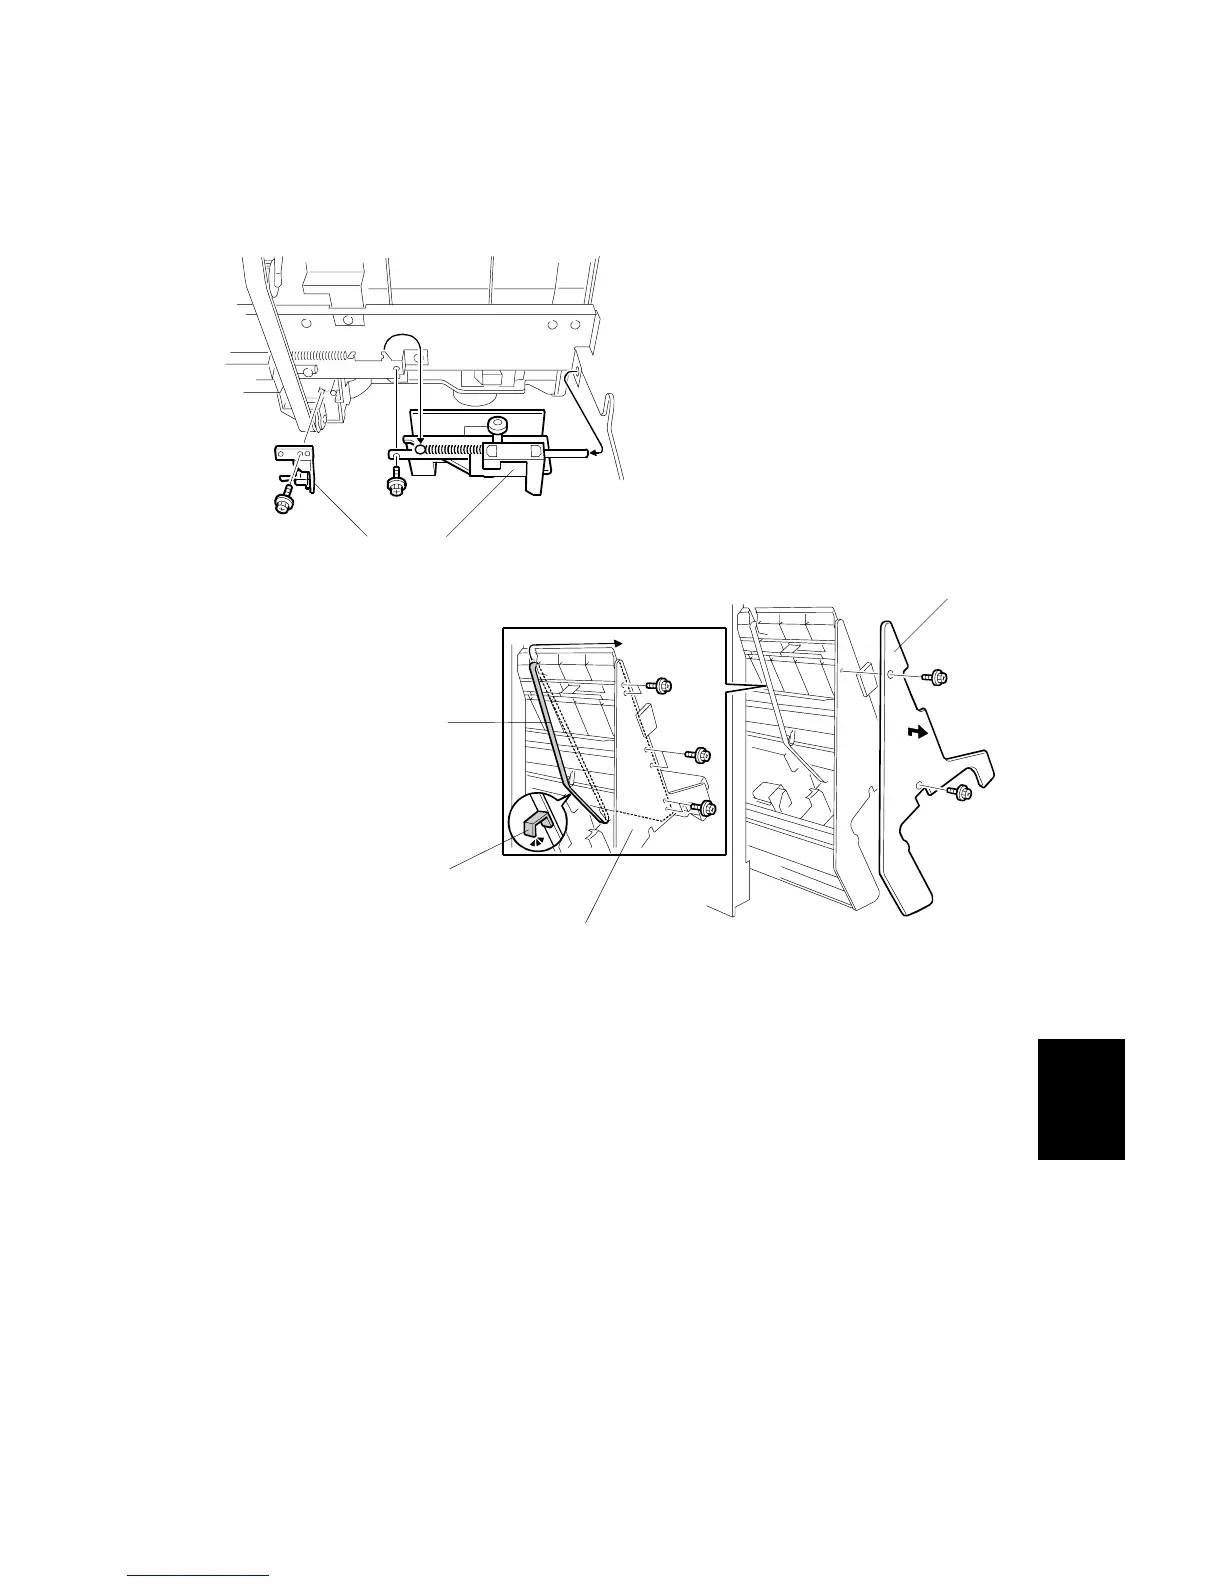
4. Remove the sensor bracket [B] ( x 1, x 1, clamp x 1).
5. Remove the front guide [C] ( x 1, spring x 1).
NOTE: When re-installing, make sure that the flat end of the shaft is against
the plate.
6. Remove the front panel [D] from the stays ( x 6).
7. Remove the old belt [E] from the bottom, center, then the top.
NOTE:
1) Make sure the ribbed side of the new belt and pawl [F] are facing down.
2) Make sure the new belt is engaged at all three rollers.
B478R523.WMF
B478R524.WMF
[B]
[C]
[A]
[D]
[E]
[F]
06/09

Table of Contents

Other manuals for Toshiba e-STUDIO4500c

Questions and Answers:

Question and Answer IconNeed help?

Do you have a question about the Toshiba e-STUDIO4500c and is the answer not in the manual?

Toshiba e-STUDIO4500c Specifications

General IconGeneral
BrandToshiba
Modele-STUDIO4500c
CategoryAll in One Printer
LanguageEnglish

Related product manuals