EasyManuals Logo

Toshiba e-STUDIO4500c Service Manual

Toshiba e-STUDIO4500c
1120 pages
To Next Page IconTo Next Page
To Previous Page IconTo Previous Page
Page #86 background imageLoading...
Page #86 background image
August, 2006 A3/11" X 17" PAPER SIZE TRAY (B331)
1-47
Installation
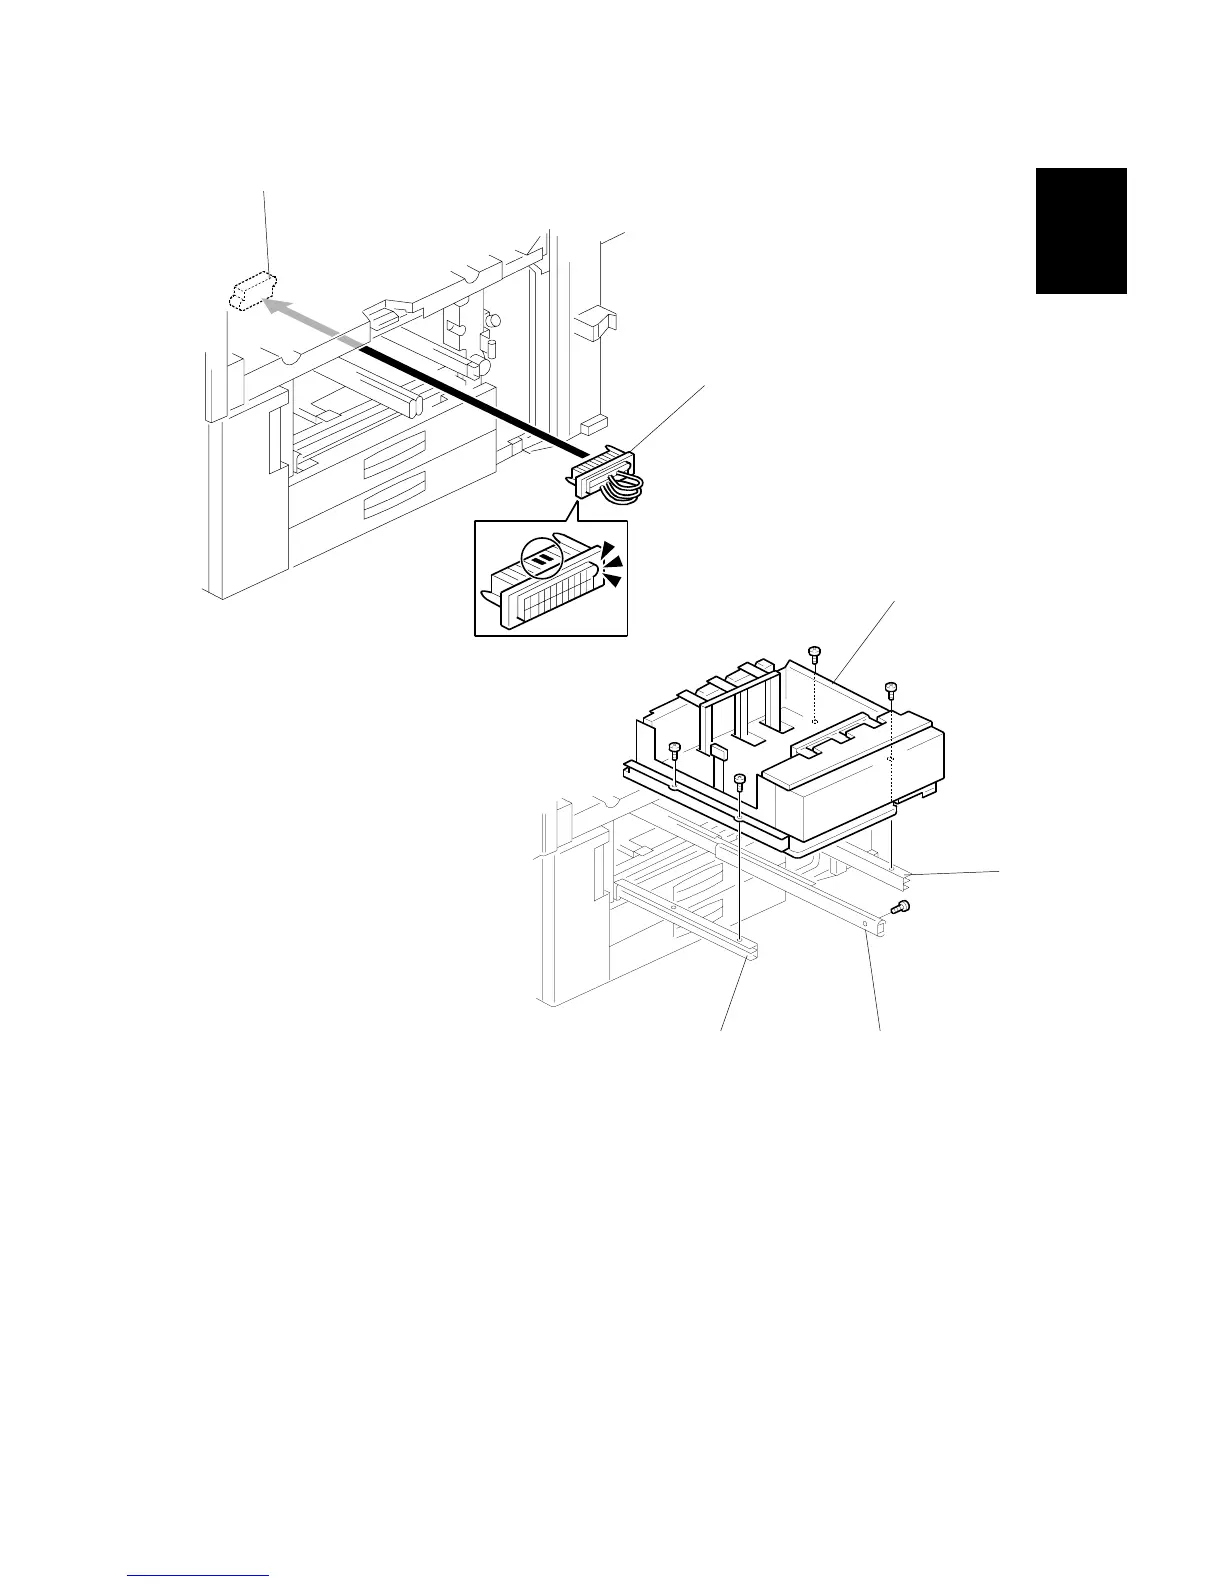
9. Put the short connector [A] into the socket in the machine [B].
NOTE: Hold the connector as shown in the illustration.
10. Install the A3 / 11”x17” paper size tray [C] on the right rail [D], center rail [E],
and left rail [F]. Use the screws that you removed in Steps 6 and 8.
NOTE: You must use the short, silver screws on the left and right rails. If you
use one of the longer screws, it will stop the movement of the tray on
the rails.
B331I004.WMF
B331I003.WMF
[C]
[D]
[E]
[F]
[A]
[B]

Table of Contents

Other manuals for Toshiba e-STUDIO4500c

Questions and Answers:

Question and Answer IconNeed help?

Do you have a question about the Toshiba e-STUDIO4500c and is the answer not in the manual?

Toshiba e-STUDIO4500c Specifications

General IconGeneral
BrandToshiba
Modele-STUDIO4500c
CategoryAll in One Printer
LanguageEnglish

Related product manuals