EasyManuals Logo

Toshiba e-STUDIO4500c Service Manual

Toshiba e-STUDIO4500c
1120 pages
To Next Page IconTo Next Page
To Previous Page IconTo Previous Page
Page #116 background imageLoading...
Page #116 background image
August, 2006 PUNCH UNIT (B702)
1-77
Installation
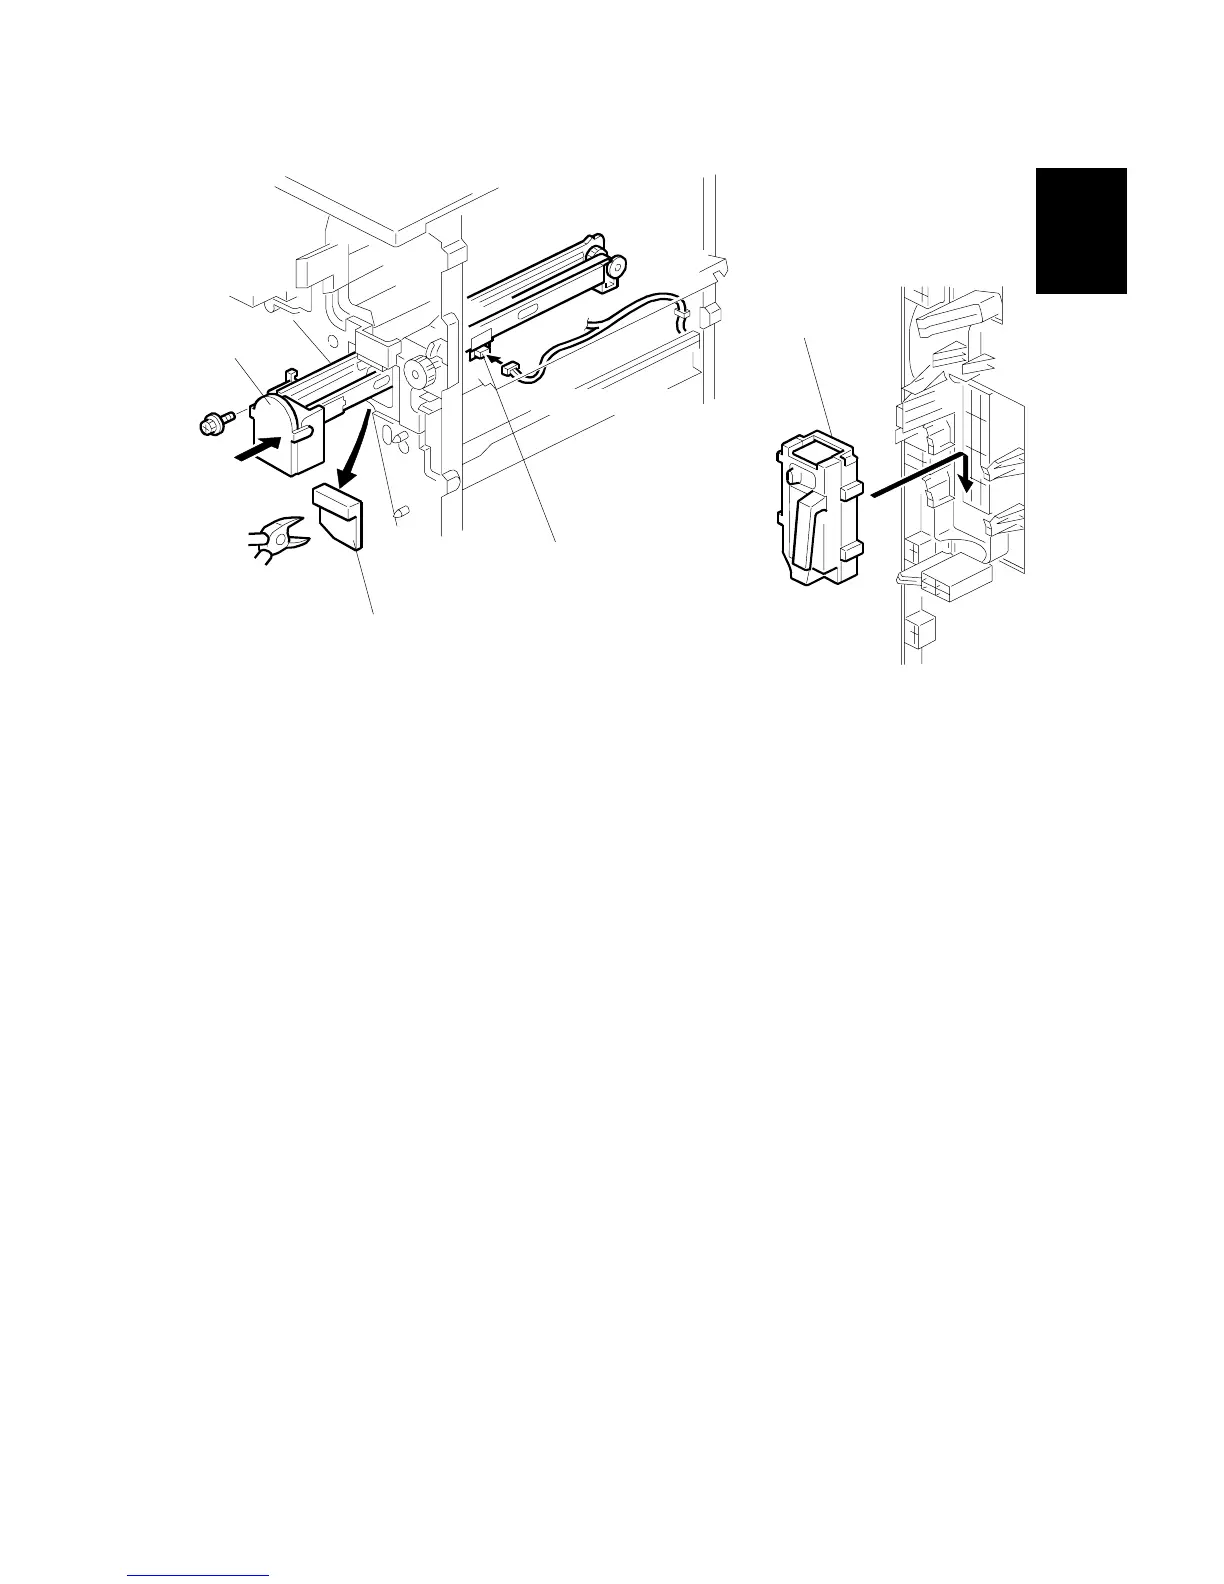
12. At the front, use a pair of wire cutters to remove the part [A] of the cover.
13. Install the punchout waste unit [B] in the finisher.
NOTE: Make sure that the punchout waste unit moves smoothly on its rails. If it
does not, make sure that the rails are aligned with the grooves.
14. Remove the short connector from the connector [C].
NOTE: This is the 4-pin connector.
15. Connect the cable and attach the punchout waste transport unit
( x 1, x 1, x 1).
16. Set the punch waste hopper [D] in its holder.
B702I106.WMF
B702I107.WMF
[A]
[B]
[D]
4-pin Connector
[C]

Table of Contents

Other manuals for Toshiba e-STUDIO4500c

Questions and Answers:

Question and Answer IconNeed help?

Do you have a question about the Toshiba e-STUDIO4500c and is the answer not in the manual?

Toshiba e-STUDIO4500c Specifications

General IconGeneral
BrandToshiba
Modele-STUDIO4500c
CategoryAll in One Printer
LanguageEnglish

Related product manuals